冬到来!
寒い冬はこたつで新しいジブンにチャレンジしたいですね!
NanoRT でレイトレーシングと C++ プログラミングを学ぼう!
NanoRT ならラズベリーパイ(ARM)でも動くよ!
NanoRT の C++ コードは cpplint と clang-format でキレイに保たれているからはじめての C++ 若人にも安心だよ!
(examples の一部のコードは除く)
とりあえずビルドしてうごかしてみる.
まずは, C++ コンパイラである, g++ or clang++ いれようね.
git もいれようね.
Windows のひとは Visual Studio もいいけど, Bash on Ubuntu on Windows もおすすめだよ!
ソースコードをクローンするよ.
$ git clone https://github.com/lighttransport/nanort
いくつかサンプルがある中で, まずは objrender をビルドしてうごかしてみよう!
$ cd examples/objrender
$ g++ -O2 -g -o testrender -I../../ -I../common/ -I. main.cc tiny_obj_loader.cc
コンパイルオプションを説明すると...
- -O2 : プログラムの最適化を有効にするよ
- -g : デバッグ情報をプログラムに埋め込むよ
- -o testrender : プログラムの名前を指定するよ
- -I : ヘッダファイルを探すパスを指定するよ
- main.cc tiny_obj_loader.cc : 入力の C++ ソースファイルを指定するよ
コンパイルに成功したらプログラムを動かしてみよう
$ ./testrender
render.exr という, OpenEXR 形式の画像が生成されます.
macOS だと Preview で見れます. Linux だと ImageMagick で見れます.
(Windows のひとは Blender の画像ビュー機能を使うといいかも https://www.blender.org/ )
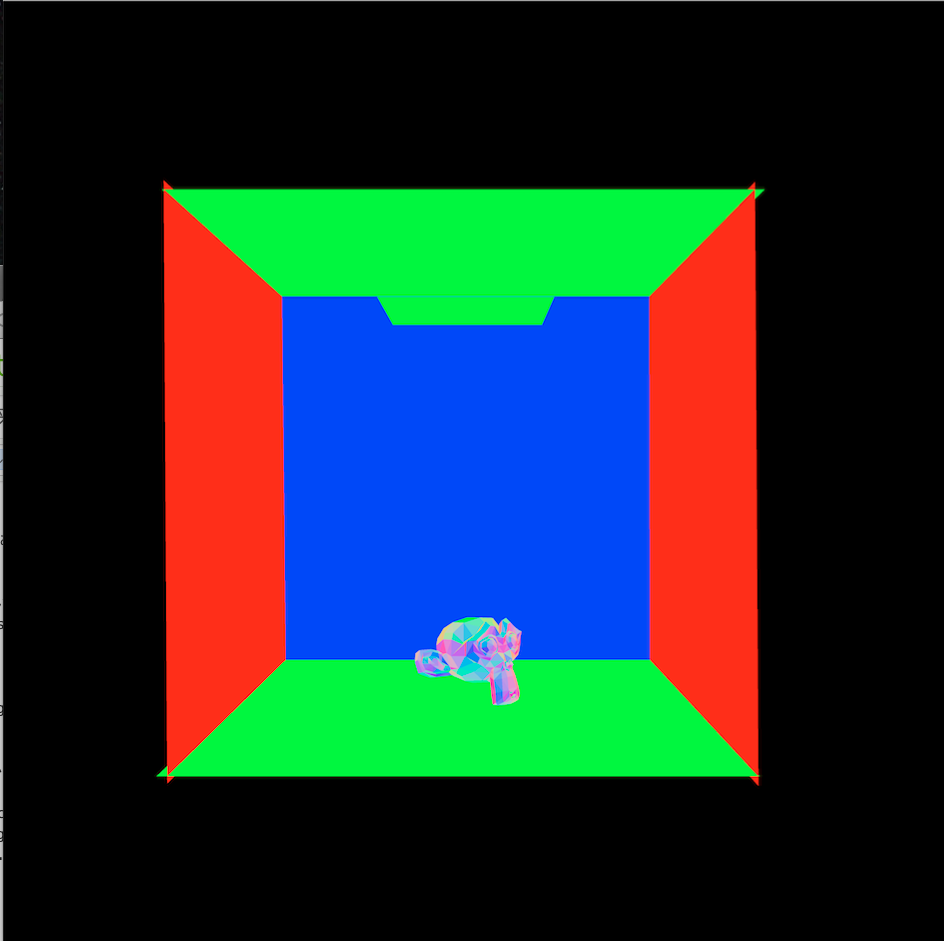
ジャーーン! 絵がでました!
楽しいね!
キモになるのは main() 関数内の 100 行くらいの部分. 写経して学ぼう!
write your shader here のところで, 色を二倍とかしてみたりするといいかも.
int main(int argc, char** argv)
{
  int width = 512;
  int height = 512;

  float scale = 1.0f;

  std::string objFilename = "cornellbox_suzanne.obj";

  if (argc > 1) {
    objFilename = std::string(argv[1]);
  }

  if (argc > 2) {
    scale = atof(argv[2]);
  }

  bool ret = false;

  Mesh mesh;
  ret = LoadObj(mesh, objFilename.c_str(), scale);
  if (!ret) {
    fprintf(stderr, "Failed to load [ %s ]\n", objFilename.c_str());
    return -1;
  }

  nanort::BVHBuildOptions<float> build_options; // Use default option
  build_options.cache_bbox = false;

  printf("  BVH build option:\n");
  printf("    # of leaf primitives: %d\n", build_options.min_leaf_primitives);
  printf("    SAH binsize         : %d\n", build_options.bin_size);

  timerutil t;
  t.start();

  nanort::TriangleMesh<float> triangle_mesh(mesh.vertices, mesh.faces, sizeof(float) * 3);
  nanort::TriangleSAHPred<float> triangle_pred(mesh.vertices, mesh.faces, sizeof(float) * 3);

  printf("num_triangles = %lu\n", mesh.num_faces);
  printf("faces = %p\n", mesh.faces);

  nanort::BVHAccel<float, nanort::TriangleMesh<float>, nanort::TriangleSAHPred<float>, nanort::TriangleIntersector<> > accel;
  ret = accel.Build(mesh.num_faces, build_options, triangle_mesh, triangle_pred);
  assert(ret);

  t.end();
  printf("  BVH build time: %f secs\n", t.msec() / 1000.0);


  nanort::BVHBuildStatistics stats = accel.GetStatistics();

  printf("  BVH statistics:\n");
  printf("    # of leaf   nodes: %d\n", stats.num_leaf_nodes);
  printf("    # of branch nodes: %d\n", stats.num_branch_nodes);
  printf("  Max tree depth     : %d\n", stats.max_tree_depth);
  float bmin[3], bmax[3];
  accel.BoundingBox(bmin, bmax);
  printf("  Bmin               : %f, %f, %f\n", bmin[0], bmin[1], bmin[2]);
  printf("  Bmax               : %f, %f, %f\n", bmax[0], bmax[1], bmax[2]);

  std::vector<float> rgb(width * height * 3, 0.0f);

  t.start();

  // Shoot rays.
  #ifdef _OPENMP
  #pragma omp parallel for
  #endif
  for (int y = 0; y < height; y++) {
    for (int x = 0; x < width; x++) {

      // Simple camera. change eye pos and direction fit to .obj model.

      nanort::Ray<float> ray;
      ray.org[0] = 0.0f;
      ray.org[1] = 5.0f;
      ray.org[2] = 20.0f;

      float3 dir;
      dir[0] = (x / (float)width) - 0.5f;
      dir[1] = (y / (float)height) - 0.5f;
      dir[2] = -1.0f;
      dir.normalize();
      ray.dir[0] = dir[0];
      ray.dir[1] = dir[1];
      ray.dir[2] = dir[2];

      float kFar = 1.0e+30f;
      ray.min_t = 0.0f;
      ray.max_t = kFar;

      nanort::TriangleIntersector<> triangle_intersector(mesh.vertices, mesh.faces, sizeof(float) * 3);
      nanort::BVHTraceOptions trace_options;
      bool hit = accel.Traverse(ray, trace_options, triangle_intersector);
      if (hit) {
        // Write your shader here.
        float3 normal(0.0f, 0.0f, 0.0f);
        unsigned int fid = triangle_intersector.intersection.prim_id;
        if (mesh.facevarying_normals) {
          normal[0] = mesh.facevarying_normals[9*fid+0];
          normal[1] = mesh.facevarying_normals[9*fid+1];
          normal[2] = mesh.facevarying_normals[9*fid+2];
        }
        // Flip Y
        rgb[3 * ((height - y - 1) * width + x) + 0] = fabsf(normal[0]);
        rgb[3 * ((height - y - 1) * width + x) + 1] = fabsf(normal[1]);
        rgb[3 * ((height - y - 1) * width + x) + 2] = fabsf(normal[2]);
      }
    }
  }

  t.end();
  printf("Render %f secs\n", t.msec() / 1000.0);

  // Save image.
  SaveImage("render.exr", &rgb.at(0), width, height);
  // Save Raw Image that can be opened by tools like GIMP
  SaveImageRaw("render.data", &rgb.at(0), width, height);

  return 0;
}
もっとレイトレーシングやりたい!
examples/path_tracer を動かすともっときれいな絵がでるよ!
C++ をもっと知りたい!
The Definitive C++ Book Guide and List
レイトレーシングをもっと知りたい!
Disney が作ったレイトレーシング(パストレーシング)の解説が参考になるよ!
(レイトレーシング人材育成のためにディズニーとかすごい頑張っているよ!)
PBRT-v3 もおすすめ!
1,000 ページを超える本は圧巻だね! Kindle 版で iPad とかタブレットで見るのもおすすめ.
そして, 2018 年 10 月 15 日に, PBRT book v3 が web で無償公開されたよ.
HTML もいいけど, 本や PDF でみたいときもあるよね. 製本版や Kindle 版はクリスマスプレゼントとしておねだりしよう!
ちなみにレイトレーシングをするには, 最低限中学数学の知識が必須! できれば高校数学の知識が望ましい.
「はじめようレイトレーシング」は, レイトラ ![]() と一緒にレイトレーシングを学ぶことができるよ.
と一緒にレイトレーシングを学ぶことができるよ.
優秀な小学生さまにおすすめ!
「はじめようレイトレーシング」でレイトレーシングを学ぶことで, 中学, 高校数学を楽しく学ぶことができるね!
TODO
- 優秀な若人さまが, 日々切磋琢磨し, レイトレーシングと C++ を人類史上最速でお極めなされるスキームを確立したい.