AndroidアプリのUIを改善したい
以前、初めてのAndroidアプリとして、AWSの請求金額を取得するAndroidアプリを作りました。自分しか使わないのでデザインはどうでもいいのですが、さすがに見た目がこれ
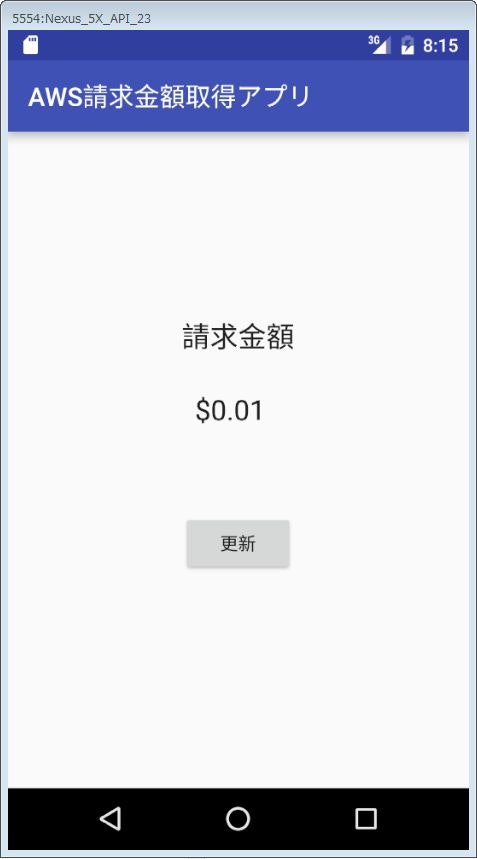
ではどうかと思ったので、Android Bootstrapを利用してUIを改善します。
Android Bootstrapを導入する
Android Bootstrapライブラリを取得する
「build.gradle」のdependenciesに以下を追記します。利用するAndroid Bootstrapは2.xです。1.xの場合、以降で記述する導入、利用方法が異なるようなのでご注意ください。
build.gradle
dependencies {
    compile 'com.beardedhen:androidbootstrap:2.+'
}
Applicationクラスを拡張する
Applicationクラスを継承した新規クラスを作成し、onCreateメソッドを拡張して、FontAwesomeのWebフォントをアイコンとして使えるようにします。
BillingInfoBootstrap.java
import android.app.Application;
import com.beardedhen.androidbootstrap.TypefaceProvider;

public class BillingInfoBootstrap extends Application {
    @Override public void onCreate() {
        super.onCreate();
        TypefaceProvider.registerDefaultIconSets();
    }
}
マニフェストファイルを修正する
マニフェストファイルに上記で作成したクラスを追記します。
AndroidManifest.xml
<application
    android:name="BillingInfoBootstrap"
>
    ・・・
</application>
レイアウトファイルを修正する
レイアウトファイルでBootsotrapの名前空間が利用できるように以下を追記します。
activity_main.xml
<RelativeLayout
    xmlns:app="http://schemas.android.com/apk/res-auto"
>
UIを改善する
Android Bootstrapを利用する環境が整ったので、実際にUIを改善します。
ラベルを修正する
appで始まる要素がBootstrap独自の要素です。
activity_main.xml
    <com.beardedhen.androidbootstrap.BootstrapLabel
        android:layout_width="fill_parent"
        android:layout_height="wrap_content"
        android:text="請求金額"
        android:id="@+id/view"
        android:layout_alignParentStart="true"
        android:layout_alignParentEnd="true"
        android:layout_alignParentTop="true"
        app:bootstrapBrand="primary"
        app:bootstrapHeading="h4"
/>
テキストを修正する
activity_main.xml
    <com.beardedhen.androidbootstrap.AwesomeTextView
        android:layout_width="fill_parent"
        android:layout_height="wrap_content"
        android:text="$0.00"
        android:id="@+id/billingCost"
        android:textSize="100dp"
        android:layout_alignParentStart="true"
        android:layout_below="@+id/view"
        app:bootstrapBrand="primary"/>
ボタンを修正する
bootstrapTextでFontAwesomeのWebフォントを利用しています。
http://fontawesome.io/cheatsheet/から、利用したいフォントを探して、そのクラス名を記述します。また、app:roundedCornersにtrueを指定すると、ボタンの角が丸くなります。
activity_main.xml
    <com.beardedhen.androidbootstrap.BootstrapButton
        android:layout_width="fill_parent"
        android:layout_height="wrap_content"
        android:id="@+id/update"
        android:height="50dp"
        android:textStyle="bold"
        android:layout_below="@+id/billingCost"
        android:layout_alignParentStart="true"
        android:layout_marginTop="20dp"
        app:bootstrapText="{fa-rotate-right}  更新"
        app:bootstrapSize="lg"
        app:buttonMode="regular"
        app:bootstrapBrand="success"
        app:roundedCorners="true"/>
MainActivityクラスを修正する
Android標準のUIクラスを、上記で指定したBootstrap独自のクラスに置き換えます。
前回、作成したソースから修正した箇所だけ抜粋します。
MainActivity.java(修正前)
Button updateBtn = (Button) findViewById(R.id.update);

TextView billingTextView = (TextView) findViewById(R.id.billingCost);
try {
    billingTextView.setText(billingInfoFuture.get());
MainActivity.java(修正後)
BootstrapButton updateBtn = (BootstrapButton) findViewById(R.id.update);

BootstrapTextView billingTextView = (BootstrapTextView) findViewById(R.id.billingCost);
try {
    billingTextView.setMarkdownText(billingInfoFuture.get());
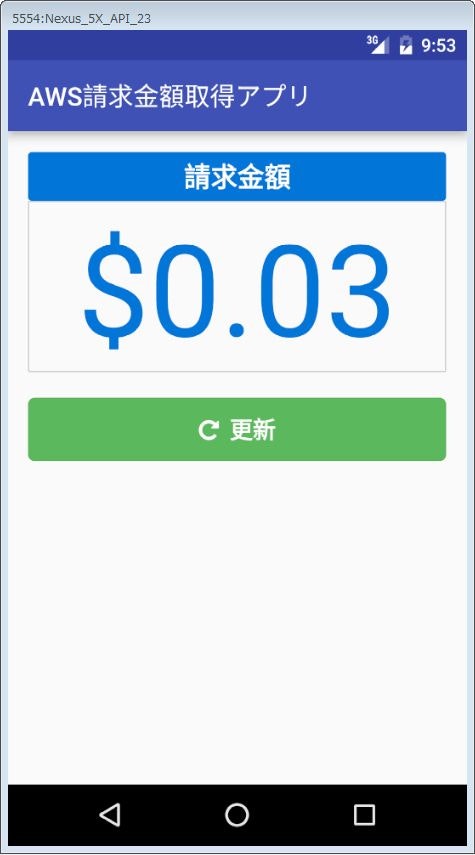
完了
上記に加えて、テキストに枠線を描写できるようにしたりしましたが、UI改善後のイメージは以下の通りです。