普段Edisonで何かする時は、pythonやnodejsで書くことが多いけど、前から気になってたgobotを使ってみたかったので、Golang使ったことないけど勉強がてらやってみました
Gobot
Gobot is a framework for robotics, physical computing, and the Internet of Things, written in the Go programming language
このように、gobotはロボティックス、IoT向けのフレームワークで、golangで書かれています。
対応しているプラットフォームは現時点(2015/7/26)で15種類。
これらの中から、Intel Edisonを使ってみたいとおもいます。
Goの準備
Golang使ったことがないので、まずはGoのインストールをします。
https://golang.org/doc/install#osx
次に、環境変数の設定をします。
パッケージでインストールすると、/usr/local/goにインストールされるので、GOROOT に追加しておきます。
GOPATH は後からインストールするパッケージ等が格納されるディレクトリになるので、自分のパーミッションがある適当なパスを指定します。
私の場合は、.zshrcに以下を追記してます。
export PATH=/usr/local/go/bin:$PATH
export GOROOT=/usr/local/go
export GOPATH=$HOME/go
Intel Edisonで試す
こちらのサイトを参考にインストールを進めます。
http://gobot.io/documentation/platforms/edison/
go get -d -u github.com/hybridgroup/gobot/... && go install github.com/hybridgroup/gobot/platforms/intel-iot/edison
これをコピペしてそのまま実行すると、必要なライブラリがGOROOTで指定したパスにインストールされます。
(&&で分けてコマンドを実行するとインストールに失敗するので、必ず1行で実行する)
Edison向けにコンパイル
cd $GOROOT/src
sudo GOOS=linux GOARCH=386 ./make.bash --no-clean
サンプルプログラムをコンパイル
GOPATHで指定されたディレクトリの中にサンプルプログラムがあるので、これを利用します。
https://github.com/hybridgroup/gobot/blob/master/examples/edison_blink.go
GOARCH=386 GOOS=linux go build $GOPATH/src/github.com/hybridgroup/gobot/examples/edison_blink.go
$GOPATHにコンパイルされたファイルが出来ます
ls -l
total 4880
-rwxr-xr-x  1 sparkgene  sparkgene  2496064  7 25 11:42 edison_blink
drwxr-xr-x  3 sparkgene  sparkgene      102  7 25 11:40 pkg
drwxr-xr-x  5 sparkgene  sparkgene      170  7 25 11:40 src
出来上がったファイルをEdisonにコピーします
scp edison_blink root@192.168.0.1:/home/root/
Edison上で実行
sshでEdisonに入った後、先ほどファイルをコピーしたディレクトリ/home/root/で実行します
root@sparkgene-a:~# ls -l
-rwxr-xr-x    1 root     root       2496040 Jul 26 04:34 edison_blink

root@sparkgene-a:~# ./edison_blink
2015/07/26 04:36:07 Initializing Robot blinkBot ...
2015/07/26 04:36:07 Initializing connections...
2015/07/26 04:36:07 Initializing connection edison ...
2015/07/26 04:36:07 Initializing devices...
2015/07/26 04:36:07 Initializing device led ...
2015/07/26 04:36:07 Starting Robot blinkBot ...
2015/07/26 04:36:07 Starting connections...
2015/07/26 04:36:07 Starting connection edison...
2015/07/26 04:36:07 Starting devices...
2015/07/26 04:36:07 Starting device led on pin 13...
2015/07/26 04:36:07 Starting work...
^C2015/07/26 04:36:23 Stopping Robot blinkBot ...
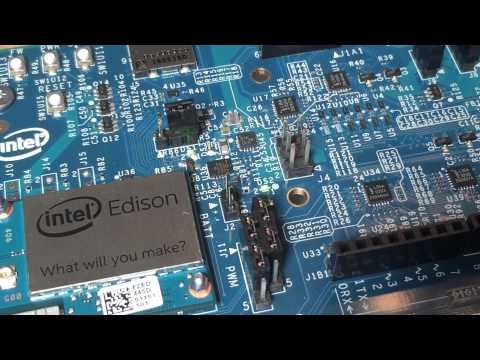
簡単にLチカが出来ました。
Gobotではプラットフォームが実行する環境を意味していて、そのプラットフォームを利用するには、アダプターをが必要になります。
ドライバがプラットフォーム上での操作を定義していて、上記のEdisonの場合はアダプターはEdisonAdaptorを利用し、ドライバはLedDriverを利用しています。
e := edison.NewEdisonAdaptor("edison")
led := gpio.NewLedDriver(e, "led", "13")
これで、ドライバで定義したPIN13のLEDを点滅させます。
gobot.Every(1*time.Second, func() {
	led.Toggle()
})
複数のプラットフォーム
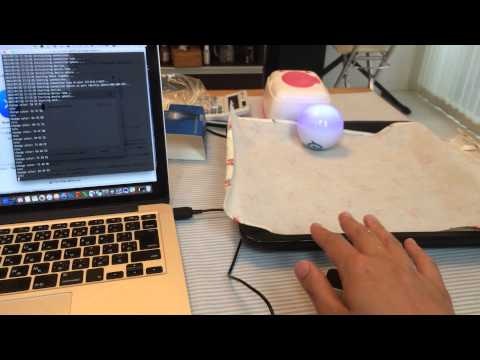
Gobotでは複数のプラットフォームを同時に使うことも可能で、サンプルの中にLeap Motionとspheroを連動させるのがありました。
https://github.com/hybridgroup/gobot/blob/master/examples/leap_sphero.go
このサンプルだと色を変えるだけで物足りないので、転がる動きも組み合わせたサンプルに改造しました。
package main

import (
	"math"
	"fmt"

	"github.com/hybridgroup/gobot"
	"github.com/hybridgroup/gobot/platforms/leap"
	"github.com/hybridgroup/gobot/platforms/sphero"
)

func main() {
	gbot := gobot.NewGobot()

	leapAdaptor := leap.NewLeapMotionAdaptor("leap", "127.0.0.1:6437")
	spheroAdaptor := sphero.NewSpheroAdaptor("Sphero", "/dev/tty.Sphero-OBG-AMP-SPP")

	leapDriver := leap.NewLeapMotionDriver(leapAdaptor, "leap")
	spheroDriver := sphero.NewSpheroDriver(spheroAdaptor, "sphero")

	work := func() {
		cnt := 0
		gobot.On(leapDriver.Event("message"), func(data interface{}) {
			hands := data.(leap.Frame).Hands

			if len(hands) > 0 {
				// サンプリング毎に実行するとあれなので、50回に1回と言う頻度にしています
				if cnt > 50 {
					x := math.Abs(hands[0].Direction[0])
					y := math.Abs(hands[0].Direction[1])
					z := math.Abs(hands[0].Direction[2])
					spheroDriver.SetRGB(scale(x), scale(y), scale(z))
					fmt.Printf("change color: %X %X %X\n", scale(x), scale(y), scale(z))

					fmt.Println("role")
					spheroDriver.Roll(30, uint16(gobot.Rand(360)))
					cnt = 0
				} else {
					cnt++
				}
			}
		})
	}

	robot := gobot.NewRobot("leapBot",
		[]gobot.Connection{leapAdaptor, spheroAdaptor},
		[]gobot.Device{leapDriver, spheroDriver},
		work,
	)

	gbot.AddRobot(robot)

	gbot.Start()
}

func scale(position float64) uint8 {
	return uint8(gobot.ToScale(gobot.FromScale(position, 0, 1), 0, 255))
}
実際に試す時は、spheroをMacとbluetoothでペアリングさせなければならないのですが、ペアリングしてもbluetoothの画面では切れたり繋がったりと不安定な動きをします。
しかし、この状態は無視して、ペアリング後にプログラムを実行すると、ちゃんと動きます。
動かない場合は、ペアリング解除してspheroのリセットをし、再度ペアリングさせれば繋がります。
実行コマンドは、Edisonの時みたいにコンパイルして転送するのではなく、Macのターミナルから直接コマンドを実行します。
go run leap_sphero.go
まとめ
Gobotを利用することで少ないコードで色々なプラットフォーム上でセンサーを使ったり、動かしたりできるので、なかなか面白いですね。