前回、ESP-WROOM-02でWeb Serverを動かしました。
今回は、Web Clientと動作させ、ESP-WROOM-02に接続した光センサーの値を、IFTTTのMaker Channelに渡す事で、最終的にTwitterにtweetする。という事をやってみたいと思います。
IFTTT Maker Channel
IFTTTとは?
IFTTT(イフト)とは「レシピ」と呼ばれる個人作成もしくは公に共有しているプロフィールを使って数あるWebサービス(Facebook、Evernote、Weather、Dropboxなど)同士で連携することができるWebサービスである。
「if this then that」というシンプルなコンセプトに基づく「レシピ」を作成し共有することができる
Wikipediaより
Maker Channelとは?
今年6月に、IFTTTに新しくMaker Cahnnelができました。Raspberry PiやArduinoを簡単につなげられるチャンネルです。
今まで、ネット上のサービスのみの連携だったものが、実際のモノも連携できるようになりました。
詳しくは下記のSwitch Scienceのブログ記事をご参照ください。
IFTTTやMaker Channelの雰囲気が分かるかと思います。
IFTTTにMaker Channelができました
Recipeの作成
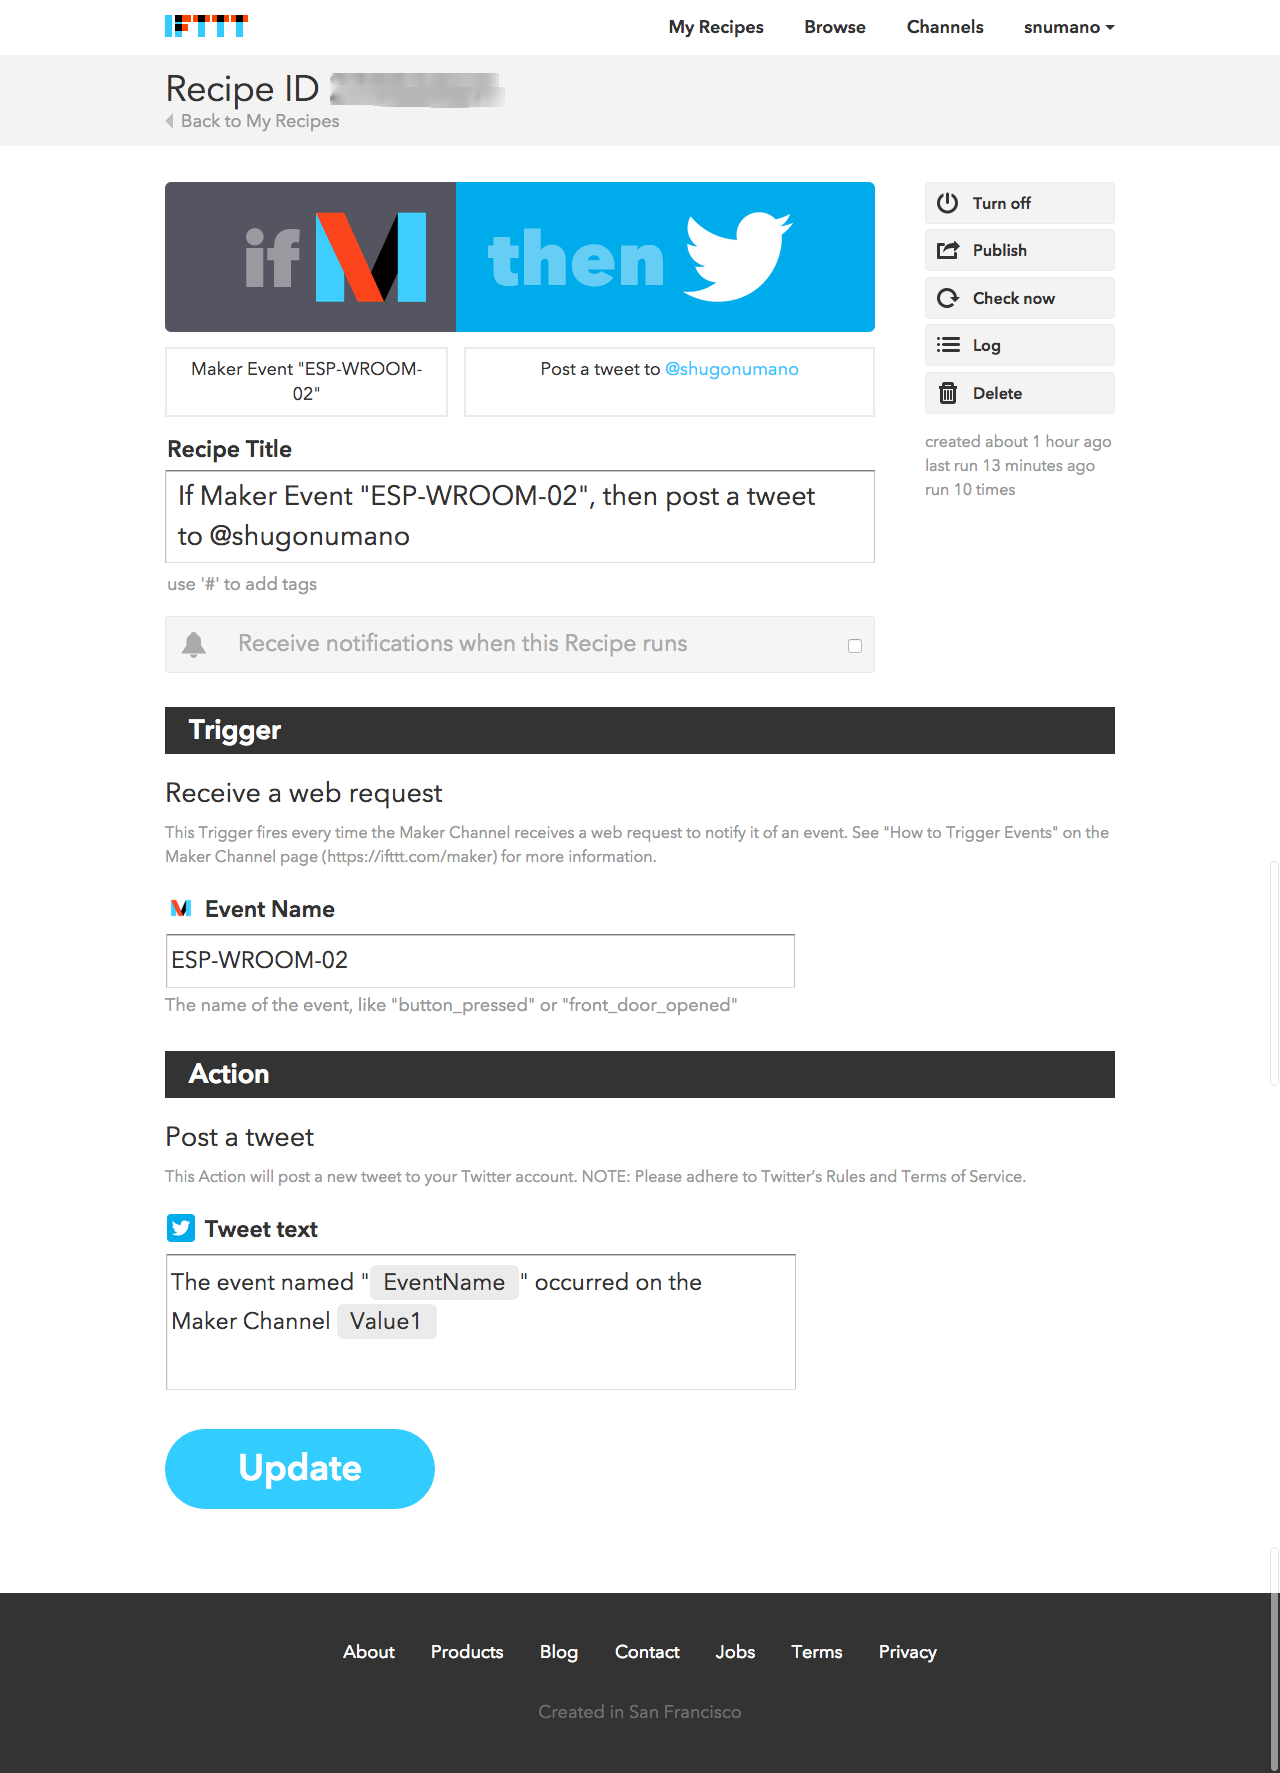
まずは、連携の設定(Recipe)を作成します。
今回はテストなので、TriggerとしてMaker Channelを、Actionとしては何でもいいのですがTwitterを選択します。
event名の「ESP-WROOM-02」を覚えておきます。
また、Action側にはValue1-Value3まで3つの値を渡せるのですが、今回TwitterにはValue1のみを渡すことにします。
triggerへの値の渡し方
値の渡し方は、Maker Channleの「How to Trigger Events」もしくは「Secret Key」をクリックすると詳細表示されます。詳細は、下記が参考になります。
IFTTTの説明では、POSTの例が記載されていますが、下記の記事によるとGETも使えるようです。
IFTTTにMaker Channelができました
今回、下記のようにURLを用意して、GETで値を渡したいと思います。
eventには先ほど確認したevent名を、secret-keyにはMaker Channelで表示されたSecret Keyを、そしてval1からval3にはセンサーで取得した値を指定して渡します。
GET http://maker.ifttt.com/trigger/{event}/with/key/{secret-key}?value1={val1}&value2={val2}&value3={val3} HTTP/1.1"
ESP-WROOM-02で光センサーの値を取得
通常のArduinoだと、アナログ値の読み込みはanalogRead()を使いますが、ESP8266では実装されておらず、代わりにsystem_adc_read()を使うようです。
http://qiita.com/azusa9/items/26e74e4e0d5773ce9c41
Web Client
Arduino IDEから[ファイル]-[スケッチの例]-[ESP8266Wifi]-[WebClient]を読み込んだものを利用しました。
ssidとpasswordは使用するWiFi環境の設定を、secretkeyにはIFTTT Maker Channelで割り当てられたSecret Keyを登録してください。
光センサーで値をsystem_adc_read()で取得してval1とします。その後、上記で確認したChannel Makerで指定しているURLを作成し、GETで、val1を渡します。
/*
 *  This sketch sends data via HTTP GET requests to data.sparkfun.com service.
 *
 *  You need to get streamId and privateKey at data.sparkfun.com and paste them
 *  below. Or just customize this script to talk to other HTTP servers.
 *
 */

# include <ESP8266WiFi.h>
extern "C" {
# include "user_interface.h"
}

const char* ssid     = "*****";
const char* password = "*****";

const char* host = "maker.ifttt.com";
const char* event = "ESP-WROOM-02";
const char* secretkey = "*****";
int val1 = 0;
int val2 = 0;
int val3 = 0;

void setup() {
  Serial.begin(115200);
  delay(10);

  // We start by connecting to a WiFi network

  Serial.println();
  Serial.println();
  Serial.print("Connecting to ");
  Serial.println(ssid);

  WiFi.begin(ssid, password);

  while (WiFi.status() != WL_CONNECTED) {
    delay(500);
    Serial.print(".");
  }

  Serial.println("");
  Serial.println("WiFi connected");
  Serial.println("IP address: ");
  Serial.println(WiFi.localIP());
}

int value = 0;

void loop() {
  delay(5000);
  val1 = system_adc_read();
  Serial.println("=======ANALOG:" + String(val1));
  ++value;

  Serial.print("connecting to ");
  Serial.println(host);

  // Use WiFiClient class to create TCP connections
  WiFiClient client;
  const int httpPort = 80;
  if (!client.connect(host, httpPort)) {
    Serial.println("connection failed");
    return;
  }

  // We now create a URI for the request
  String url = "/trigger/";
  url += event;
  url += "/with/key/";
  url += secretkey;
  url += "?value1=";
  url += String(val1);
  url += "&value2=";
  url += String(val2);
  url += "&value3=";
  url += String(val3);

  Serial.print("Requesting URL: ");
  Serial.println(url);

  // This will send the request to the server
  client.print(String("GET ") + url + " HTTP/1.1\r\n" +
               "Host: " + host + "\r\n" +
               "Connection: close\r\n\r\n");
  delay(10);

  // Read all the lines of the reply from server and print them to Serial
  while(client.available()){
    String line = client.readStringUntil('\r');
    Serial.print(line);
  }

  Serial.println();
  Serial.println("closing connection");
}
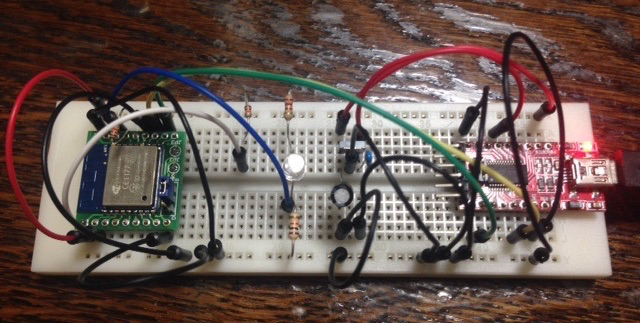
回路
真ん中にあるLEDみたいなのが光センサーです。
1Vに分圧して、ESP-WROOM-02のTOUTに接続しています。
動作確認
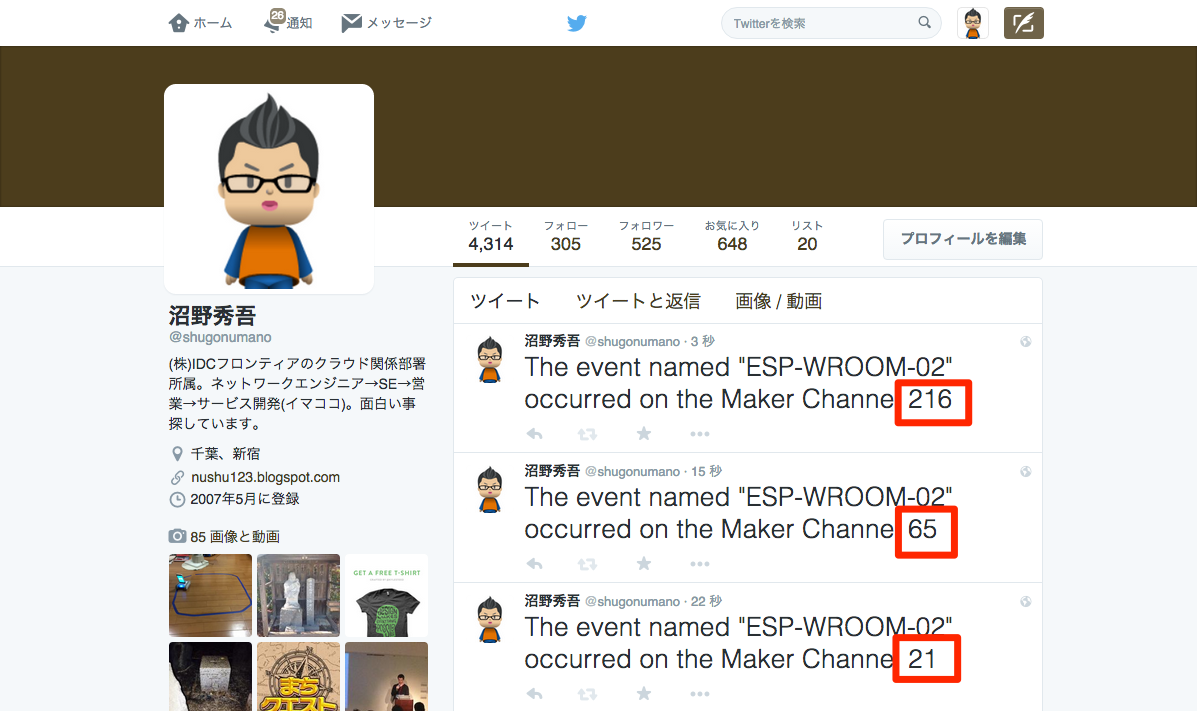
下図のように5秒毎に光センサーで取得した値がTwitterに投稿される事を確認できました。
値の変化の度合いによって、部屋に明かりが点いた・消灯したを判定し、その結果をTriggerに投げるようにすると実用的になってくると思います。
また、ActionもTwitter以外にmailやchat等もありますので、自分の目的にあったものを探してみてはいかがでしょうか。
まとめ
やっと、気になっていたIFTTT Maker Channelを試す事ができました。
URLを指定するだけでDataを渡せるのは手軽でいいです。httpsを使う事もできるので、ビジネス用途でも使えそうです。
次は、myThingsを試してみたいと思います。


