ニューラルスタイル変換とは
ニューラルスタイル変換とはあるターゲット画像を、他の画像のスタイル(質感)に変換して新たな画像を生成する機械学習のテクニックの一つです。街や人の画像をゴッホ風に変えたりするアプリで使われている技術ですね。

ではこの技術を使って今回は本物の、今にも人を食べてしまいそうな凶暴なワニ画像を、100日後に死ぬワニ風にスタイル変換して優しいにこにこワニに変換できるか試してみたいと思います。
(それにしてもこの画像のにいちゃん大丈夫か、、、気をつけないと死んじゃうよ!)
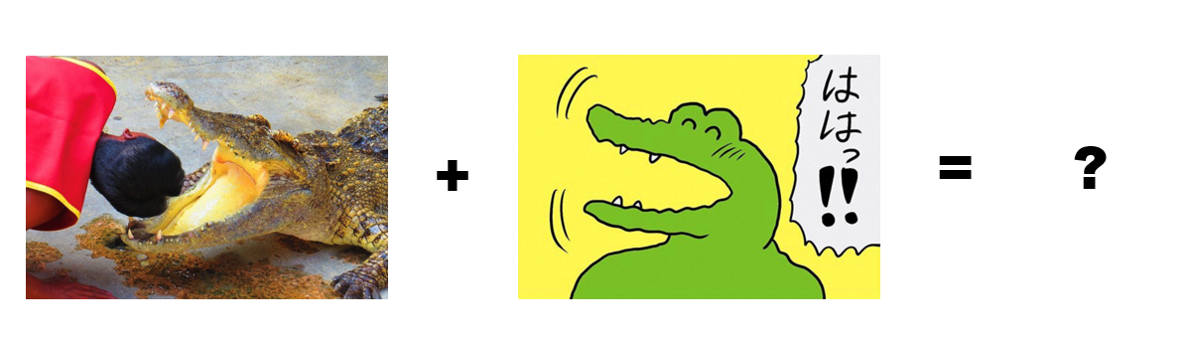
やることは基本的には元の画像のコンテンツ(画像の骨組みといったマクロな構造)を維持した上で、100ワニ風の漫画タッチのスタイル(質感)を取り入れます。ディープラーニングでは常にある達成したいことを指定する損失関数を定義して、その損失関数を最小化することで目的の達成を目指します。今回の例の物凄くざっくりした最小化したい損失関数のイメージはこんなです↓
損失関数 = (本物のワニ画像コンテンツ - 生成画像コンテンツ) + (100ワニのスタイル - 生成画像のスタイル)
ソースコードはKeras制作者のこの本↓の物を使っております。ほぼこの本にそっているので詳細気になる方は是非購入してみてください。
PythonとKerasによるディープラーニング
ソースコード
環境
Google Colabを使います。構成が不要でGPUへの無料アクセスができるので簡単に画像の処理を行うことができます。使う画像はGoogle Driveに保存しておいてGoogle Colabから画像を読み込みます。
Kerasを使ったニューラルスタイル変換 in Google Colab
まずは処理したいターゲット画像とスタイル画像をgoogle driveに保存しておきます。保存したらgoogle colabでノートブックを開きます。そこでgoogle driveにアクセスするために↓を実行し、google drive側でアクセスを許可してください。するとauthorization codeが手に入るのでこれを下記のコード実行後に出てくるフォームに入力します。
from google.colab import drive
drive.mount('/content/drive')
次に画像のpathを定義しておきます。ついてでに処理した画像が同じようなサイズになるよう処理しておきます。
import keras
keras.__version__
from keras.preprocessing.image import load_img, img_to_array

# ターゲット画像のpath。pathは自分が保存した場所に書き換えてください。
target_image_path = '/content/drive/My Drive/Colab Notebooks/wani/wani2.png'
# スタイル画像のpath。pathは自分が保存した場所に書き換えてください。
style_reference_image_path = '/content/drive/My Drive/Colab Notebooks/wani/100wani.png'

# 生成画像サイズ
width, height = load_img(target_image_path).size
img_height = 400
img_width = int(width * img_height / height)
次にVGG19でやり取りする画像の読み込み、前処理、後処理を行う補助関数を作っておきます。
import numpy as np
from keras.applications import vgg19

def preprocess_image(image_path):
    img = load_img(image_path, target_size=(img_height, img_width))
    img = img_to_array(img)
    img = np.expand_dims(img, axis=0)
    img = vgg19.preprocess_input(img)
    return img

def deprocess_image(x):
    x[:, :, 0] += 103.939
    x[:, :, 1] += 116.779
    x[:, :, 2] += 123.68
    x = x[:, :, ::-1]
    x = np.clip(x, 0, 255).astype('uint8')
    return x
続いてVGG19を定義します。
from keras import backend as K

target_image = K.constant(preprocess_image(target_image_path))
style_reference_image = K.constant(preprocess_image(style_reference_image_path))

# 生成画像を保持するプレースホルダー
combination_image = K.placeholder((1, img_height, img_width, 3))

# 3つの画像を1つのバッチにまとめる
input_tensor = K.concatenate([target_image,
                              style_reference_image,
                              combination_image], axis=0)

# 3つの画像からなるバッチを入力として使用するVGG19を構築
# このモデルには学習済みのImageNetの重みが読み込まれます
model = vgg19.VGG19(input_tensor=input_tensor,
                    weights='imagenet',
                    include_top=False)
print('Model loaded.')
損失関数を定義します。
#  コンテンツの損失関数
def content_loss(base, combination):
    return K.sum(K.square(combination - base))

#  スタイルの損失関数
def gram_matrix(x):
    features = K.batch_flatten(K.permute_dimensions(x, (2, 0, 1)))
    gram = K.dot(features, K.transpose(features))
    return gram

def style_loss(style, combination):
    S = gram_matrix(style)
    C = gram_matrix(combination)
    channels = 3
    size = img_height * img_width
    return K.sum(K.square(S - C)) / (4. * (channels ** 2) * (size ** 2))

#  全変動損失関数
def total_variation_loss(x):
    a = K.square(
        x[:, :img_height - 1, :img_width - 1, :] - x[:, 1:, :img_width - 1, :])
    b = K.square(
        x[:, :img_height - 1, :img_width - 1, :] - x[:, :img_height - 1, 1:, :])
    return K.sum(K.pow(a + b, 1.25))
最小化の対象となる最終的な損失関数(これら3つの関数の加重平均)を定義します。
outputs_dict = dict([(layer.name, layer.output) for layer in model.layers])
content_layer = 'block5_conv2'
style_layers = ['block1_conv1',
                'block2_conv1',
                'block3_conv1',
                'block4_conv1',
                'block5_conv1']

total_variation_weight = 1e-4
style_weight = 1.
content_weight = 0.025

loss = K.variable(0.)
layer_features = outputs_dict[content_layer]
target_image_features = layer_features[0, :, :, :]
combination_features = layer_features[2, :, :, :]
loss += content_weight * content_loss(target_image_features,
                                      combination_features)
for layer_name in style_layers:
    layer_features = outputs_dict[layer_name]
    style_reference_features = layer_features[1, :, :, :]
    combination_features = layer_features[2, :, :, :]
    sl = style_loss(style_reference_features, combination_features)
    loss += (style_weight / len(style_layers)) * sl
loss += total_variation_weight * total_variation_loss(combination_image)
勾配降下法のプロセスを定義
grads = K.gradients(loss, combination_image)[0]
fetch_loss_and_grads = K.function([combination_image], [loss, grads])

class Evaluator(object):

    def __init__(self):
        self.loss_value = None
        self.grads_values = None

    def loss(self, x):
        assert self.loss_value is None
        x = x.reshape((1, img_height, img_width, 3))
        outs = fetch_loss_and_grads([x])
        loss_value = outs[0]
        grad_values = outs[1].flatten().astype('float64')
        self.loss_value = loss_value
        self.grad_values = grad_values
        return self.loss_value

    def grads(self, x):
        assert self.loss_value is not None
        grad_values = np.copy(self.grad_values)
        self.loss_value = None
        self.grad_values = None
        return grad_values

evaluator = Evaluator()
やっと最後に実行です!
from scipy.optimize import fmin_l_bfgs_b
# from scipy.misc import imsave
import imageio
import time

result_prefix = 'style_transfer_result'
iterations = 30

# Run scipy-based optimization (L-BFGS) over the pixels of the generated image
# so as to minimize the neural style loss.
# This is our initial state: the target image.
# Note that `scipy.optimize.fmin_l_bfgs_b` can only process flat vectors.
x = preprocess_image(target_image_path)
x = x.flatten()
for i in range(iterations):
    print('Start of iteration', i)
    start_time = time.time()
    x, min_val, info = fmin_l_bfgs_b(evaluator.loss, x,
                                     fprime=evaluator.grads, maxfun=20)
    print('Current loss value:', min_val)
    # Save current generated image
    img = x.copy().reshape((img_height, img_width, 3))
    img = deprocess_image(img)
    fname = result_prefix + '_at_iteration_%d.png' % i
    #imsave(fname, img)
    imageio.imwrite(fname, img)
    end_time = time.time()
    print('Image saved as', fname)
    print('Iteration %d completed in %ds' % (i, end_time - start_time))
画像を出力します
from scipy.optimize import fmin_l_bfgs_b
from matplotlib import pyplot as plt

# コンテンツ画像
plt.imshow(load_img(target_image_path, target_size=(img_height, img_width)))
plt.figure()

# スタイル画像
plt.imshow(load_img(style_reference_image_path, target_size=(img_height, img_width)))
plt.figure()

# 生成画像
plt.imshow(img)
plt.show()
出力結果
出力結果は、、、、、、、、、、
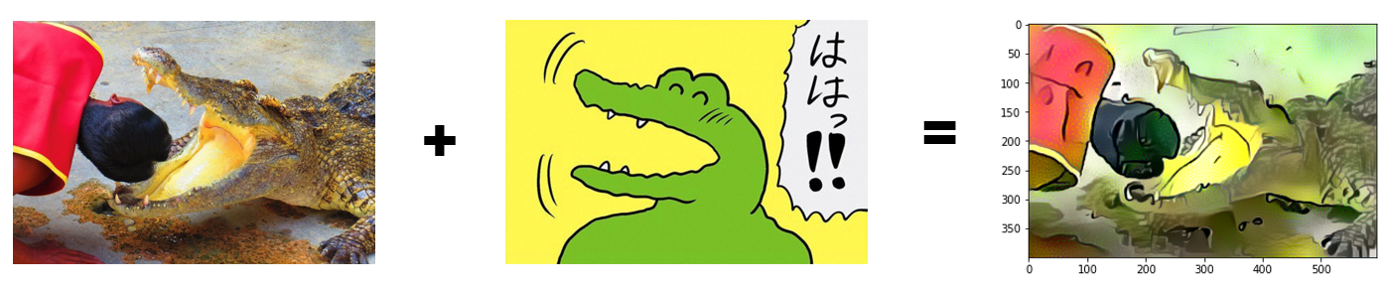
なんかイメージしていたのと違う!!!!!全然ポップで優しいワニ感無し!!!!!!
まぁ、これがディープラーニングあるあるなのですが、とりあえず割と簡単にGoogle ColabやKerasを使えばディープラーニングが試せることは体験して頂けたのではないでしょうか。こちらのコードで自分でいろいろな画像処理を試せるので皆さんも是非試してみてください。
ほんとKerasすごい。再掲しておきますが今回のコードはPythonとKerasによるディープラーニングに掲載されている↓こちらのコードを使っております。
ソースコード