iOS10で、Firebaseを用いたサイレント通知を行う。
Firebase Webコンソールから送信できるFirebase NotificationsではJSONをカスタマイズできないので、Firebase Cloud Messagingを利用する。
クライアント側
1. 普通のpush通知を送れるようにする
https://firebase.google.com/docs/cloud-messaging/ios/client?hl=ja
ドキュメントにはiOS9までの実装方法しか書かれていないので、User Notifications Frameworkを用いたやり方で書く。
2. BackgroundModesの設定
TARGETS > Capabilities > Background ModesのBackground fetchとRemote notificationsにチェック
3. AppDelegateに下記のメソッドを追加
    func application(_ application: UIApplication,
                     didReceiveRemoteNotification userInfo: [AnyHashable : Any],
                     fetchCompletionHandler completionHandler: @escaping (UIBackgroundFetchResult) -> Void)
    {
        // 処理
        completionHandler(.newData)
    }
アプリのforeground, backgroundに関わらず上記のメソッドが呼ばれる。
サーバ側
1. ChromeウェブストアからPostmanをインストール
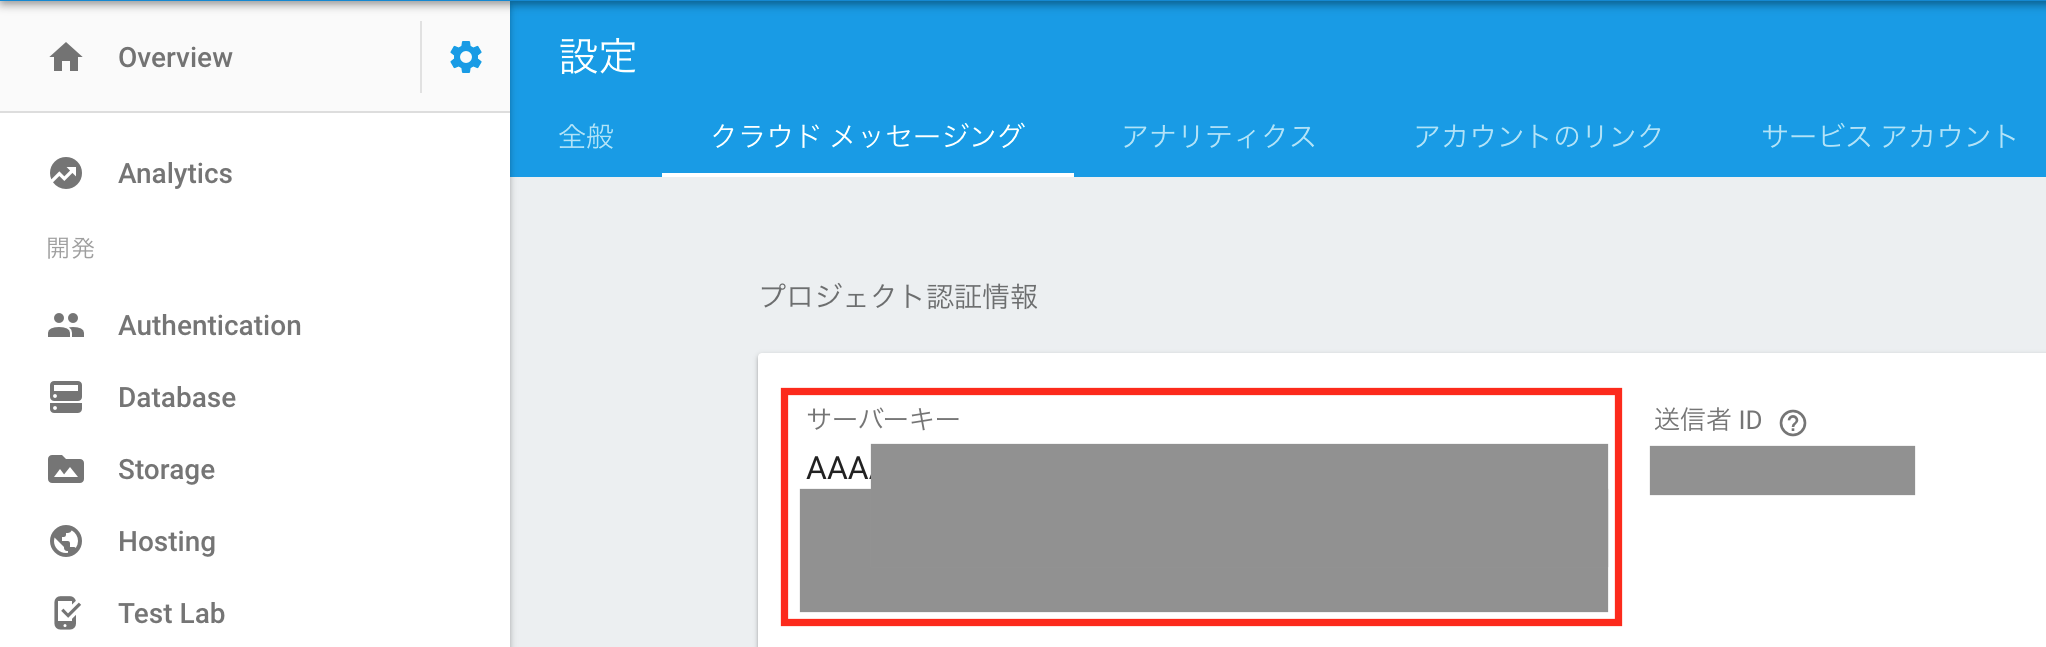
2. Firebase Webコンソールからサーバーキーを取得
左上の歯車マーク > プロジェクトの設定 > クラウドメッセージング
3. Postmanで送信するJSONを記述
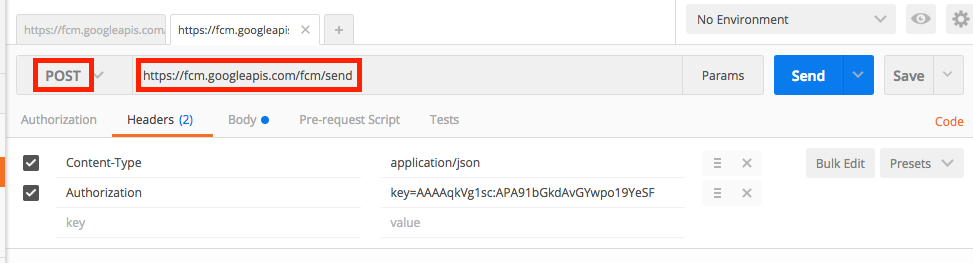
HTTPメソッドはPOST、URLは https://fcm.googleapis.com/fcm/send を設定。
Headersに下記のキーを追加する。
  Content-Type:application/json
  Authorization:key=xxxxxxxxxxxxxxxxxxxxxxxxxxxxxxxxxxxxxx
xxxxxには先ほど取得したサーバーキーを入力する。
key=がないとエラーコード401が返ってくるので注意。
BodyにJSONを記述する。
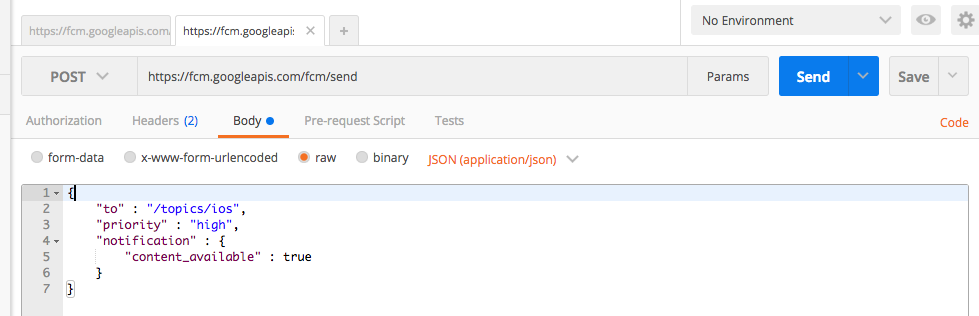
{
    "to" : "/topics/ios",
    "priority" : "high",
    "notification" : {
        "content_available" : true
    }
}
"to":は送信したいデバイスが登録されてあるトピックか、もしくはデバイストークンを指定する。トピックの登録にはFIRMessaging.messaging().subscribe(toTopic: "トピック名")を用いる。反映されるまで数時間かかるが、それまではそのトピックに送信ができない。Firebase WebコンソールのNotifications > 新しいメッセージ > ターゲット > トピック に表示されるようになったら送信することができる。
このキーを削ると全てのデバイスに通知が行くわけではなく、通知の送信に失敗してしまう。
"notification:"内の"content_available" : trueで、アプリがバックグラウンド状態でもメソッドを呼び出すことができる。なお、Appleの公式ガイドには以下のように書いてあるが、こちらのJSONでは通知が届かないので注意。

4. POSTリクエストを送信
右上の"Send"からリクエストを送信する。
アプリがbackgroundであってもdidReceiveRemoteNotification内の処理が実行される。ヤッタネ!![]()
追記
UIApplication.shared.registerForRemoteNotifications()
このコードだけ書くと承認アラートを出さずにサイレント通知を送れるようになる。