はじめに
追記型でどんどんアプデしていきます。
用語が多くてルー大柴みたいになります。
作業リポジトリはこちら
プラグインの利用方法についてはこちら
2日目できました こちら
目的
- オーナーズストアに商品を増やしたい。
- プラグインを作る開発者に向けて、手助けになる記事にしたい。
- EC-CUBE3本体で、足りない箇所を洗い出したい。
EC-CUBE3のプラグインを2日でつくる - 1日目
というわけで作っていきます。
まずはどんなもの作るかってところから。
構想
カテゴリコンテンツというEC-CUBE2系であったプラグインをver.3にあわせて作り変えようと思います。
設計というほどのものではないですが、利用するEventはおおまかには以下な感じ。
- Entity拡張:独自のものを定義
- View拡張:Symfony/kernel.response
これらを軸に必要なものを肉付けしたいと思います。
カテゴリコンテンツとは?
カテゴリごとにデザインを変えたい!そんなあなたに!なプラグインです。
完成後に画像をアップします。
Entity拡張
何をやるにもまずはEntityから作ります。
(作る順番は好みです)
- Entity
- Repository
- Form\Type, Form\Extension
- Twig
の順で書いていきます。
カテゴリページ( http://example.com/products/list?category_id=X )に紐づく拡張なので、
カテゴリ編集画面側からつくります。
画像の矢印の位置に入れたいと思います。
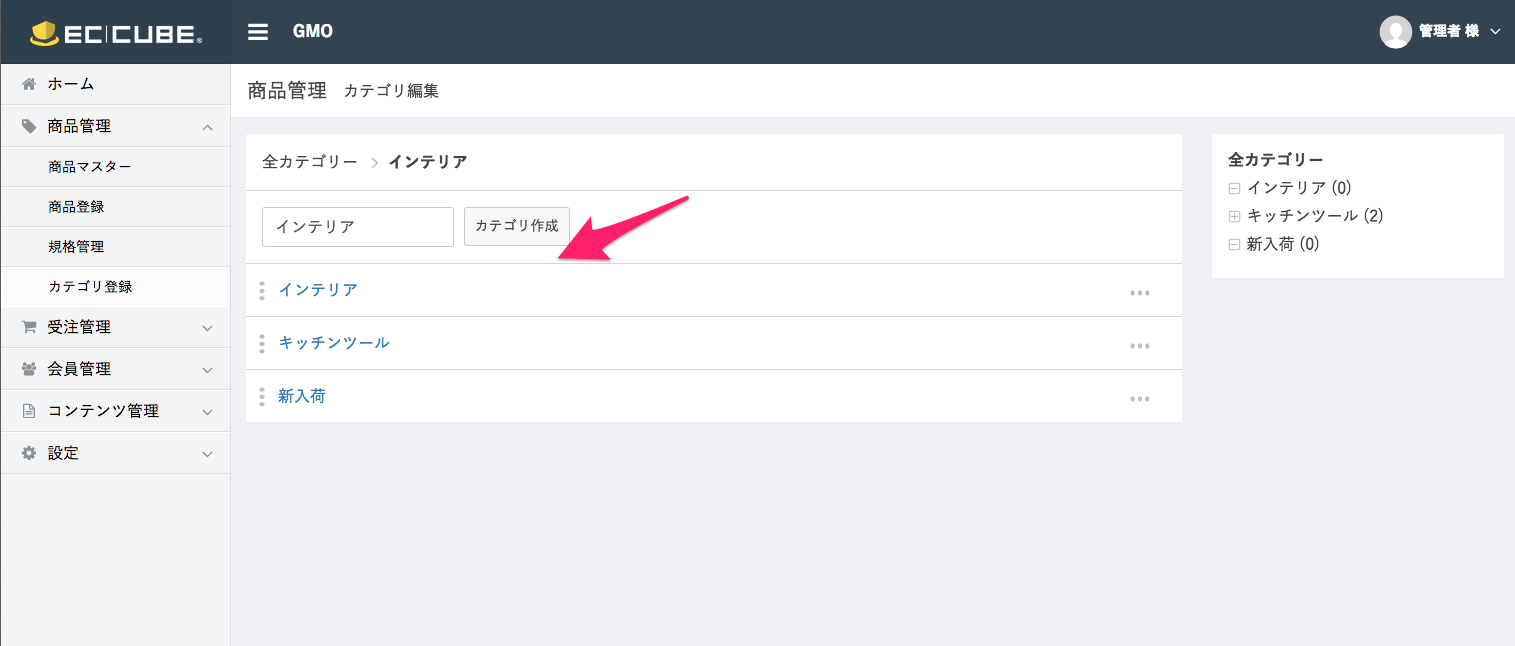
まずはミニマムに。カテゴリIDに紐づくtextareaをつけるだけのシンプルな拡張テーブルを用意。
MetadataのYamlも一緒に作った方が安全です。
# app/Plugin/CategoryContent/Entity/CategoryContent.php
<?php

namespace Plugin\CatgeoryContent\Entity;

use Eccube\Entity\Category;

class CategoryContent extends \Eccube\Entity\AbstractEntity
{
    private $Category;

    private $content;

    public function setCategory(Category $Category)
    {
        $this->Category = $Category;

        return $this;
    }

    public function getCategory()
    {
        return $this->Category;
    }

    public function setContent($content)
    {
        $this->content = $content;

        return $this;
    }

    public function getContent()
    {
        return $this->content;
    }
}
# app/Plugin/CategoryContent/Resource/doctrine/Plugin.CategoryContent.Entity.CategoryContent.dcm.yml
Plugin\CategoryContent\Entity\CategoryContent:
    type: entity
    table: category_content
    repositoryClass: Plugin\CategoryContent\Repository\CategoryContent
    id:
        category_id:
            type: smallint
            nullable: false
            unsigned: false
            id: true
            generator:
                strategy: NONE
    fields:
        content:
            type: text
            nullable: false
        create_date:
            type: datetime
            nullable: false
        update_date:
            type: datetime
            nullable: true
    oneToOne:
        Category:
            targetEntity: Category
            joinColumn:
                name: category_id
                referencedColumnName: category_id
    lifecycleCallbacks: {  }
Repositoryを用意
つづいてRepository。こちらは最初のうちはEntityで指定したClassを書いておくだけで大丈夫です。
# app/Plugin/CategoryContent/Repository/CatgeoryContentRepository.php
<?php

namespace Plugin\CategoryContent\Repository;

use Doctrine\ORM\EntityRepository;

class CategoryContentRepository extends EntityRepository
{
}
インストール用のファイルを定義
さて、拡張したEntityをDBに登録するために、PluginManagerとMigrationファイルを記載して、DBとの疎通テスト+登録をおこないます。
ざっとひな形を置いておきます。
<?php

namespace Plugin\CategoryContent;

use Eccube\Plugin\AbstractPluginManager;

class PluginManager extends AbstractPluginManager
{

    public function install($config, $app)
    {
        $this->migrationSchema($app, __DIR__ . '/Migration', $config['code']);
    }

    public function uninstall($config, $app)
    {
        $this->migrationSchema($app, __DIR__ . '/Migration', $config['code'], 0);
    }

    public function enable($config, $app)
    {
    }

    public function disable($config, $app)
    {
    }

    public function update($config, $app)
    {
    }
}
<?php
# app/Plugin/CategoryContent/Migration/Version20150706204400.php

namespace DoctrineMigrations;

use Doctrine\DBAL\Migrations\AbstractMigration;
use Doctrine\DBAL\Schema\Schema;

class Version20150706204400 extends AbstractMigration
{

    public function up(Schema $schema)
    {
        $this->createDtbCategoyContentPlugin($schema);
    }

    public function down(Schema $schema)
    {
        $schema->dropTable('category_content');
    }

    protected function createDtbCategoryContentPlugin(Schema $schema)
    {
        $table = $schema->createTable("category_contnet");
        $table
            ->addColumn('category_id', 'integer', array(
                'notnull' => true,
            ))
            ->addColumn('content', 'text')
        ;
    }
}
こちらを用意して、tar.gzを作ったらインストールしてみましょう。
Form\Extensionの作成
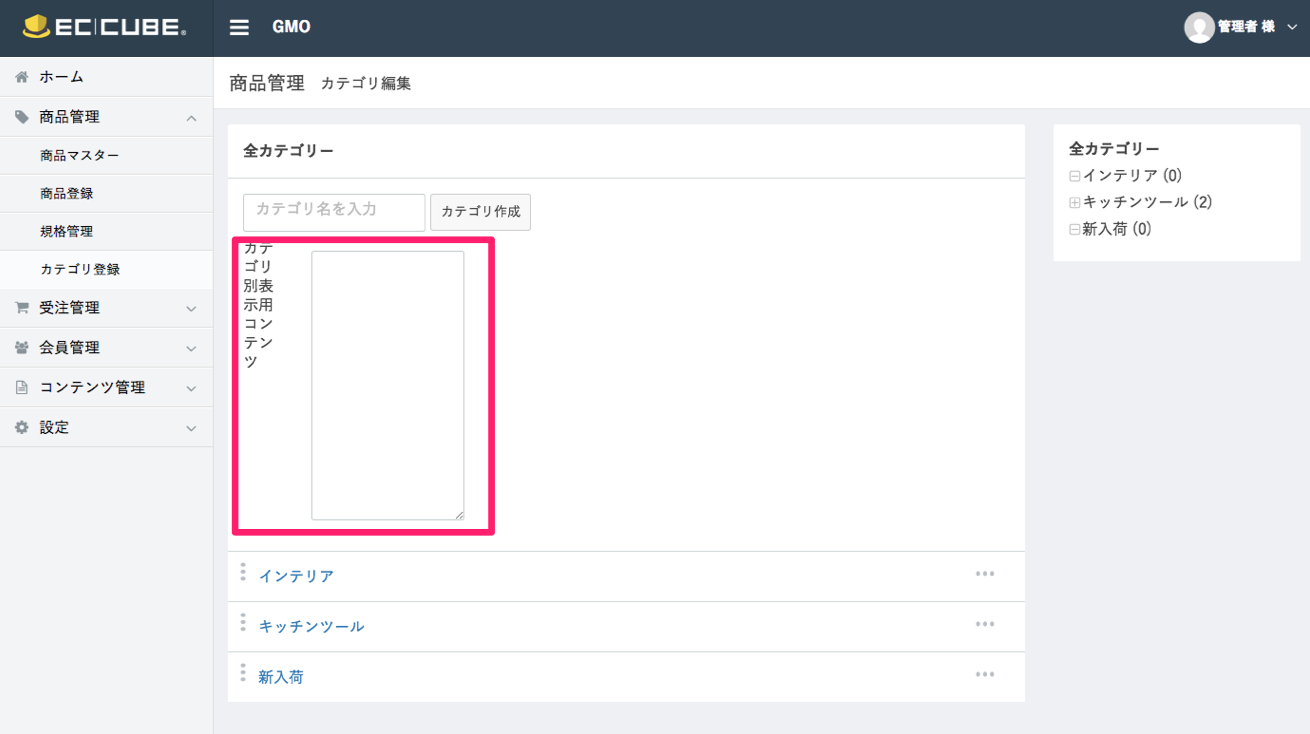
続いて、カテゴリ登録ページの、さきほどの画像のところにデータを入れたいので、 Form\Extension として実装していきます。
こちらも1カラム追加するだけなのでシンプルに。
getExtendedType() には、Extendしたいやつを指定してやりましょう。
指定したところが勝手に拡張されます。
でも親側でbindされたくないので 'mapped' => false にしておいてあげましょう。
# app/Plugin/CategoryContent/Form/Extension/CategoryContentExtension.php
<?php

namespace Plugin\CategoryContent\Form\Extension;

use Symfony\Component\Form\AbstractTypeExtension;
use Symfony\Component\Form\FormBuilderInterface;

class CategoryContentExtension extends AbstractTypeExtension
{
    public function buildForm(FormBuilderInterface $builder)
    {
        $builder
            ->add('content', 'textarea', array(
                'lable' => 'カテゴリ別表示用コンテンツ',
                'mapped' => false,
            ))
        ;
    }

    public function getExtendedType()
    {
        return 'category';
    }
}
忘れないうちに ServiceProvider に記載しておきましょう。
忘れてたので、Repositoryも登録します。
登録してないのに「動かない!ムキー」ってなること結構あります。マジで。おはやめの登録を。
# app/Plugin/CategoryContent/ServiceProvider/CategoryContentServiceProvider.php
<?php

namespace Plugin\CategoryContent\ServiceProvider;

use Eccube\Application;
use Silex\Application as BaseApplication;
use Silex\ServiceProviderInterface;

class CategoryContentServiceProvider implements ServiceProviderInterface
{
    public function register(BaseApplication $app)
    {
        // Form/Extension
        $app['form.type.extensions'] = $app->share($app->extend('form.type.extensions', function ($extensions) {
            $extensions[] = new \Plugin\CategoryContent\Form\Extension\CategoryContentExtension();

            return $extensions;
        }));

        //Repository
        $app['category_content.repository.category_content'] = $app->share(function () use ($app) {
            return $app['orm.em']->getRepository('Plugin\CategoryContent\Entity\CategoryContent');
        });


    }

    public function boot(BaseApplication $app)
    {
    }
}
さっきから思ってますが、 category_content って長い。
Viewの拡張
さて、 {{ form_widget(form) }} で出力してる場合は、Viewの拡張がほとんどいらないんですが、
今回はデザイナに見えなくなることを防ぐために、一個一個分解して記述しているため、追加したFormをRenderしてあげなければなりません。
event.yml にイベントを定義して、 kernel.response にイベントを知らせてあげましょう。
書き方はこんな感じです。
# app/Plugin/CategoryContent/event.yml
eccube.event.render.admin_product_category_edit.before:
    - [onRenderAdminProductCategoryEditBefore, NORMAL]
長い!!
これで、 admin_product_category_edit のルーティングできたときにRenderイベントが拡張できます。
わたってくる引数は Symfony\Component\HttpKernel\Event\FilterResponseEvent 型です。
こいつからResponseオブジェクトを、さらにそこからHTMLのデータを引っ張りだしてきます。
$event->getResponse()->getContent()
そして更に、コネコネします。
コネコネの仕方はSymfony/DomCrawlerつかってもよし、DomDocument使ってもよし、replaceしてもよし。(replaceはオススメできません)
<?php

namespace Plugin\CategoryContent;

use Eccube\Event\RenderEvent;
use Eccube\Event\ShoppingEvent;
use Symfony\Component\DomCrawler\Crawler;
use Symfony\Component\HttpKernel\Event\FilterResponseEvent;
use Symfony\Component\CssSelector\CssSelector;

class CategoryContent
{
    private $app;

    public function __construct($app)
    {
        $this->app = $app;
    }

    public function onRenderAdminProductCategoryEditBefore(FilterResponseEvent $event)
    {
        $app = $this->app;
        $request = $event->getRequest();
        $response = $event->getResponse();

        // DomCrawlerにHTMLを食わせる
        $html = $response->getContent();
        $crawler = new Crawler($html);

        $form = $app['form.factory']
            ->createBuilder('admin_category')
            ->getForm();
        $form->handleRequest($request);
        $twig = $app->renderView(
            'CategoryContent/Resource/template/Admin/category.twig',
            array('form' => $form->createView())
        );

        $oldHtml = $crawler
            ->filter('form')
            ->first()
            ->html()
        ;
        $newHtml = $oldHtml . $twig;

        // DomCrawlerからHTMLを吐き出す
        $html = $crawler->html();
        $html = str_replace($oldHtml, $newHtml, $html);

        $response->setContent($html);
        $event->setResponse($response);
    }

}
コネコネする前に適当に加工して、表示できるかどうかのテストをしておくといいかと思います。
さらに、読み込むViewをこんな感じに定義しときます。
<!-- app/Plugin/CategoryContent/Resource/template/admin/category.twig -->
<br />
<div class="form-group">
    {{ form_label(form.content) }}
    <div class="col-sm-9 col-lg-10" style="margin-top: 20px;">
        {{ form_widget(form.content, { attr : { 'rows' : 15, style : 'font-size:12px' } }) }}
        {{ form_errors(form.content) }}
    </div>
</div>
ここまででだいたいこんな感じになりました。
この画面はBootstrapを崩してHTMLが記述されているため、
あまりいい感じじゃないですが、今回は置いておきます。
ここまできたら管理画面はバインドして登録するだけですね。
後処理ミドルウェアの追加
バインドしてデータ保管するために、後処理用のミドルウェアを使います。
event.yml に追記してあげます。
eccube.event.controller.admin_product_category.after:
    - [onAdminProductCategoryEditAfter, NORMAL]
eccube.event.controller.admin_product_category_edit.after:
    - [onAdminProductCategoryEditAfter, NORMAL]
そして、中身はこんな感じ。
2日しかないのでソースが汚いのは勘弁してくださいm(_ _)m
<?php
# app/Plugin/CategoryContent/CategoryContent.php
namespace Plugin\CategoryContent;

use Eccube\Event\RenderEvent;
use Eccube\Event\ShoppingEvent;
use Symfony\Component\DomCrawler\Crawler;
use Symfony\Component\HttpKernel\Event\FilterResponseEvent;
use Symfony\Component\CssSelector\CssSelector;

class CategoryContent
{
    private $app;

    public function __construct($app)
    {
        $this->app = $app;
    }

    public function onRenderAdminProductCategoryEditBefore(FilterResponseEvent $event)
    {
        $app = $this->app;
        $request = $event->getRequest();
        $response = $event->getResponse();
        $id = $request->attributes->get('id');

        // DomCrawlerにHTMLを食わせる
        $html = $response->getContent();
        $crawler = new Crawler($html);

        $CategoryContent = $app['category_content.repository.category_content']->find($id);
        if (is_null($CategoryContent)) {
            $CategoryContent = new \Plugin\CategoryContent\Entity\CategoryContent();
        }

        $form = $app['form.factory']
            ->createBuilder('admin_category')
            ->getForm();
        $form->get('content')->setData($CategoryContent->getContent());
        $form->handleRequest($request);

        $twig = $app->renderView(
            'CategoryContent/Resource/template/Admin/category.twig',
            array('form' => $form->createView())
        );

        $oldCrawler = $crawler
            ->filter('form')
            ->first();

        // DomCrawlerからHTMLを吐き出す
        $html = $crawler->html();
        $oldHtml = '';
        $newHtml = '';
        if (count($oldCrawler) > 0) {
            $oldHtml = $oldCrawler->html();
            $newHtml = $oldHtml . $twig;
        }

        $html = str_replace($oldHtml, $newHtml, $html);

        $response->setContent($html);
        $event->setResponse($response);
    }

    public function onAdminProductCategoryEditAfter()
    {
        $app = $this->app;
        $id = $app['request']->attributes->get('id');

        $form = $app['form.factory']
            ->createBuilder('admin_category')
            ->getForm();

        $CategoryContent = $app['category_content.repository.category_content']->find($id);
        if (is_null($CategoryContent)) {
            $CategoryContent = new \Plugin\CategoryContent\Entity\CategoryContent();
        }
        $form->get('content')->setData($CategoryContent->getContent());

        $form->handleRequest($app['request']);

        if ('POST' === $app['request']->getMethod()) {
            if ($form->isValid()) {
                $content = $form->get('content')->getData();

                $Category = $app['eccube.repository.category']->find($id);

                $CategoryContent
                    ->setCategoryId($Category->getId())
                    ->setCategory($Category)
                    ->setContent($content);

                $app['orm.em']->persist($CategoryContent);
                $app['orm.em']->flush();
            }
        }
    }

}
管理画面は荒削りですが、以上です。
2日目はフロント画面の拡張をしていきます。
検証以外でのプラグイン拡張が初めて、かつ、今回も検証の意味合いが大きいのでソースが多少荒っぽいのはご了承ねがいますmm