AWS LambdaとAPI Gatewayを使いこなすためにいい練習になるかなと思って
SlackからLambdaをキックしたり、起動したLambda functionのログとかをSlackに通知するような仕組みを作ってみる。
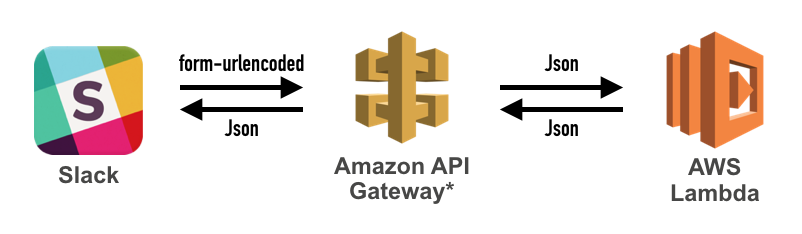
構成はこんな感じ
この構成ができれば、いわゆるサーバレスアーキテクチャが出来るってことになるのでなかなかアツい。
Lambdaが出来てからサーバレスアプリケーションが最近注目を集めてますよね。
それにbotのためにサーバー(コンテナ)を立てる必要もなくなるのでエコな構成になるんじゃないだろうか。
それではさっそくチャレンジしてみる。
AWS Lambdaについて
Lambdaを触ったことがないって人にはこの記事がおすすめ。細かく丁寧に説明されています。
http://qiita.com/s_s_k/items/b584435120e99d63975b
Lambdaを準備する
まず初めにLambdaに処理を書いていきます。
Node.jsで書く必要があります。javaでも書けるそうですがNode.jsの方がレスポンス早そうなのでこちらを採用します。
内容は簡単で、いくつかのStringメッセージを json 形式に格納して、ランダムに返却するというもの。
exports.handler = (event, context, callback) => {

    var res = {};
    res.username = "outgoing-webhook-from-lambda";
    var array = [
        'わからないことは<https://api.slack.com/custom-integrations|こちら>を参照してください。',
        'こんにちは、私は'+ res.username +'です。\nAWSのLambda functionで処理されています。\n',
        'API Gatewayを使ってLambda functionを起動する良い練習になりますね。',
        'outgoing-webhookを使用すればLambda functionをAPI Gateway経由でキックすることができます。'
    ];
    res.text = array[Math.floor(Math.random() * array.length)];

    callback(null, res);
};
今回はSlackに返却するのでOutgoing WebHooksが受けられるような形式にしています。以下がその形式。
{
"username": "発言するbotのユーザ名";
"text": "表示されるテキスト";
}
API Gatewayの準備
Lambda functionを起動するためにAPI GatewayからAPI(POST)してみましょう。
testというメソッドを作成しています。統合リクエストには先ほど設定したLambdaを書いておきましょう。

統合リクエストの詳細をみると以下のようになっています。
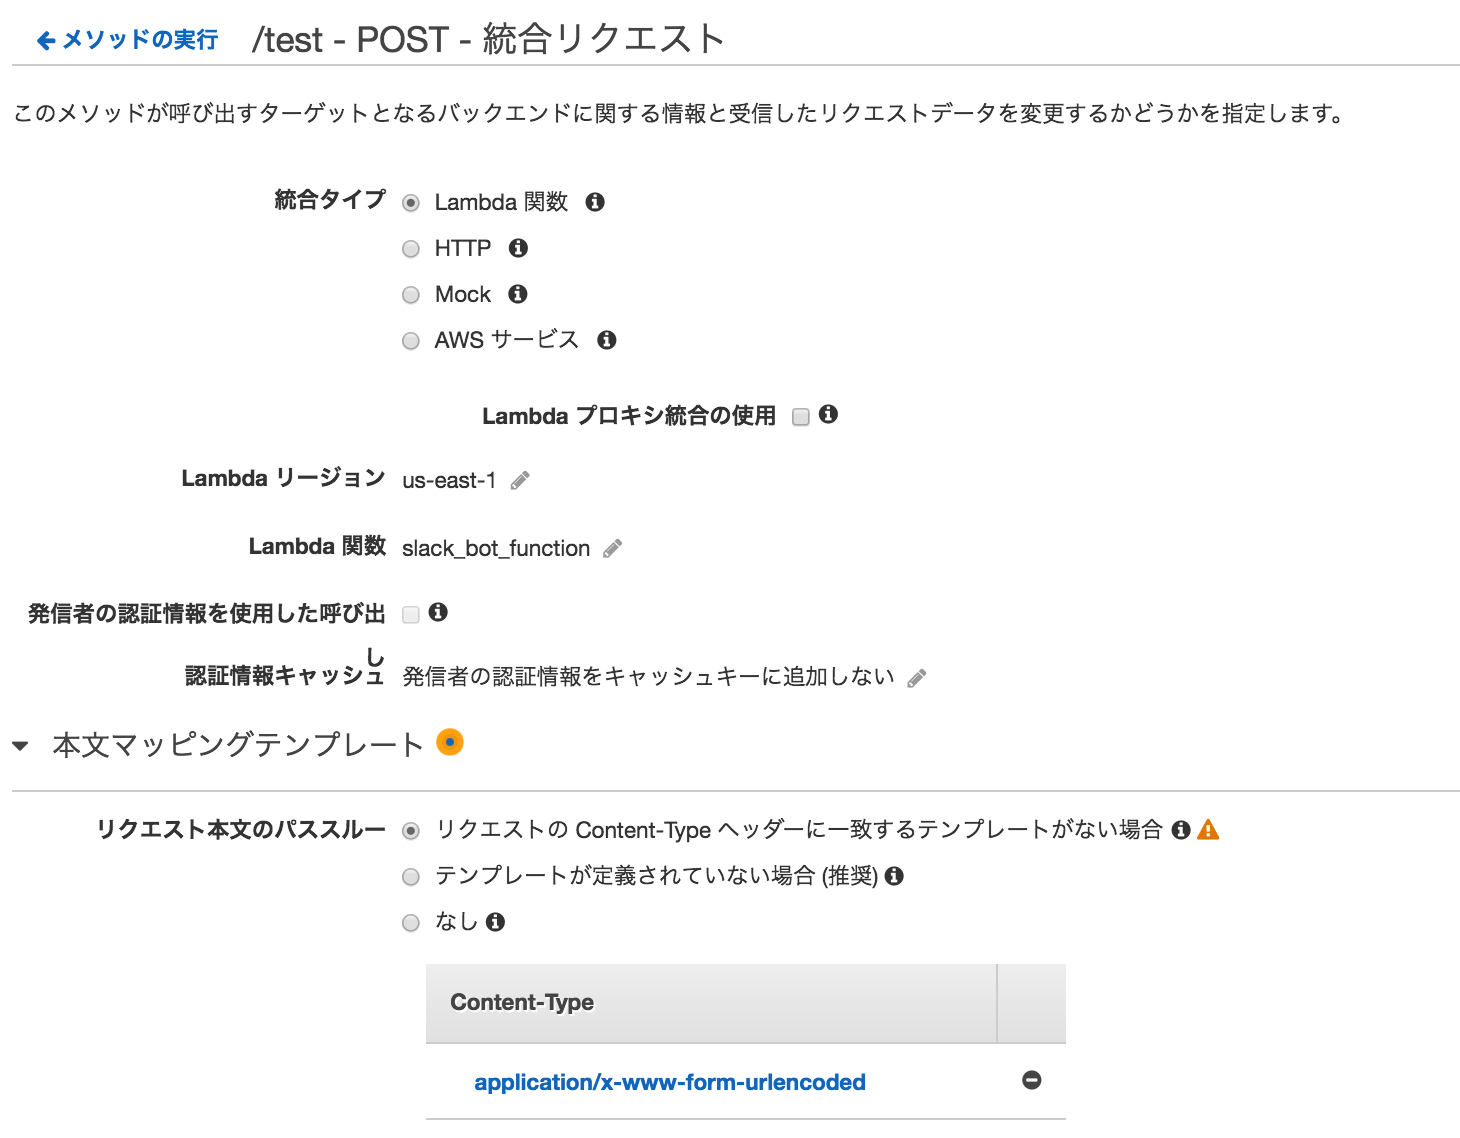
注意しなければいけないのが「本文マッピングテンプレート」の部分。
Slackから飛んでくるPOSTは形式が jsonではなく、form-urlencodedで送られてくるらしい。
そこで「application/x-www-form-urlencoded」の時は json 型に変換するマッピングを定義します。
以下のようにしてあげれば良いと思います。
## convert HTML POST data or HTTP GET query string to JSON

## get the raw post data from the AWS built-in variable and give it a nicer name
# if ($context.httpMethod == "POST")
 #set($rawAPIData = $input.path('$'))
# elseif ($context.httpMethod == "GET")
 #set($rawAPIData = $input.params().querystring)
 #set($rawAPIData = $rawAPIData.toString())
 #set($rawAPIDataLength = $rawAPIData.length() - 1)
 #set($rawAPIData = $rawAPIData.substring(1, $rawAPIDataLength))
 #set($rawAPIData = $rawAPIData.replace(", ", "&"))
# else
 #set($rawAPIData = "")
# end

## first we get the number of "&" in the string, this tells us if there is more than one key value pair
# set($countAmpersands = $rawAPIData.length() - $rawAPIData.replace("&", "").length())

## if there are no "&" at all then we have only one key value pair.
## we append an ampersand to the string so that we can tokenise it the same way as multiple kv pairs.
## the "empty" kv pair to the right of the ampersand will be ignored anyway.
# if ($countAmpersands == 0)
 #set($rawPostData = $rawAPIData + "&")
# end

## now we tokenise using the ampersand(s)
# set($tokenisedAmpersand = $rawAPIData.split("&"))

## we set up a variable to hold the valid key value pairs
# set($tokenisedEquals = [])

## now we set up a loop to find the valid key value pairs, which must contain only one "="
# foreach( $kvPair in $tokenisedAmpersand )
 #set($countEquals = $kvPair.length() - $kvPair.replace("=", "").length())
 #if ($countEquals == 1)
  #set($kvTokenised = $kvPair.split("="))
  #if ($kvTokenised[0].length() > 0)
   ## we found a valid key value pair. add it to the list.
   #set($devNull = $tokenisedEquals.add($kvPair))
  #end
 #end
# end

## next we set up our loop inside the output structure "{" and "}"
{
# foreach( $kvPair in $tokenisedEquals )
  ## finally we output the JSON for this pair and append a comma if this isn't the last pair
  #set($kvTokenised = $kvPair.split("="))
 "$util.urlDecode($kvTokenised[0])" : #if($kvTokenised[1].length() > 0)"$util.urlDecode($kvTokenised[1])"#{else}""#end#if( $foreach.hasNext ),#end
# end
}
 この部分ですね。
ここまでできればAPIをデプロイしてやって、URLを作成しましょう。
Slack側の設定
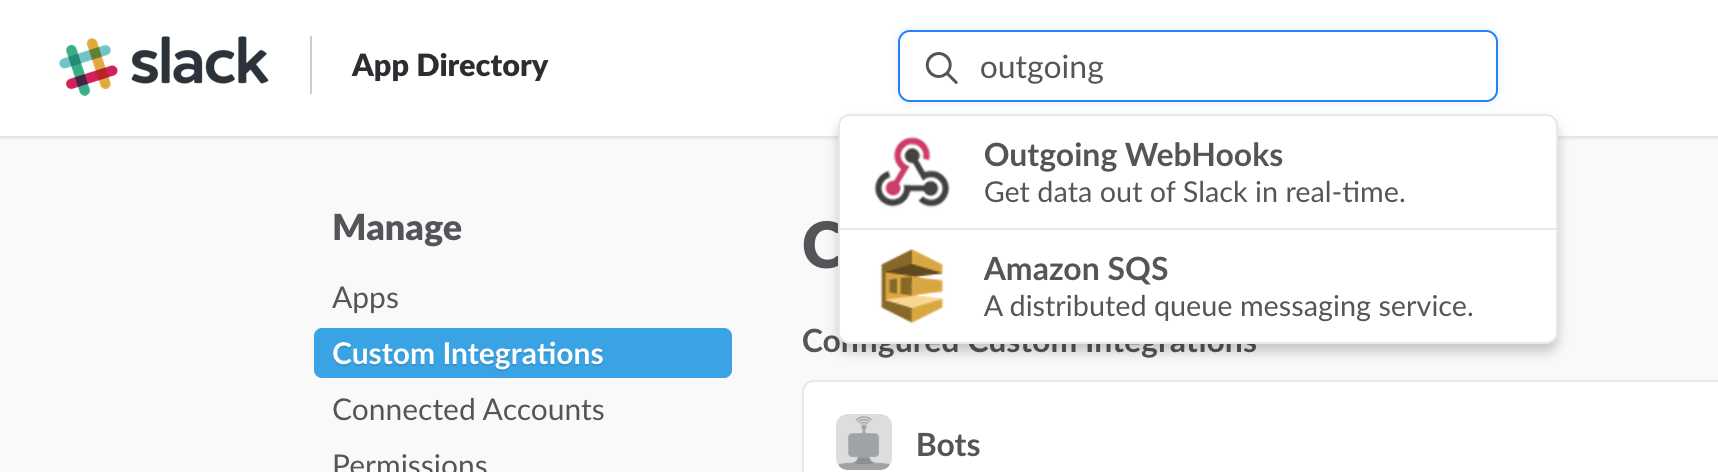
Slack Outgoing WebHooks
integrationメニューから Outgoing WebHooks を検索してください。
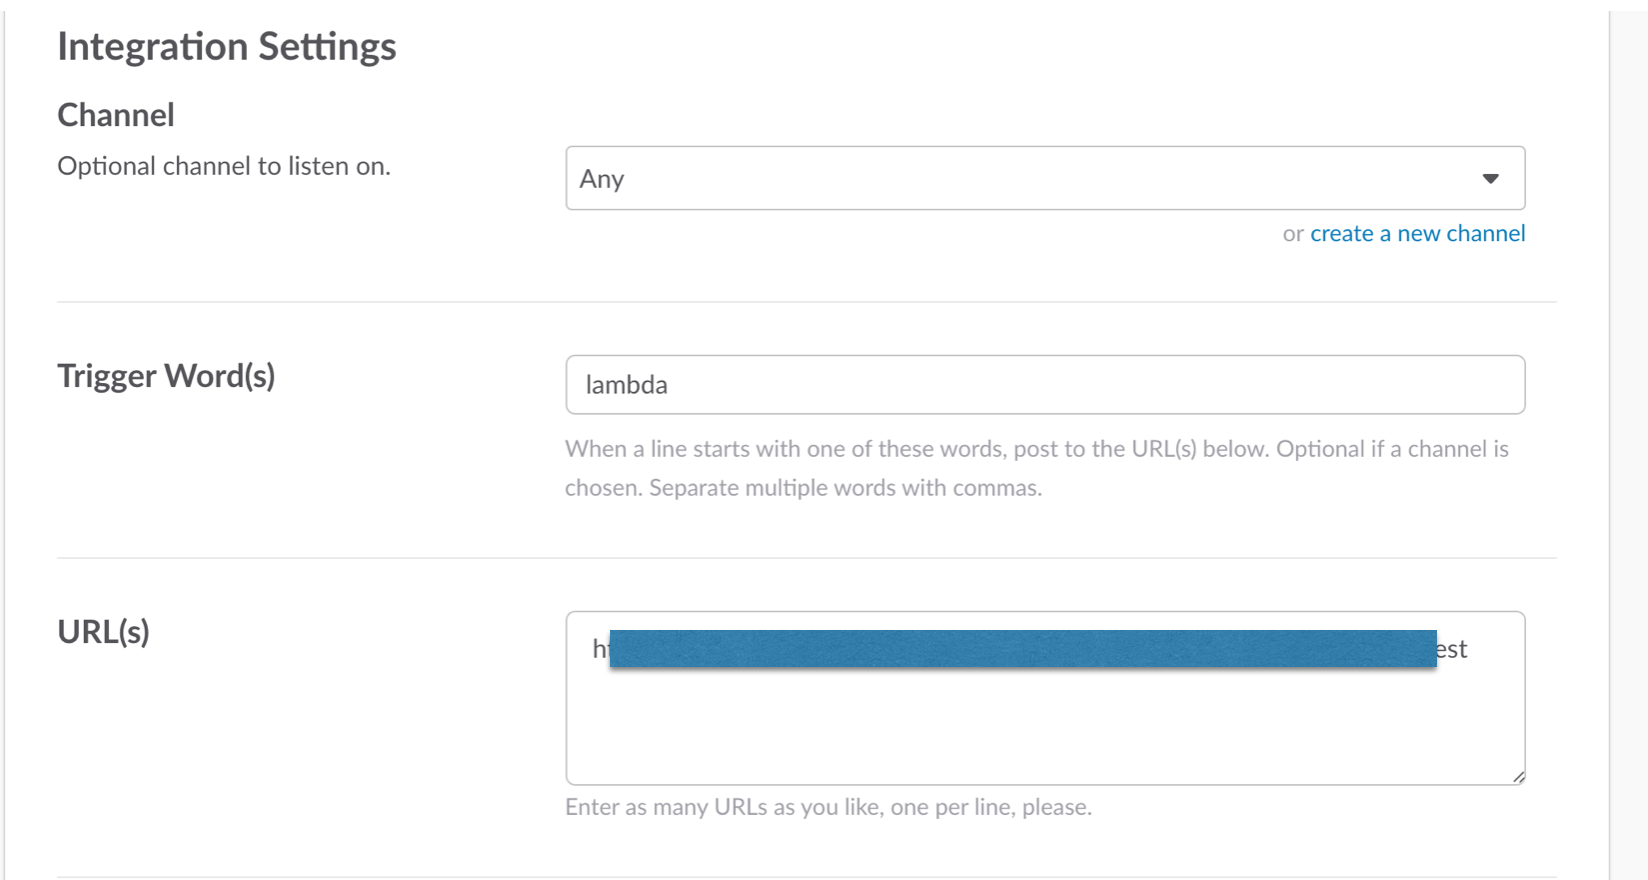
流れにしたがって設定していってください。
ここに先ほどAPI Gatewayで作成したURLを貼り付けるだけでOK
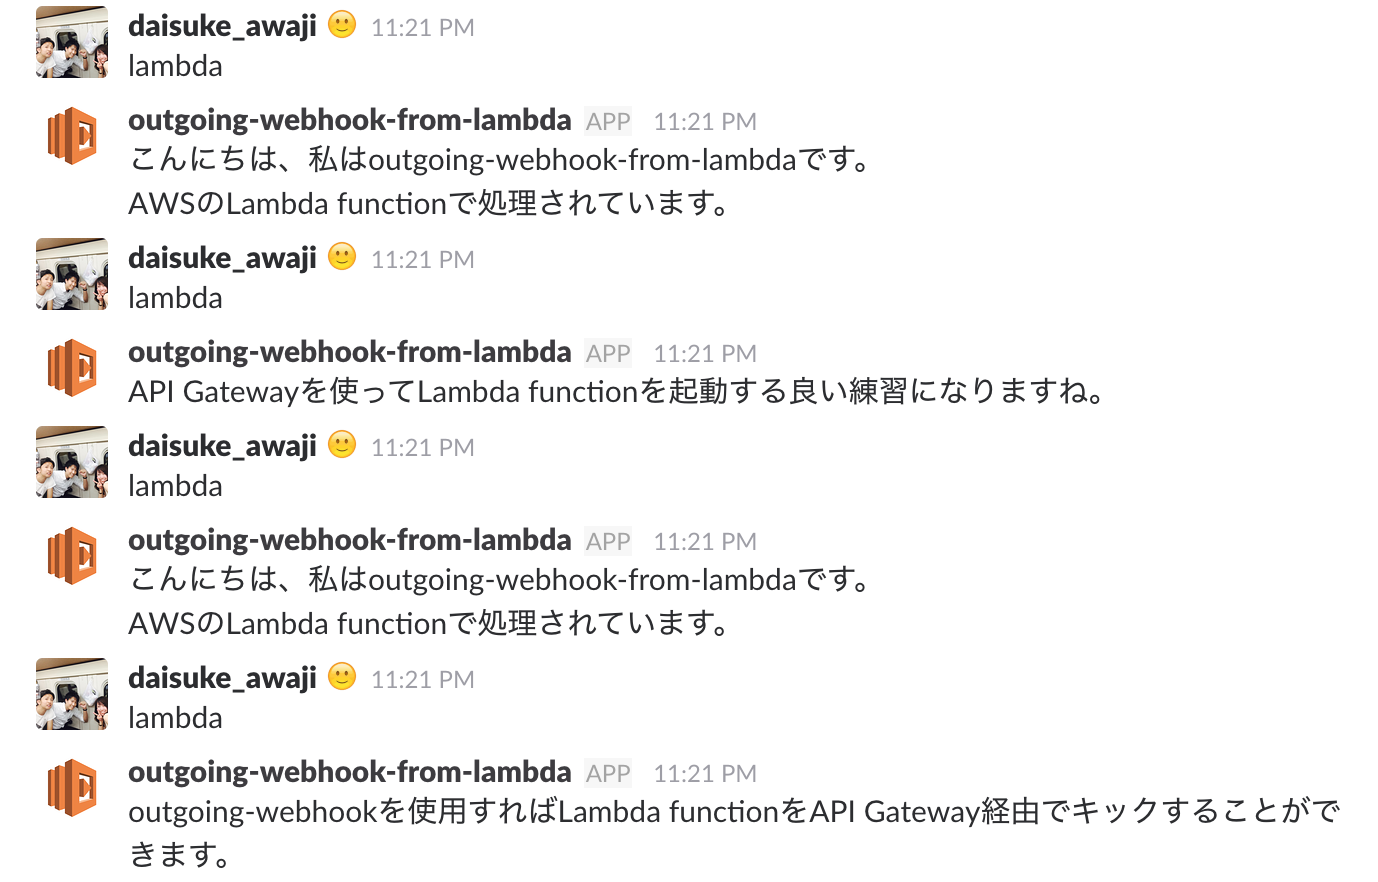
動かして見ましょう。
いい感じにできました。
次回はLambdaをDBに繋ぐ or Cognito の UserPool を使って認証を簡単に作成したりしてみようと思います。