Oracleのvirtualboxをインストールする。
vagrantをbrewでインストールする。
bash-3.2$ brew install caskroom/cask/vagrant
Updating Homebrew...
==> Auto-updated Homebrew!
Updated 2 taps (homebrew/core, homebrew/dupes).
==> New Formulae
abuse                        fairymax                     mgba                         rom-tutum
--------------------------------------------
途中略
--------------------------------------------
dynamodb-local         keybase                pangox-compat          qtplay                 unfs3

==> Tapping caskroom/cask
Cloning into '/usr/local/Homebrew/Library/Taps/caskroom/homebrew-cask'...
remote: Counting objects: 3663, done.
remote: Compressing objects: 100% (3646/3646), done.
remote: Total 3663 (delta 35), reused 328 (delta 13), pack-reused 0
Receiving objects: 100% (3663/3663), 1.22 MiB | 1.65 MiB/s, done.
Resolving deltas: 100% (35/35), done.
Checking connectivity... done.
Tapped 0 formulae (3,671 files, 3.8M)
==> brew cask install caskroom/cask/vagrant
==> Creating Caskroom at /usr/local/Caskroom
==> We'll set permissions properly so we won't need sudo in the future
==> Downloading https://releases.hashicorp.com/vagrant/1.9.1/vagrant_1.9.1.dmg
######################################################################## 100.0%
==> Verifying checksum for Cask vagrant
==> Running installer for vagrant; your password may be necessary.
==> Package installers may write to any location; options such as --appdir are ignored.
Password:
==> installer: Package name is Vagrant
==> installer: Installing at base path /
==> installer: The install was successful.
🍺  vagrant was successfully installed!
仮想マシン用にワークディレクトリを作成する
適当なワークディレクトリを作成し、そのディレクトリに移動する。
bash-3.2$ mkdir sgp_dev
bash-3.2$ cd sgp_dev/
vagrant init
vagrant init コマンドを実行する。
この時点でvagrantの環境を設定するVagrantfileが作成される。
bash-3.2$ vagrant init
A `Vagrantfile` has been placed in this directory. You are now
ready to `vagrant up` your first virtual environment! Please read
the comments in the Vagrantfile as well as documentation on
`vagrantup.com` for more information on using Vagrant.
bash-3.2$ ls
Vagrantfile
boxイメージ
HashiCorp社のホームページから欲しいboxファイルをダウンロードする。
https://atlas.hashicorp.com/boxes/search
bash-3.2$ vagrant box add "ubuntu/trusty64"
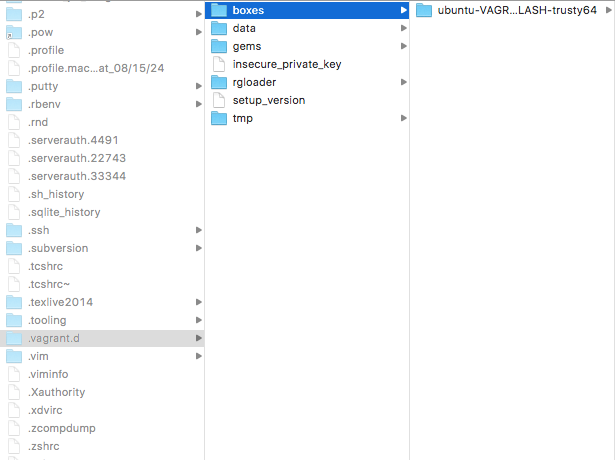
上記のコマンドで.vagrant.d/boxesディレクトリ配下に自動的にboxファイルが保存されるが、他者からboxファイルをもらう場合は自分で配置する必要がある。
以下、他者からboxファイルをもらう場合の手順
Ubuntuのイメージファイル(Boxファイル)を.vagrant.d/boxesディレクトリ配下に保存する。
下記のコマンドでvagrantで使用できるboxのリストを表示することができる。
bash-3.2$ vagrant box list
ubuntu/trusty64 (virtualbox, 20170215.0.0)
Vagrantfile
起動するboxイメージを設定する
# 仮想マシンを構築するベースのイメージファイル
config.vm.box = "ubuntu/trusty64"
# 仮想マシンのホスト名を定義
config.vm.hostname = "sgp_dev"
# 仮想マシンのIPアドレスを指定
config.vm.network :private_network, ip: "192.168.33.10"
# 共有ディレクリの設定 第一引数がホスト、第二引数が仮想マシンのディレクトリを指す
config.vm.synced_folder ".", "/home/vagrant/sync"
vagrant up
vagrant upコマンドで仮想環境を一発で構築する
bash-3.2$ vagrant up
Bringing machine 'default' up with 'virtualbox' provider...
==> default: Importing base box 'ubuntu/trusty64'...
==> default: Matching MAC address for NAT networking...
==> default: Checking if box 'ubuntu/trusty64' is up to date...
==> default: Setting the name of the VM: sgp_dev_default_1487396967098_69148
==> default: Clearing any previously set forwarded ports...
==> default: Clearing any previously set network interfaces...
==> default: Preparing network interfaces based on configuration...
    default: Adapter 1: nat
==> default: Forwarding ports...
    default: 22 (guest) => 2222 (host) (adapter 1)
==> default: Booting VM...
==> default: Waiting for machine to boot. This may take a few minutes...
    default: SSH address: 127.0.0.1:2222
    default: SSH username: vagrant
    default: SSH auth method: private key
    default:
    default: Vagrant insecure key detected. Vagrant will automatically replace
    default: this with a newly generated keypair for better security.
    default:
    default: Inserting generated public key within guest...
    default: Removing insecure key from the guest if it's present...
    default: Key inserted! Disconnecting and reconnecting using new SSH key...
==> default: Machine booted and ready!
==> default: Checking for guest additions in VM...
    default: The guest additions on this VM do not match the installed version of
    default: VirtualBox! In most cases this is fine, but in rare cases it can
    default: prevent things such as shared folders from working properly. If you see
    default: shared folder errors, please make sure the guest additions within the
    default: virtual machine match the version of VirtualBox you have installed on
    default: your host and reload your VM.
    default:
    default: Guest Additions Version: 4.3.36
    default: VirtualBox Version: 5.1
==> default: Mounting shared folders...
    default: /vagrant => /Users/daisuke/sgp_dev
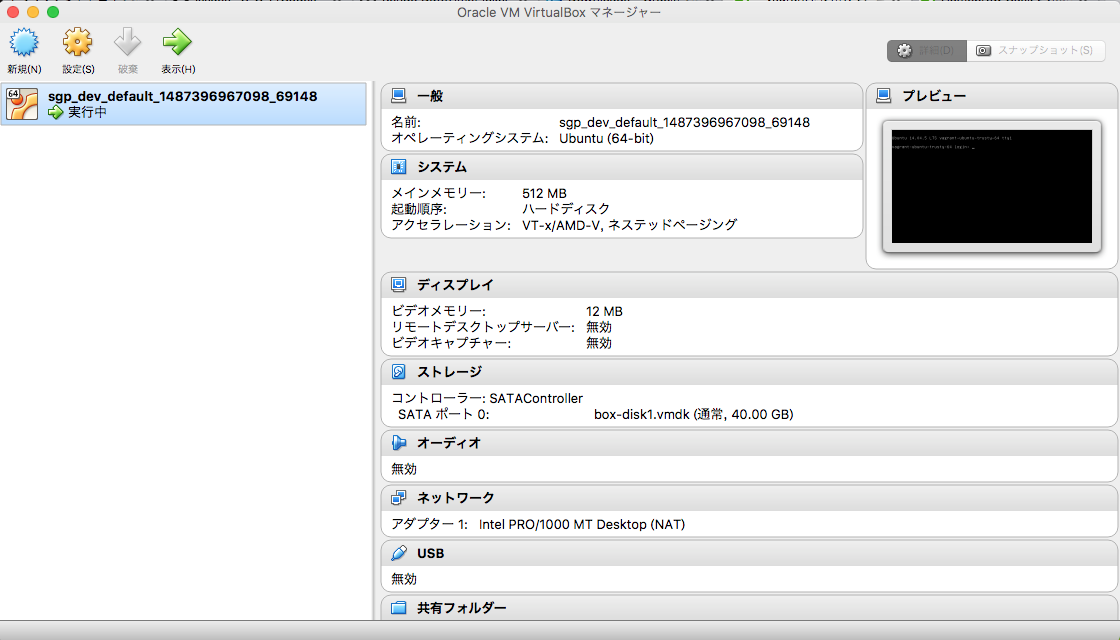
VirtualBoxを起動して確認してみる。
作成した仮想環境にvagrant sshで実際に接続してみる。
IPアドレスやsshの鍵を指定することなく接続することができる。
bash-3.2$ vagrant ssh
Welcome to Ubuntu 14.04.5 LTS (GNU/Linux 3.13.0-108-generic x86_64)

 * Documentation:  https://help.ubuntu.com/

  System information as of Sat Feb 18 05:49:49 UTC 2017

  System load:  0.77              Processes:           80
  Usage of /:   3.6% of 39.34GB   Users logged in:     0
  Memory usage: 25%               IP address for eth0: 10.0.2.15
  Swap usage:   0%

  Graph this data and manage this system at:
    https://landscape.canonical.com/

  Get cloud support with Ubuntu Advantage Cloud Guest:
    http://www.ubuntu.com/business/services/cloud

0 packages can be updated.
0 updates are security updates.

New release '16.04.2 LTS' available.
Run 'do-release-upgrade' to upgrade to it.


vagrant@vagrant-ubuntu-trusty-64:~$
ホストPCから仮想マシンを停止させるには以下を実行する。
bash-3.2$ vagrant halt
==> default: Attempting graceful shutdown of VM...

