概要
Raspberry pi 2 Model B (Raspbian)で aitendo RPiLCD035TP(WaveShare 3.5inch LCD) 設定覚書き
参考
参考にしました、ありがとうございます。
- このLCDについて←買う前に読むことをお薦めします
- FBTFTドライバ
- LCD設定手順
- ソフトウェアキーボード設定手順
LCD設定手順
- ほぼここの手順そのままの内容です。
SPI有効
SPI設定
$ sudo raspi-config
「8 Advanced Options」 → 「A6 SPI」 → 「SPI enable」SPIを有効にする
フレームバッファ変更
fb変更
$ sudo nano /usr/share/X11/xorg.conf.d/99-fbturbo.conf
「/dev/fb0」(HDMI) → 「/dev/fb1」(New LCD) へ変更する
Section "Device"
        Identifier      "Allwinner A10/A13 FBDEV"
        Driver          "fbturbo"
        Option          "fbdev" "/dev/fb1"
        Option          "SwapbuffersWait" "true"
EndSection
FBTFTドライバインストール
FBTFTドライバ
$ sudo REPO_URI=https://github.com/notro/rpi-firmware rpi-update
TouchScreen関連パッケージインストール
TouchScreenパッケージ
$ sudo apt-get install xinput evtest libts-bin
ドライバ読み込み設定
ドライバ設定
$ sudo nano /etc/modules
# for waveshare rpi lcd 3.5
flexfb  width=320  height=480  regwidth=16 init=-1,0xb0,0x0,-1,0x11,-2,250,-1,0x3A,0x55,-1,0xC2,0x44,-1,0xC5,0x00,0x00,0x00,0x00,-1,0xE0,0x0F,0x1F,0x1C,0x0C,0x0F,0x08,0x48,0x98,0x37,0x0A,0x13,0x04,0x11,0x0D,0x00,-1,0xE1,0x0F,0x32,0x2E,0x0B,0x0D,0x05,0x47,0x75,0x37,0x06,0x10,0x03,0x24,0x20,0x00,-1,0xE2,0x0F,0x32,0x2E,0x0B,0x0D,0x05,0x47,0x75,0x37,0x06,0x10,0x03,0x24,0x20,0x00,-1,0x36,0x28,-1,0x11,-1,0x29,-3
fbtft_device debug=3 rotate=90 name=flexfb speed=16000000 gpios=reset:25,dc:24
ads7846_device model=7846 cs=1 gpio_pendown=17 speed=2000000 keep_vref_on=1 swap_xy=0 pressure_max=255 x_plate_ohms=60 x_min=200 x_max=3900 y_min=200 y_max=3900
キャリブレーション設定
キャリブレーション設定
$ sudo rm /usr/share/X11/xorg.conf.d/99-calibration.conf
$ sudo nano /usr/share/X11/xorg.conf.d/99-calibration.conf
Section "InputClass"
    Identifier "calibration"
    MatchProduct "ADS7846 Touchscreen"
    Option "Calibration" "3873 272 236 3868"
    Option  "SwapAxes"      "1"
EndSection
GPUメモリ割り当て設定
GPUメモリ割り当て
$ sudo nano /boot/config.txt
gpu_mem=128
コンソール設定
コンソール設定
$ sudo nano /boot/cmdline.txt
fbcon=map:1 fbcon=font:ProFont6x11
自動ログイン設定
自動ログイン
$ sudo nano /etc/inittab
# 1:2345:respawn:/sbin/getty --noclear 38400 tty1
1:2345:respawn:/bin/login -f pi tty </dev/tty1 >/dev/tty1 2>&1
X自動起動設定
X自動起動設定
$ sudo nano /etc/rc.local
_IP=$(hostname -I) || true
if [ "$_IP" ]; then
  printf "My IP address is %s\n" "$_IP"
fi

su -l pi -c startx

exit 0
再起動
再起動
$ sudo reboot
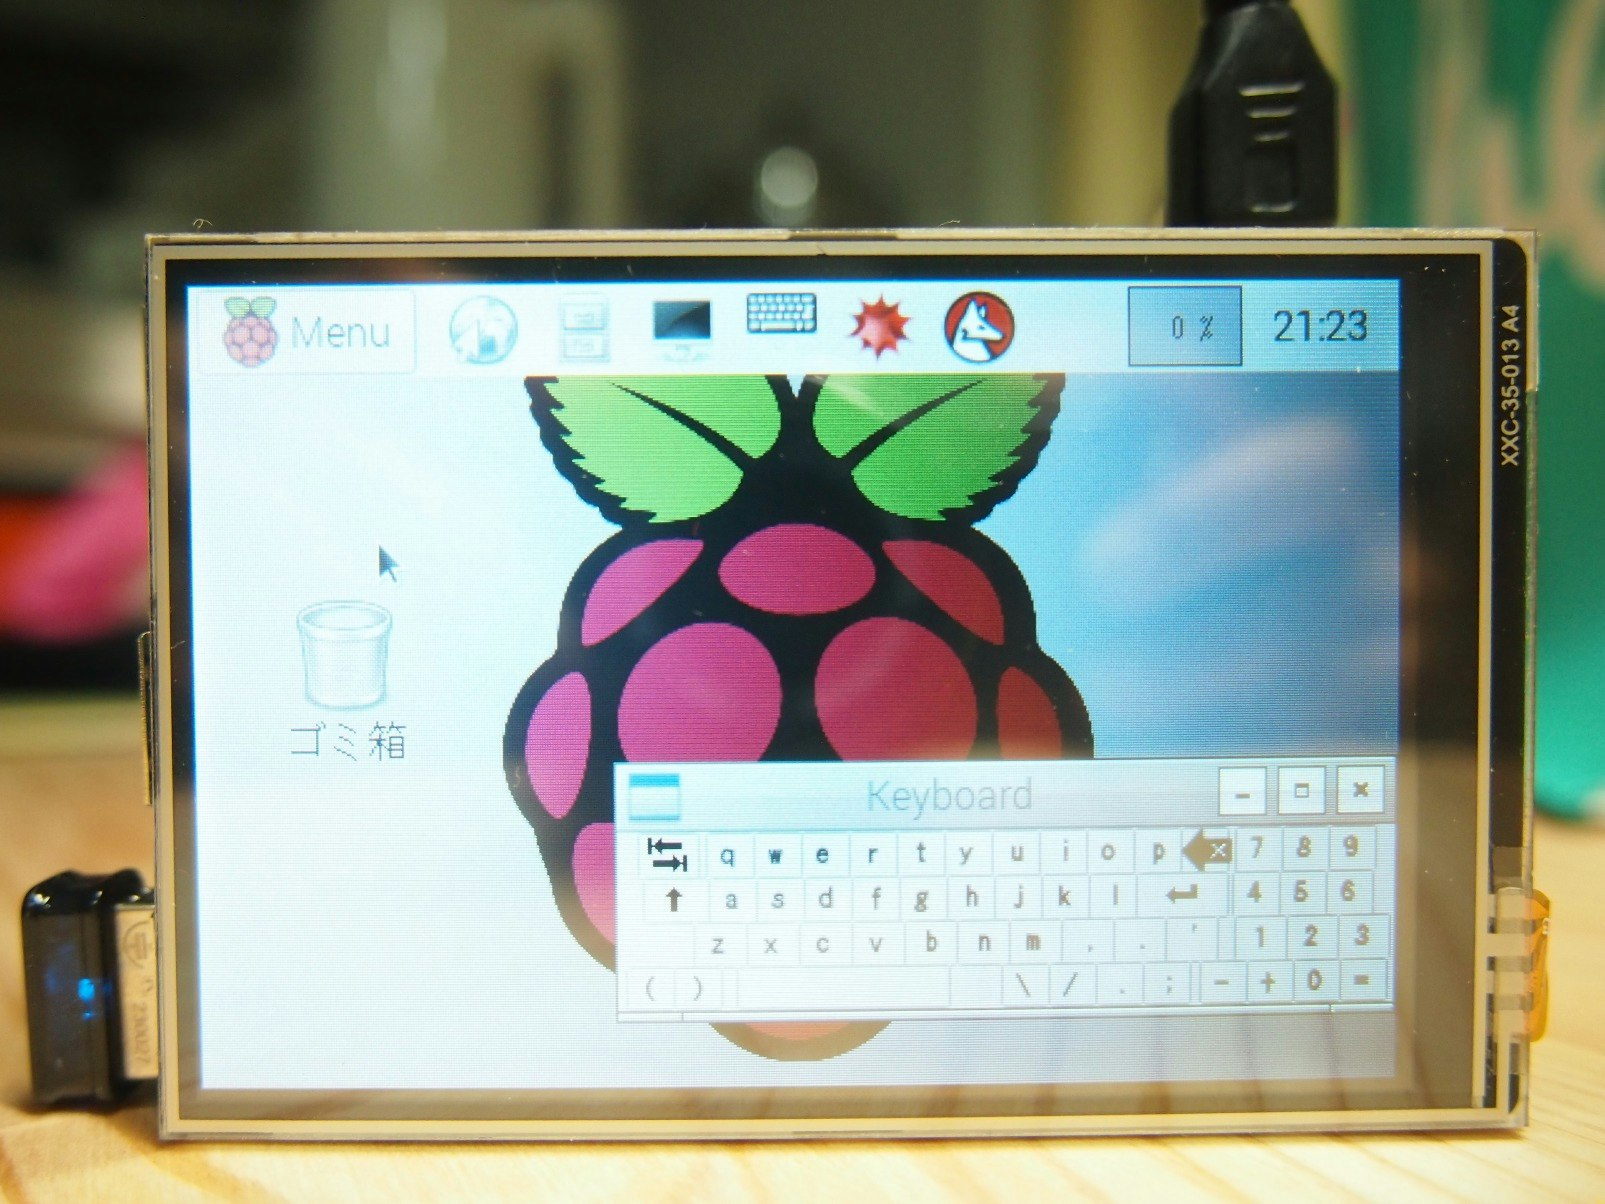
ソフトウェアキーボード設定手順
- ソフトウェアキーボード←そのままの手順ですが覚書として載せます
ソフトウェアキーボード関連パッケージインストール
パッケージインストール
$ sudo apt-get install libfakekey-dev libpng-dev libxft-dev autoconf libtool
matchbox-keyboardのmakeとインストール
matchbox-keyboard
$ git clone https://github.com/mwilliams03/matchbox-keyboard.git
$ cd matchbox-keyboard
$ ./autogen.sh
$ make
$ sudo make install
matchboxライブラリのインストール
matchboxライブラリ
$ sudo apt-get install libmatchbox1
シェルスクリプト作成
シェルスクリプト
$ sudo nano /usr/bin/toggle-matchbox-keyboard.sh
# !/bin/bash
# This script toggle the virtual keyboard

PID=`pidof matchbox-keyboard`
if [ ! -e $PID ]; then
    killall matchbox-keyboard
else
    matchbox-keyboard -s 65 extended&
fi
パーミッション設定
パーミッション設定
$ sudo chmod +x /usr/bin/toggle-matchbox-keyboard.sh
スタートボタン登録
スタートメニュー登録
$ sudo nano /usr/local/share/applications/toggle-matchbox-keyboard.desktop
[Desktop Entry]
Name=Toggle Matchbox Keyboard
Comment=Toggle Matchbox Keyboard
Exec=toggle-matchbox-keyboard.sh
Type=Application
Icon=matchbox-keyboard.png
Categories=Panel;Utility;MB
X-MB-INPUT-MECHANSIM=True
起動設定
起動設定の追記
$ cd
$ sudo nano ./.config/lxpanel/LXDE-pi/panels/panel
    Button {
      id=/usr/local/share/applications/toggle-matchbox-keyboard.desktop
    }
以上