PhoneGapの最新版 (Cordova 3.4.0)でiOSのプラグインを作る
$ cordova create hello jp.blogspot.sassylog HelloApp
$ cd hello
$ cordova platform add ios
でベースのアプリを作る。
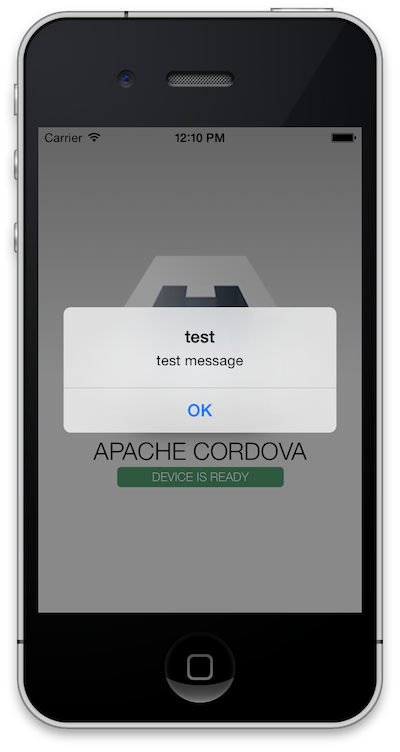
今回はHelloというUIAlertViewを表示するだけのPluginを作成してみます。
プラットフォームはiOSのみです。
pluginの置き場はplugins以下に置きます。
以下がディレクトリ構成
plugins
├── hello
│   ├── package.json
│   ├── plugin.xml
│   ├── src
│   │   └── ios
│   │       ├── CDVHello.h
│   │       └── CDVHello.m
│   └── www
│       └── hello.js
└── ios.json
ios.jsonにはhelloプラグインの情報を書き加えます。
deviceプラグインを入れて真似して書いてみました。
{"prepare_queue":{"installed":[],"uninstalled":[]},"config_munge":{"config.xml":{"/*":{"<feature name=\"Hello\"><param name=\"ios-package\" value=\"CDVHello\" /></feature>":1,"<feature name=\"Device\"><param name=\"ios-package\" value=\"CDVDevice\" /></feature>":1}},"framework":{"ImageIO.framework":{},"CoreLocation.framework":{},"CoreGraphics.framework":{},"AssetsLibrary.framework":{},"MobileCoreServices.framework":{}}},"installed_plugins":{"hello":{"PACKAGE_NAME":"jp.blogspot.sassylog"},"org.apache.cordova.device":{"PACKAGE_NAME":"jp.blogspot.sassylog"}},"dependent_plugins":{}}
あとpluginには package.jsonとplugin.xmlが必要です。
以下適当に書いてみます。
{
    "version": "1",
    "name": "hello",
    "cordova_name": "Hello",
    "description": "Cordova Hello Plugin",
    "keywords": [
        "cordova",
        "hello"
    ],
    "engines": []
}
<?xml version="1.0" encoding="UTF-8"?>

<plugin xmlns="http://apache.org/cordova/ns/plugins/1.0"
    xmlns:rim="http://www.blackberry.com/ns/widgets"
    xmlns:android="http://schemas.android.com/apk/res/android"
    id="hello"
    version="0.2.8">
    <name>Hello</name>

    <js-module src="www/hello.js" name="hello">
        <clobbers target="hello" />
    </js-module>

    <!-- ios -->
    <platform name="ios">
        <config-file target="config.xml" parent="/*">
            <feature name="Hello">
                <param name="ios-package" value="CDVHello"/>
            </feature>
        </config-file>

        <header-file src="src/ios/CDVHello.h" />
        <source-file src="src/ios/CDVHello.m" />
    </platform>
</plugin>
あとは、www/hello.js src/ios/CDVHello.h src/ios/CDVHello.m を作成して完成です。
var exec = require('cordova/exec');

function Hello() {
}

Hello.prototype.showMessage = function(successCallback, errorCallback) {
    exec(successCallback, errorCallback, "Hello", "showMessage", []);
};

module.exports = new Hello();
exec()でメソッドの登録が行えるようです。
ちなみに、引数は最後の配列で渡せます。(今回は空っぽ)
# import <Cordova/CDV.h>
# import <UIKit/UIKit.h>

@interface CDVHello : CDVPlugin
{}

- (void)showMessage:(CDVInvokedUrlCommand*)command;

@end
# import "CDVHello.h"

@implementation CDVHello

- (void)showMessage:(CDVInvokedUrlCommand*)command
{
    CDVPluginResult* pluginResult = [CDVPluginResult resultWithStatus:CDVCommandStatus_OK messageAsString:@"message"];

    UIAlertView *alert =
    [[UIAlertView alloc] initWithTitle:@"test" message:@"test message" delegate:self cancelButtonTitle:@"OK" otherButtonTitles:nil];
    [alert show];

    [self.commandDelegate  sendPluginResult:pluginResult callbackId:command.callbackId];
}

@end
ちなみに、引数はcommand.argumentsでNSArray形式で取得できます。
テスト用に、www/js/index.js で呼び出してみます。
    onDeviceReady: function() {
        app.receivedEvent('deviceready');
        window.hello.showMessage(function(){}, function(){});
    },
これでビルドして、問題ないなら完成です。
$ cordova build ios
CDVPluginResult
プラグインの結果はコールバックを通して渡しますが、
その結果はCDVPluginResultに入れます。
CDVPluinresultは
resultWithStatus:CDVCommandStatus_XXX messageAsXXX:XXX
というメソッドで格納します。
statusは OKならば、CDVCommandStatus_OK を返せばよいです。
エラーの場合、CDVCommandStatus_XXXX_EXCEPTIONといった各種Exceptionだったり、CDVCommandStatus_INVALID_ACTIONのようなエラーを返してあげればよいです。
messageAsXXX は返したい値の型にあわせてください。
文字列なら messageAsString
配列なら messageAsArray
です。
