Vagrant+DockerでLDAPサーバを構築
今回はVirtualBox + Vagrantを使って、仮想環境を構築。
さらに、仮想環境にDockerを入れLDAPサーバを動かす。
仮想環境を構築
今回はVirtualBox + Vagrantを使って、仮想環境を構築。
- まず、仮想環境を2個作るための設定を書き出し。
Vagrantfile
VAGRANTFILE_API_VERSION = "2"

Vagrant.configure(VAGRANTFILE_API_VERSION) do |config|

  config.vm.box = "ubuntu14.04"

  config.vm.define :server do |node|
    node.vm.box = "ubuntu14.04"
    node.vm.network :private_network, ip:"192.168.33.11"
  end

  config.vm.define :client do |node|
    node.vm.box = "ubuntu14.04"
    node.vm.network :private_network, ip:"192.168.33.12"
  end
end
- 仮想環境の起動
vagrant up
server側の操作
- server側のメモリ量が足りないので、VirtualBoxのGUIからメモリ量を4GBに増やした。
- dockerのInstall
sudo -s
apt-get update
wget -qO- https://get.docker.com/ | sh
- docker imageをDL
docker pull osixia/openldap
docker pull osixia/phpldapadmin
- docker containerを作成するスクリプトを書き出し
ldap.sh
SERVICE=ldap-service
HOST_NAME=ldap-host
PASSWORD=adminpass
DOMAIN=example.com

docker run \
    -p 389:389 \
    --name $SERVICE \
    --hostname $SERVICE \
    --env 'LDAP_ORGANISATION=Lab' \
    --env LDAP_DOMAIN=$DOMAIN \
    --env LDAP_ADMIN_PASSWORD=$PASSWORD \
    --detach \
    osixia/openldap

docker run \
    -p 443:443 \
    --name ${SERVICE}-admin \
    --hostname ${SERVICE}-admin \
    --link $SERVICE:$HOST_NAME \
    --env PHPLDAPADMIN_LDAP_HOSTS=$HOST_NAME \
    --detach \
    osixia/phpldapadmin
- docker を走らせる
bash ldap.sh
phpldapadminの操作
-
phpldapadminがブラウザ上から閲覧できるので、ブラウザで
https://192.168.33.11にアクセス -
loginする。
DN : cn=admin,dc=example,dc=com
PW : adminpass
- ouを作成する。
create new entry here から Generic: Organisational Unitを選択
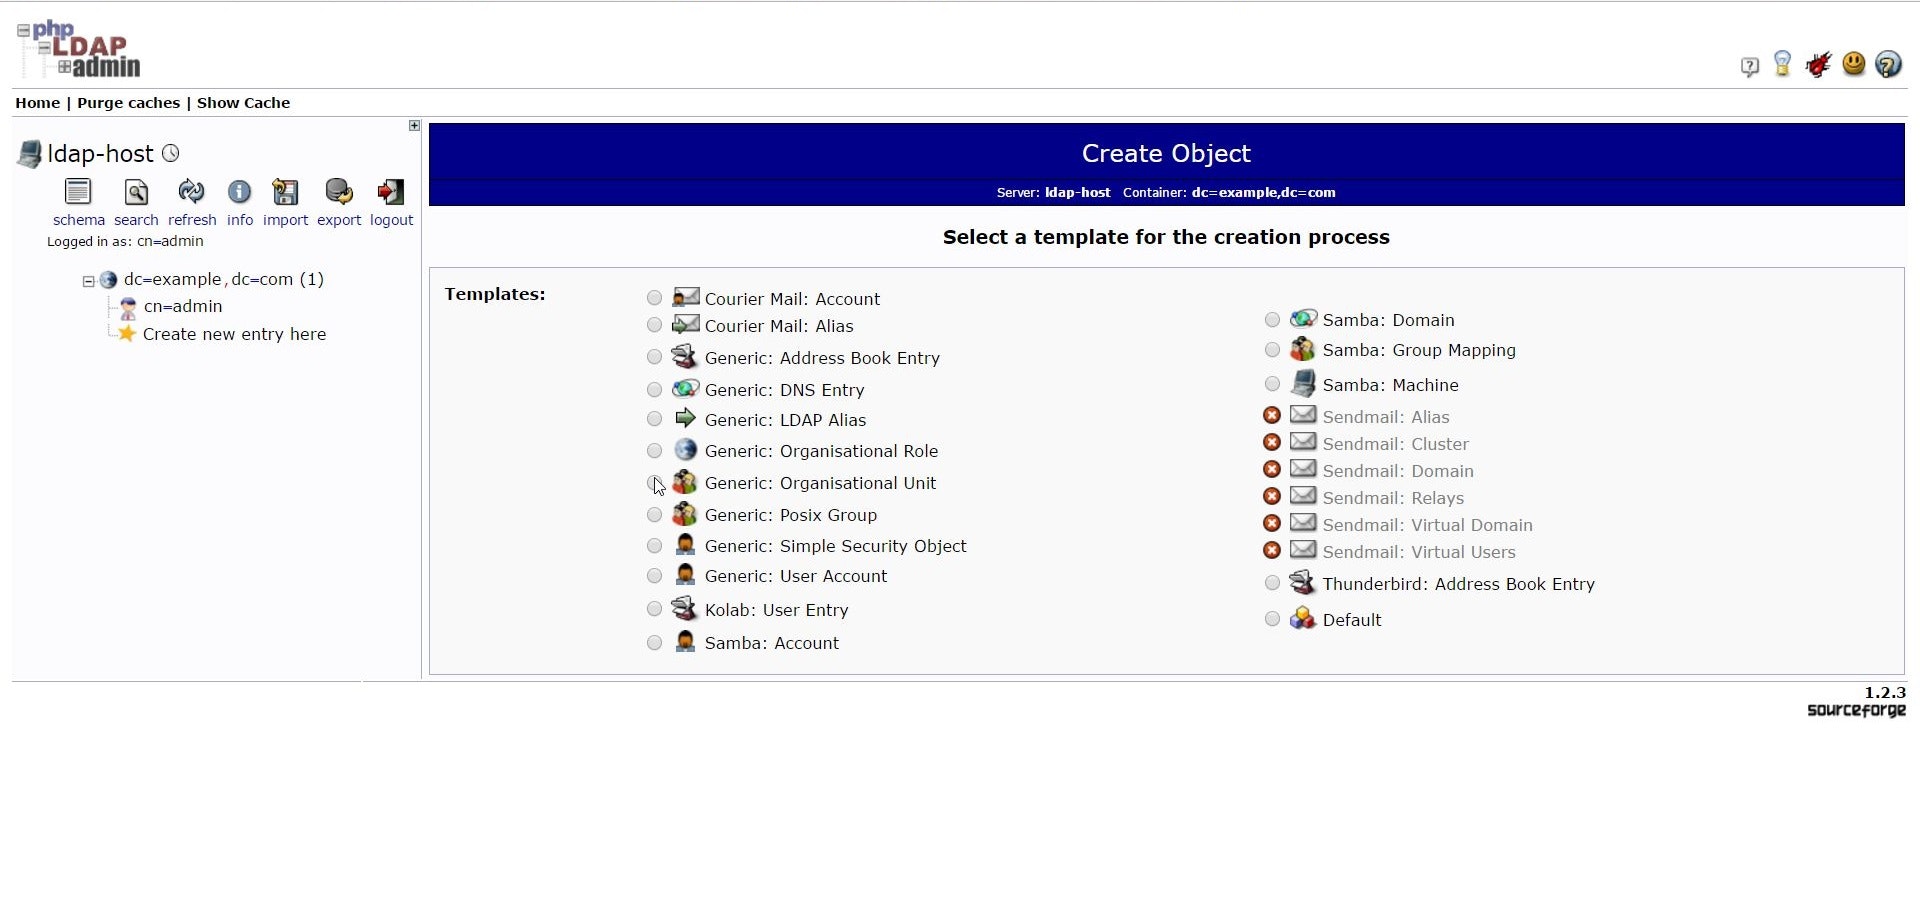
ou=people と ou=group を作成する。
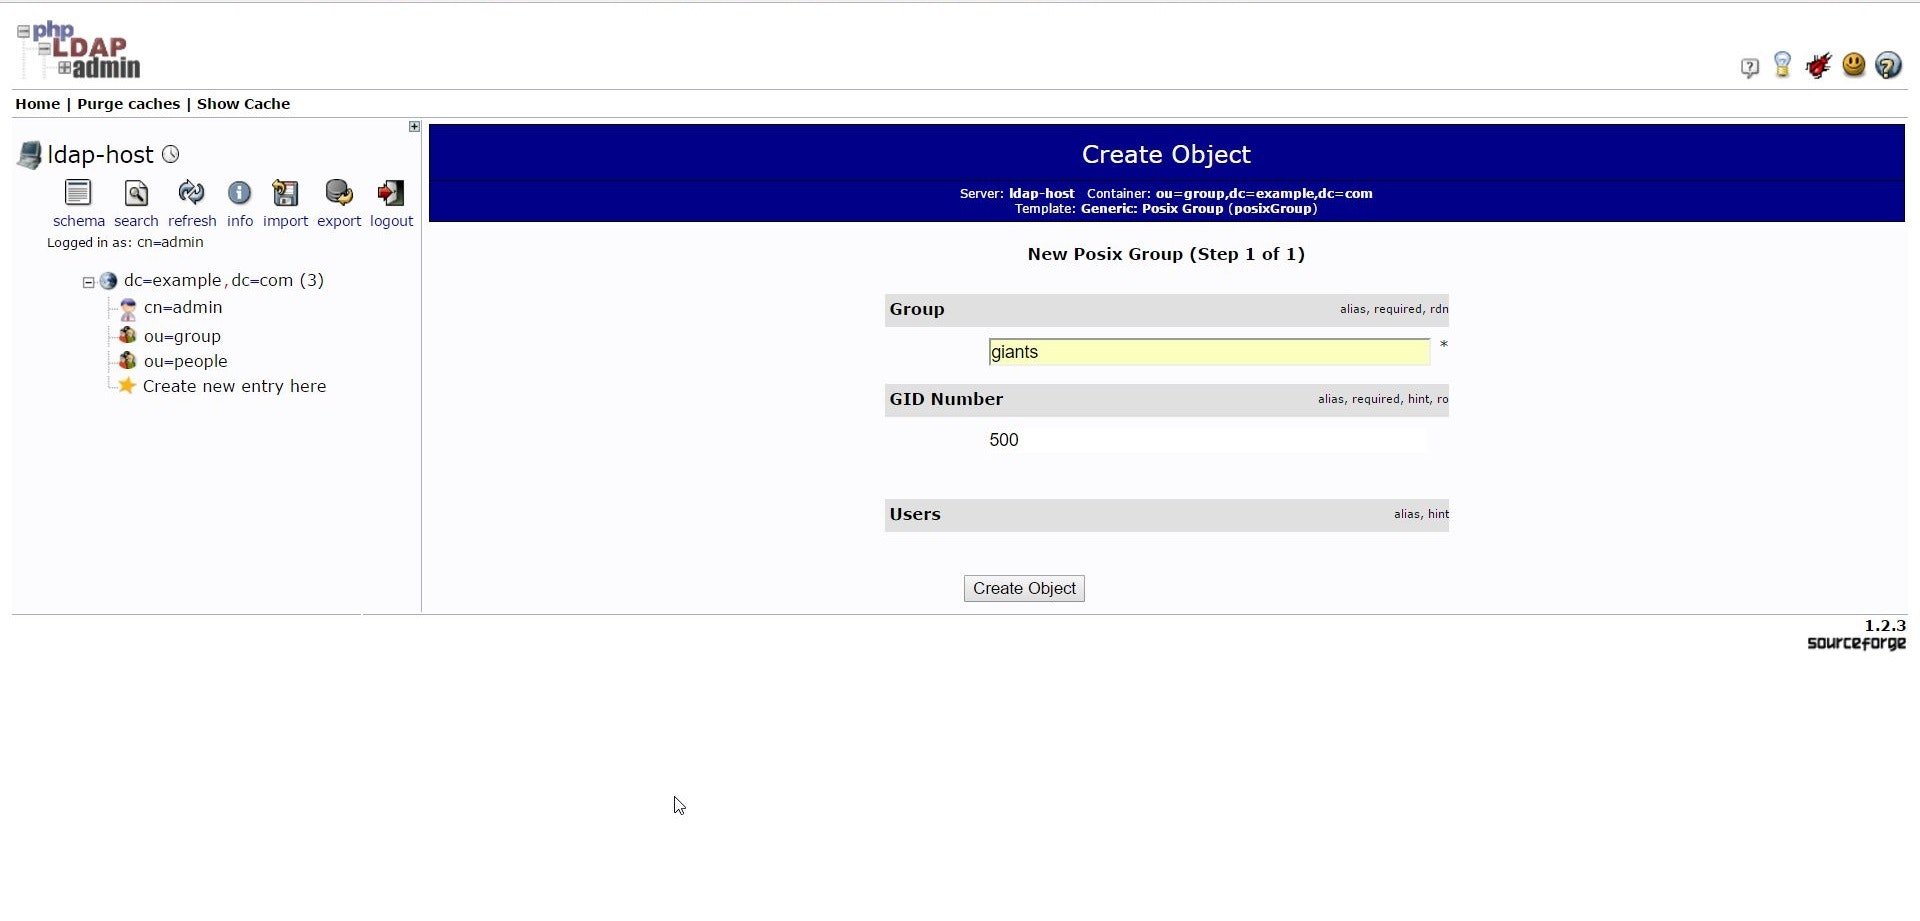
- groupの作成
ou=group の Create a child entry を選択し、Generic: Posix Group を選択
適当にこんな感じで作成。
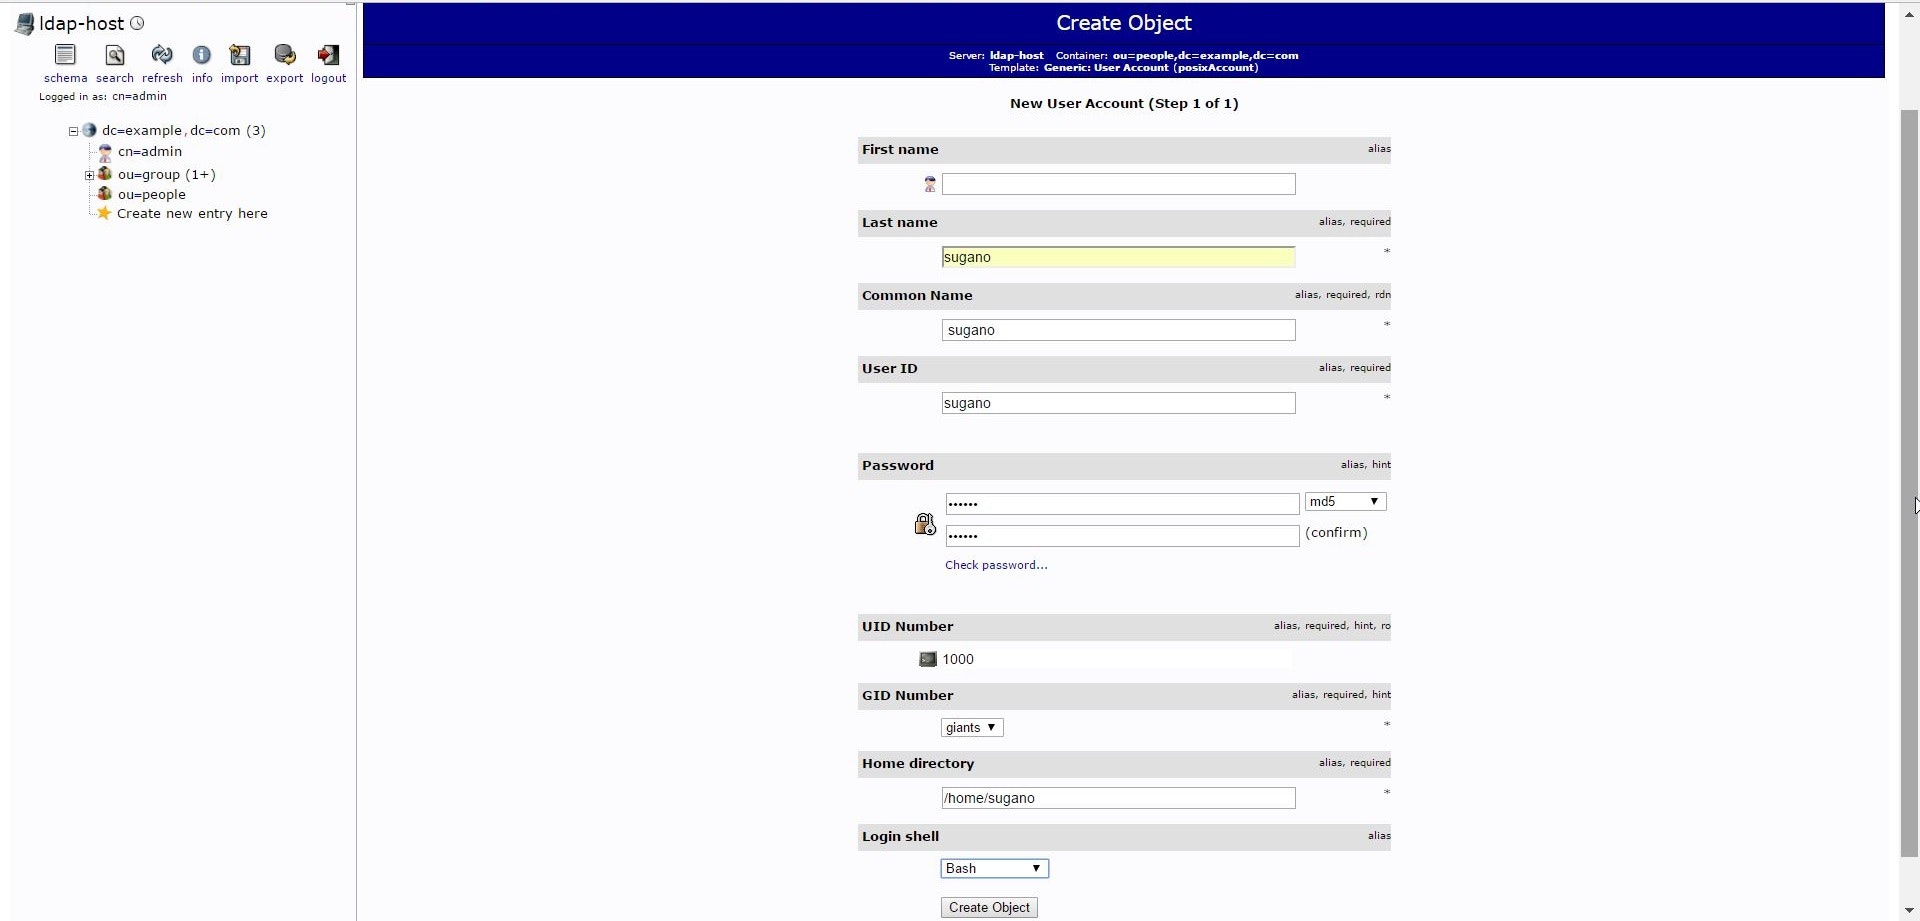
- userの作成
ou=people の Create a child entry を選択し、Generic: User Account を選択
適当にこんな感じで作成。
client側の操作
- まず必要なものをInstall
sudo -s
apt-get install libnss-ldap libpam-ldap ldap-utils
コマンド実行すると、紫のBGにいろいろ出てくるので色々設定していく。
- LDAP URI の指定
ここ間違えると動かないし、先頭はldapi:///ではないので要注意。
ldap://192.168.33.11:389/
-
base の指定
dc=example,dc=com -
LDAP Version の指定
3 -
次2つの選択はDefaultでOK
-
管理アカウントの設定
cn=admin,dc=example,dc=com -
管理アカウントのPW
adminpass -
暗号化
md5
これでLDAP自体の設定は終わり。UbuntuがLDAPを使うように設定していく。
- /etc/nsswitch.conf の編集
/etc/nsswitch.conf
# /etc/nsswitch.conf
#
# Example configuration of GNU Name Service Switch functionality.
# If you have the `glibc-doc-reference' and `info' packages installed, try:
# `info libc "Name Service Switch"' for information about this file.

passwd:         compat ldap
group:          compat ldap
shadow:         compat ldap

hosts:          files myhostname dns
networks:       files

protocols:      db files
services:       db files
ethers:         db files
rpc:            db files

netgroup:       ldap nis
- /etc/pam.d/common-password の編集
/etc/pam.d/common-password
#
# /etc/pam.d/common-password - password-related modules common to all services
#
# This file is included from other service-specific PAM config files,
# and should contain a list of modules that define the services to be
# used to change user passwords.  The default is pam_unix.

# Explanation of pam_unix options:
#
# The "sha512" option enables salted SHA512 passwords.  Without this option,
# the default is Unix crypt.  Prior releases used the option "md5".
#
# The "obscure" option replaces the old `OBSCURE_CHECKS_ENAB' option in
# login.defs.
#
# See the pam_unix manpage for other options.

# As of pam 1.0.1-6, this file is managed by pam-auth-update by default.
# To take advantage of this, it is recommended that you configure any
# local modules either before or after the default block, and use
# pam-auth-update to manage selection of other modules.  See
# pam-auth-update(8) for details.

# here are the per-package modules (the "Primary" block)
password        [success=2 default=ignore]      pam_unix.so obscure sha512
password        [success=1 user_unknown=ignore default=die]     pam_ldap.so try_first_pass
# here's the fallback if no module succeeds
password        requisite                       pam_deny.so
# prime the stack with a positive return value if there isn't one already;
# this avoids us returning an error just because nothing sets a success code
# since the modules above will each just jump around
password        required                        pam_permit.so
# and here are more per-package modules (the "Additional" block)
# end of pam-auth-update config
ここで再起動して、ユーザーが反映されているか見てみる。
getent passwd
これでさっき作成したユーザが反映されていれば終わり。