5回目になります!
今回は、最近勉強中のフォームについて。
formとは
ユーザーからの入力を受け付けてデータを送信するための仕組み。
formタグ
<form></form> :入力・送信フォームを作る時に使用する。inputなどのフォームに関する要素は基本的に、この要素内に含める。
action : (アクション)属性。送信先URLを指定する時に使う。
method : (メソッド)属性。 データの送信方法を指定する。
get : 送信内容がURLとして渡される(初期値)
post : 本文(本体)として送信される
<form action="送信先.php" method="get"></form>
inputタグ
データや表を表す。ユーザーから送られてきたものを受け付けるための部品。
<input type="#" name="〇〇〇">
type属性 : (タイプ)属性。要素のデータタイプを指定する。
text :1行のテキストボックス。
ユーザー名 :<input type="text" name="user_name" id="user_name">
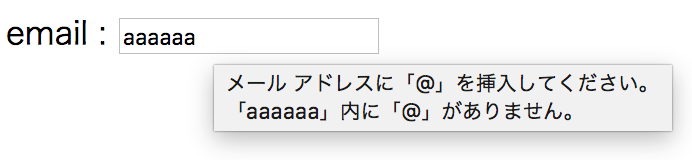
email : メールアドレスのデータを表すテキストボックス。
アドレスっぽくないものを入力するとエラーメッセージが表示される。email : <input type="email" name="email">
password : パスワードを入力するテキストボックス。入力したデータは●で隠されて表示される。
パスワード : <input type="password" name="pass">radio : 複数ある選択肢から1つを選択するラジオボタン。
<input type="radio" name="gender" value="man">男性
<input type="radio" name="gender" value="woman">女性
checkbox : 複数ある選択肢から複数選べるようにするチェックボックス。
iPhone :
<input type="checkbox" name="iphone" value="6" checked>iPhone6
<input type=”checkbox” name="iphone" value=”6s”>iPhone6s
<input type=”checkbox” name="iphone" value=”7”>iPhone7
submit : 送信ボタンを表示させる。
<input type="submit" value="送信">
required : 必須項目であることを指定してくれる。


buttonタグ
<button></button> : 画像を入れ込んだり、ボタンに書くテキストをよりリッチにできる。
type="submit" を指定すると送信ボタンとして機能する。
<button><img src="#" height="#" width="#"></button>
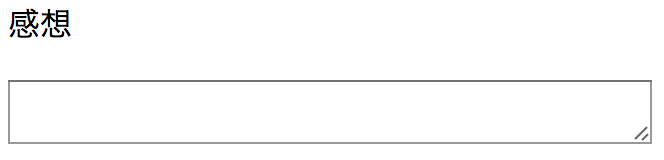
textareaタグ
<textarea></textarea> : ユーザーから送られてきたものを受け付けるための部品。inputと違い、複数行のテキストを入力できる。
<p>感想</p>
<textarea row="10" cols="60"></textarea>
cols : 幅を設定する
rows : 高さを設定する
その他テキスト関連属性
size : 入力欄の横幅を指定する。
<input type="text" name="user_name" id="user_name" size="10">maxlength : 最大入力文字数を指定。
<input type="text" name="user_name" id="user_name" maxlength="20">minlength : 最小入力文字数を指定。
<input type="text" name="user_name" id="user_name" minlength="10">placeholder : 入力欄に薄文字などで表示する文字を指定する。
<textarea row="10" cols="50" placeholder="ここに記入してください"></textarea>

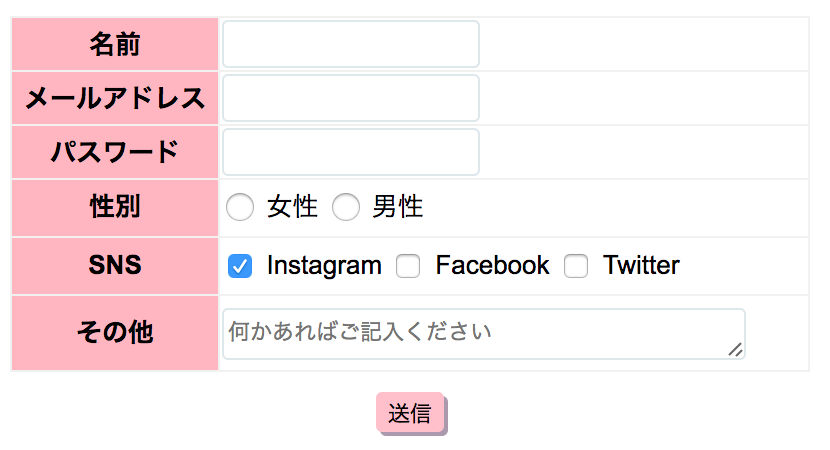
まとめ
<form action="#" method="#">
    <table>
        <tr>
            <th><label for="name">名前</label></th>
            <td><input type="text" name="name" maxlength="15" required id="name"></td>
        </tr>
        <tr>
            <th><label for="email">メールアドレス</label></th>
            <td><input type="email" name="email" required id="email"></td>
        </tr>
        <tr>
            <th><label for="pass">パスワード</label></th>
            <td><input type="password" name="password" minlength="6" required id="pass"></td>
        </tr>
        <tr>
            <th>性別</th>
            <td>
                <input type="radio" name="gender" required value="woman" id="woman">
                <label for="woman">女性</label>
                <input type="radio" name="gender" value="man" id="man">
                <label for="man">男性</label>
            </td>
        </tr>
        <tr>
            <th>SNS</th>
            <td>
                <input type="checkbox" name="sns" value="instagram" checked>Instagram
                <input type="checkbox" name=”sns” value=”facebook”>Facebook
                <input type="checkbox" name=”sns” value=”twitter”>Twitter
            </td>
        </tr>
        <tr>
            <th><label for="other">その他</label></th>
            <td><textarea row="30" cols="40" id="other" placeholder="何かあればご記入ください"></textarea></td>
        </tr>
    </table>
    <p><input type="submit" value="送信"></p>
</form>
今回は大まかなフォームについて書きました。
他にももっとたくさんの種類があるので、引き続き勉強してキレイなフォームが作れるようになります〜!