マシン環境と前提
マシン
- OSX Yoshemite
- ver 10.10.5
前提
- Railsの動作環境を作るぜ!
- mac上にvagrant環境が既にある
- vagrant上にCentOS6.7の環境が既にある
コマンドメモ
グループ一覧
cat /etc/group
ユーザ一覧
cut -d : -f1 /etc/passwd
- bashrcなどにalias登録しておくと楽
alias listusers='cut -d : -f1 /etc/passwd'
nginx
nginxユーザ追加
- グループ追加
sudo groupadd -g 600 nginx
- ユーザ追加
sudo useradd -g nginx -u 600 -s /sbin/nologin -d /home/nginx nginx
ソースコード取得
cd /usr/local/src/

sudo wget https://nginx.org/download/nginx-1.11.5.tar.gz

sudo tar zxvf nginx-1.11.5.tar.gz
-
/usr/local以下は自分でアプリケーションをインストールする場所として利用する -
/usr/local/srcはソースコードの置き場所
依存関係解消
yumで
sudo yum -y install pcre-devel #正規表現ライブラリ
ビルド
cd nginx-1.7.11

sudo ./configure --prefix=/usr/local/nginx --user=nginx --group=nginx --with-http_ssl_module

sudo make

sudo make install
起動ファイルの設置
https://www.nginx.com/resources/wiki/start/topics/examples/initscripts/
リンク先から環境に合うソースをコピーしてくる
sudo vi /etc/init.d/nginx
※コピーしてきたソースを貼る

sudo chmod 755 /etc/init.d/nginx
インストールした環境に合わせてパスの書き換えをする
sudo vi /etc/init.d/nginx


nginx="/usr/sbin/nginx"
↓
nginx="/usr/local/nginx/sbin/nginx"

NGINX_CONF_FILE="/etc/nginx/nginx.conf"
↓
NGINX_CONF_FILE="/usr/local/nginx/conf/nginx.conf"
nginxの起動確認
ログの設定
- 出力先ディレクトリ作成
sudo mkdir /var/log/nginx

sudo chmod 777 /var/log/nginx/

sudo chown nginx:nginx /var/log/nginx
- errorログの設定
sudo vi /usr/local/nginx/conf/nginx.conf


※errorログの出力を以下の設定に。
 デバッグのためにnotice以上を出力する。

error_log   /var/log/nginx/error.log notice;
ポートスキャンコマンドのインストール
sudo yum install nmap
nginx起動
- 起動
sudo /etc/init.d/nginx start
[vagrant@localhost nginx]$ sudo /etc/init.d/nginx start
nginx を起動中:                                            [  OK  ]
[vagrant@localhost nginx]$
- ポートの確認
- 80番が開いているのでOK
nmap localhost
[vagrant@localhost nginx]$ nmap localhost

Starting Nmap 5.51 ( http://nmap.org ) at 2016-12-18 05:20 UTC
Nmap scan report for localhost (127.0.0.1)
Host is up (0.00016s latency).
Other addresses for localhost (not scanned): 127.0.0.1
Not shown: 996 closed ports
PORT    STATE SERVICE
22/tcp  open  ssh
25/tcp  open  smtp
80/tcp  open  http
111/tcp open  rpcbind

Nmap done: 1 IP address (1 host up) scanned in 0.07 seconds
[vagrant@localhost nginx]$
- ログの確認
cat /var/log/nginx/error.log
[vagrant@localhost nginx]$ cat /var/log/nginx/error.log
2016/12/18 05:16:58 [notice] 9946#0: using the "epoll" event method
2016/12/18 05:16:58 [notice] 9946#0: nginx/1.11.5
2016/12/18 05:16:58 [notice] 9946#0: built by gcc 4.4.7 20120313 (Red Hat 4.4.7-16) (GCC)
2016/12/18 05:16:58 [notice] 9946#0: OS: Linux 2.6.32-573.el6.x86_64
2016/12/18 05:16:58 [notice] 9946#0: getrlimit(RLIMIT_NOFILE): 1024:4096
2016/12/18 05:16:58 [notice] 9947#0: start worker processes
2016/12/18 05:16:58 [notice] 9947#0: start worker process 9949
[vagrant@localhost nginx]$
nginxの停止
- 停止
sudo /etc/init.d/nginx stop
[vagrant@localhost nginx]$ sudo /etc/init.d/nginx stop
nginx を停止中:                                            [  OK  ]
[vagrant@localhost nginx]$
- ポートの確認
- 80番が閉じているのでOK
nmap localhost
[vagrant@localhost nginx]$ nmap localhost

Starting Nmap 5.51 ( http://nmap.org ) at 2016-12-18 05:27 UTC
Nmap scan report for localhost (127.0.0.1)
Host is up (0.0052s latency).
Other addresses for localhost (not scanned): 127.0.0.1
Not shown: 997 closed ports
PORT    STATE SERVICE
22/tcp  open  ssh
25/tcp  open  smtp
111/tcp open  rpcbind

Nmap done: 1 IP address (1 host up) scanned in 0.07 seconds
[vagrant@localhost nginx]$
環境変数にパスを通す
とりあえず追加した
sudo vi /etc/profile

最終行に以下を追記
# user add
export PATH=$PATH:/usr/local/nginx/sbin/
再ログインして確認
[vagrant@localhost nginx]$ nginx -v
nginx version: nginx/1.11.5
[vagrant@localhost nginx]$
Ruby
前提
- rbenvを利用しない
- ソースからインストール
- 本番環境を想定
- 本番環境のRubyのverを頻繁に変更することはない
- なのでRuby2.3.3をピンポイントでインストールする
- という設定で進める
CentOSにデフォルトでインストールされているrubyの削除
sudo yum erase ruby.x86_64
依存関係の解消
yumで一気にやっちまう
- yum.confの編集
- IPv6を無効にする
sudo vi /etc/yum.conf

以下を追記
# user add
ip_resolve=4
- yumのupdate&install
sudo yum -y install libyaml libyaml-devel zlib zlib-devel readline readline-devel openssl openssl-devel libxml2 libxml2-devel libxslt libxslt-devel libcurl-devel

sudo yum update libyaml libyaml-devel zlib zlib-devel readline readline-devel openssl openssl-devel libxml2 libxml2-devel libxslt libxslt-devel libcurl-devel
ダウンロード
cd /usr/local/src

sudo wget https://cache.ruby-lang.org/pub/ruby/2.3/ruby-2.3.3.tar.gz

sudo tar zxvf ruby-2.3.3.tar.gz
インストール
cd ruby-2.3.3

sudo ./configure --prefix=/usr/local/    # オプションは必要があれば何か付与すること

sudo make

sudo make install


一気にやりたいならこれでもいいかも(未検証)
sudo ./configure --prefix=/usr/local/ && make && make install
確認
ruby -v
[vagrant@localhost ruby-2.3.3]$ ruby -v
ruby 2.3.3p222 (2016-11-21 revision 56859) [x86_64-linux]
[vagrant@localhost ruby-2.3.3]$
which ruby
[vagrant@localhost ruby-2.3.3]$ which ruby
/usr/local/bin/ruby
[vagrant@localhost ruby-2.3.3]$
Rails
Gemでインストール
- gemコマンドをsudoできるようにする
-
/usr/local/bin/以下にあるコマンドは全てsudoできるようにしてしまう
-
sudo visudo


以下の記述を修正(nginxもついでに追加)
Defaults    secure_path = /sbin:/bin:/usr/sbin:/usr/bin
↓
Defaults    secure_path = /sbin:/bin:/usr/sbin:/usr/bin:/usr/local/bin/:/usr/local/nginx/sbin/
- インストール
sudo gem install rails -v 5.0.0.1
- 確認
rails -v
[vagrant@localhost ~]$ rails -v
Rails 5.0.0.1
[vagrant@localhost ~]$
Passenger
インストール
- gemでインストール
sudo gem install passenger -v '5.0.30'
- 確認
[vagrant@localhost ~]$ passenger -v
Phusion Passenger 5.0.30
[vagrant@localhost ~]$ which passenger
/usr/local/bin/passenger
[vagrant@localhost ~]$
nginxモジュールのインストール
sudo passenger-install-nginx-module
ところどころで聞かれる。
- 最初はpassengerサポートでnginxをコンパイルするか?なので
1 - 次は言語。
Rubyで - nginxのソースコードの場所を聞かれるので
/usr/local/src/nginx-1.11.5で - どこにインストールしたいか聞かれるので
/usr/local/nginxで - そのほかのconfigureオプションを聞かれるけどとりあえず無し。そのまま
Enter押下で - 最後に、やっちまうぞ!?的な感じになるのでおとなしく
yesで - 無事に終わったら
Enterで
[vagrant@localhost ~]$ sudo passenger-install-nginx-module
Welcome to the Phusion Passenger Nginx module installer, v5.0.30.

This installer will guide you through the entire installation process. It
shouldn't take more than 5 minutes in total.

Here's what you can expect from the installation process:

 1. This installer will compile and install Nginx with Passenger support.
 2. You'll learn how to configure Passenger in Nginx.
 3. You'll learn how to deploy a Ruby on Rails application.

Don't worry if anything goes wrong. This installer will advise you on how to
solve any problems.

Press Enter to continue, or Ctrl-C to abort.
1

--------------------------------------------

Which languages are you interested in?

Use <space> to select.
If the menu doesn't display correctly, press '!'

 ‣ ⬢  Ruby
   ⬢  Python
   ⬡  Node.js
   ⬡  Meteor

--------------------------------------------

Checking for required software...

 * Checking for C compiler...
      Found: yes
      Location: /usr/bin/cc

省略

--------------------------------------------

Automatically download and install Nginx?

Nginx doesn't support loadable modules such as some other web servers do,
so in order to install Nginx with Passenger support, it must be recompiled.

Do you want this installer to download, compile and install Nginx for you?

 1. Yes: download, compile and install Nginx for me. (recommended)
    The easiest way to get started. A stock Nginx 1.10.1 with Passenger
    support, but with no other additional third party modules, will be
    installed for you to a directory of your choice.

 2. No: I want to customize my Nginx installation. (for advanced users)
    Choose this if you want to compile Nginx with more third party modules
    besides Passenger, or if you need to pass additional options to Nginx's
    'configure' script. This installer will  1) ask you for the location of
    the Nginx source code,  2) run the 'configure' script according to your
    instructions, and  3) run 'make install'.

Whichever you choose, if you already have an existing Nginx configuration file,
then it will be preserved.

Enter your choice (1 or 2) or press Ctrl-C to abort: 2

--------------------------------------------

Where is your Nginx source code located?

Please specify the directory: /usr/local/src/nginx-1.11.5

--------------------------------------------

Where do you want to install Nginx to?

Please specify a prefix directory [/opt/nginx]: /usr/local/nginx

--------------------------------------------

Extra Nginx configure options

If you want to pass extra arguments to the Nginx 'configure' script, then
please specify them. If not, then specify nothing and press Enter.

If you specify nothing then the 'configure' script will be run as follows:

  sh ./configure --prefix='/usr/local/nginx' --with-http_ssl_module --with-http_gzip_static_module --with-http_stub_status_module --with-cc-opt=-Wno-error --with-ld-opt='' --add-module='/usr/local/lib/ruby/gems/2.3.0/gems/passenger-5.0.30/src/nginx_module'

Extra arguments to pass to configure script:

--------------------------------------------

Confirm configure flags

The Nginx configure script will be run as follows:

  sh ./configure --prefix='/usr/local/nginx' --with-http_ssl_module --with-http_gzip_static_module --with-http_stub_status_module --with-cc-opt=-Wno-error --with-ld-opt='' --add-module='/usr/local/lib/ruby/gems/2.3.0/gems/passenger-5.0.30/src/nginx_module'

Is this what you want? (yes/no) [default=yes]: yes

--------------------------------------------

Compiling Passenger support files...
# env NOEXEC_DISABLE=1 /usr/local/bin/ruby /usr/local/bin/rake nginx:clean nginx RELEASE=yes

省略

--------------------------------------------

Nginx with Passenger support was successfully installed.

Please edit your Nginx configuration file (probably /usr/local/nginx/conf/nginx.conf),
and set the passenger_root and passenger_ruby configuration options in the
'http' block, like this:

  http {
      ...
      passenger_root /usr/local/lib/ruby/gems/2.3.0/gems/passenger-5.0.30;
      passenger_ruby /usr/local/bin/ruby;
      ...
  }

After you (re)start Nginx, you are ready to deploy any number of web
applications on Nginx.

Press ENTER to continue.

--------------------------------------------

Deploying a web application

To learn how to deploy a web app on Passenger, please follow the deployment
guide:

  https://www.phusionpassenger.com/library/deploy/nginx/deploy/

Enjoy Phusion Passenger, a product of Phusion (www.phusion.nl) :-)
https://www.phusionpassenger.com

Phusion Passenger is a registered trademark of Hongli Lai & Ninh Bui.
[vagrant@localhost ~]$
- 確認
-
--add-moduleにpassengerのモジュールが追加されている
-
nginx -V
[vagrant@localhost ~]$ nginx -V
nginx version: nginx/1.11.5
built by gcc 4.4.7 20120313 (Red Hat 4.4.7-16) (GCC)
built with OpenSSL 1.0.1e-fips 11 Feb 2013
TLS SNI support enabled
configure arguments: --prefix=/usr/local/nginx --with-http_ssl_module --with-http_gzip_static_module --with-http_stub_status_module --with-cc-opt=-Wno-error --with-ld-opt= --add-module=/usr/local/lib/ruby/gems/2.3.0/gems/passenger-5.0.30/src/nginx_module
[vagrant@localhost ~]$
- 起動&停止確認
[vagrant@localhost ~]$ sudo /etc/init.d/nginx start
nginx を起動中:                                            [  OK  ]
[vagrant@localhost ~]$ nmap localhost

Starting Nmap 5.51 ( http://nmap.org ) at 2016-12-18 09:40 UTC
Nmap scan report for localhost (127.0.0.1)
Host is up (0.00017s latency).
Other addresses for localhost (not scanned): 127.0.0.1
Not shown: 996 closed ports
PORT    STATE SERVICE
22/tcp  open  ssh
25/tcp  open  smtp
80/tcp  open  http
111/tcp open  rpcbind

Nmap done: 1 IP address (1 host up) scanned in 0.09 seconds


[vagrant@localhost ~]$ sudo /etc/init.d/nginx stop
nginx を停止中:                                            [  OK  ]
[vagrant@localhost ~]$ nmap localhost

Starting Nmap 5.51 ( http://nmap.org ) at 2016-12-18 09:40 UTC
Nmap scan report for localhost (127.0.0.1)
Host is up (0.00031s latency).
Other addresses for localhost (not scanned): 127.0.0.1
Not shown: 997 closed ports
PORT    STATE SERVICE
22/tcp  open  ssh
25/tcp  open  smtp
111/tcp open  rpcbind

Nmap done: 1 IP address (1 host up) scanned in 0.06 seconds
[vagrant@localhost ~]$
ブラウザからアクセスしてrailsアプリを表示する
アプリの作成
cd /vagrant

rails new getwild
- Gemfileの編集
-
therubyracerのコメントアウトを外す - 外しておかないとrailsアプリを動かした時にエラーになる
-
cd getwild

vi Gemfile
-
bundle installを実行
[vagrant@localhost getwild]$ bundle install
Fetching gem metadata from https://rubygems.org/..........
Fetching version metadata from https://rubygems.org/..
Fetching dependency metadata from https://rubygems.org/.
Resolving dependencies...
Using rake 12.0.0
Using concurrent-ruby 1.0.3

省略

Using rails 5.0.0.1
Using sass-rails 5.0.6
Bundle complete! 16 Gemfile dependencies, 65 gems now installed.
Use `bundle show [gemname]` to see where a bundled gem is installed.
[vagrant@localhost getwild]$
nginx.confの編集
とりあえず以下の内容に編集。
/usr/local/nginx/conf/nginx.conf
#user  nobody;
worker_processes  1;

error_log   /var/log/nginx/error.log notice;
pid        /var/log/nginx/nginx.pid;


events {
    worker_connections  1024;
}


http {
    include       mime.types;
    default_type  application/octet-stream;

    sendfile        on;
    #tcp_nopush     on;

    #keepalive_timeout  0;
    keepalive_timeout  65;

    #gzip  on;

    passenger_root /usr/local/lib/ruby/gems/2.3.0/gems/passenger-5.0.30;
    passenger_ruby /usr/local/bin/ruby;

    server {
        listen       80;
        server_name  192.168.33.10;
        access_log   /var/log/nginx/192.168.33.10.access.log;
        error_log    /var/log/nginx/192.168.33.10.error.log;

        location / {
            root                  /vagrant/getwild/public;
            passenger_base_uri    /;
            passenger_enabled     on;
            rails_spawn_method    smart;
            rails_env             development;
            index                 index.html index.htm;
        }

        #error_page  404              /404.html;

        # redirect server error pages to the static page /50x.html
        #
        error_page   500 502 503 504  /50x.html;
        location = /50x.html {
            root   html;
        }

    }


    # another virtual host using mix of IP-, name-, and port-based configuration
    #
    #server {
    #    listen       8000;
    #    listen       somename:8080;
    #    server_name  somename  alias  another.alias;

    #    location / {
    #        root   html;
    #        index  index.html index.htm;
    #    }
    #}


    # HTTPS server
    #
    #server {
    #    listen       443 ssl;
    #    server_name  localhost;

    #    ssl_certificate      cert.pem;
    #    ssl_certificate_key  cert.key;

    #    ssl_session_cache    shared:SSL:1m;
    #    ssl_session_timeout  5m;

    #    ssl_ciphers  HIGH:!aNULL:!MD5;
    #    ssl_prefer_server_ciphers  on;

    #    location / {
    #        root   html;
    #        index  index.html index.htm;
    #    }
    #}

}
iptablesの編集
80番ポートにアクセスできるようにする
- 確認
sudo /sbin/iptables -L --line-numbers
[vagrant@localhost ~]$ sudo /sbin/iptables -L --line-numbers
Chain INPUT (policy ACCEPT)
num  target     prot opt source               destination
1    ACCEPT     all  --  anywhere             anywhere            state RELATED,ESTABLISHED
2    ACCEPT     icmp --  anywhere             anywhere
3    ACCEPT     all  --  anywhere             anywhere
4    ACCEPT     tcp  --  anywhere             anywhere            state NEW tcp dpt:ssh
5    REJECT     all  --  anywhere             anywhere            reject-with icmp-host-prohibited

Chain FORWARD (policy ACCEPT)
num  target     prot opt source               destination
1    REJECT     all  --  anywhere             anywhere            reject-with icmp-host-prohibited

Chain OUTPUT (policy ACCEPT)
num  target     prot opt source               destination
[vagrant@localhost ~]$
- 80番を開ける
sudo /sbin/iptables -I INPUT 5 -p tcp -m tcp --dport 80 -j ACCEPT
- 保存
sudo service iptables save
[vagrant@localhost ~]$ sudo service iptables save
iptables: Saving firewall rules to /etc/sysconfig/iptables:[  OK  ]
[vagrant@localhost ~]$
- 再確認
[vagrant@localhost ~]$ sudo /sbin/iptables -L --line-numbers
Chain INPUT (policy ACCEPT)
num  target     prot opt source               destination
1    ACCEPT     all  --  anywhere             anywhere            state RELATED,ESTABLISHED
2    ACCEPT     icmp --  anywhere             anywhere
3    ACCEPT     all  --  anywhere             anywhere
4    ACCEPT     tcp  --  anywhere             anywhere            state NEW tcp dpt:ssh
5    ACCEPT     tcp  --  anywhere             anywhere            tcp dpt:http
6    REJECT     all  --  anywhere             anywhere            reject-with icmp-host-prohibited

Chain FORWARD (policy ACCEPT)
num  target     prot opt source               destination
1    REJECT     all  --  anywhere             anywhere            reject-with icmp-host-prohibited

Chain OUTPUT (policy ACCEPT)
num  target     prot opt source               destination
[vagrant@localhost ~]$
ブラウザからアクセスする
自分の環境の場合以下にアクセスすることでvagrant上のアプリにつながる。
http://192.168.33.10/
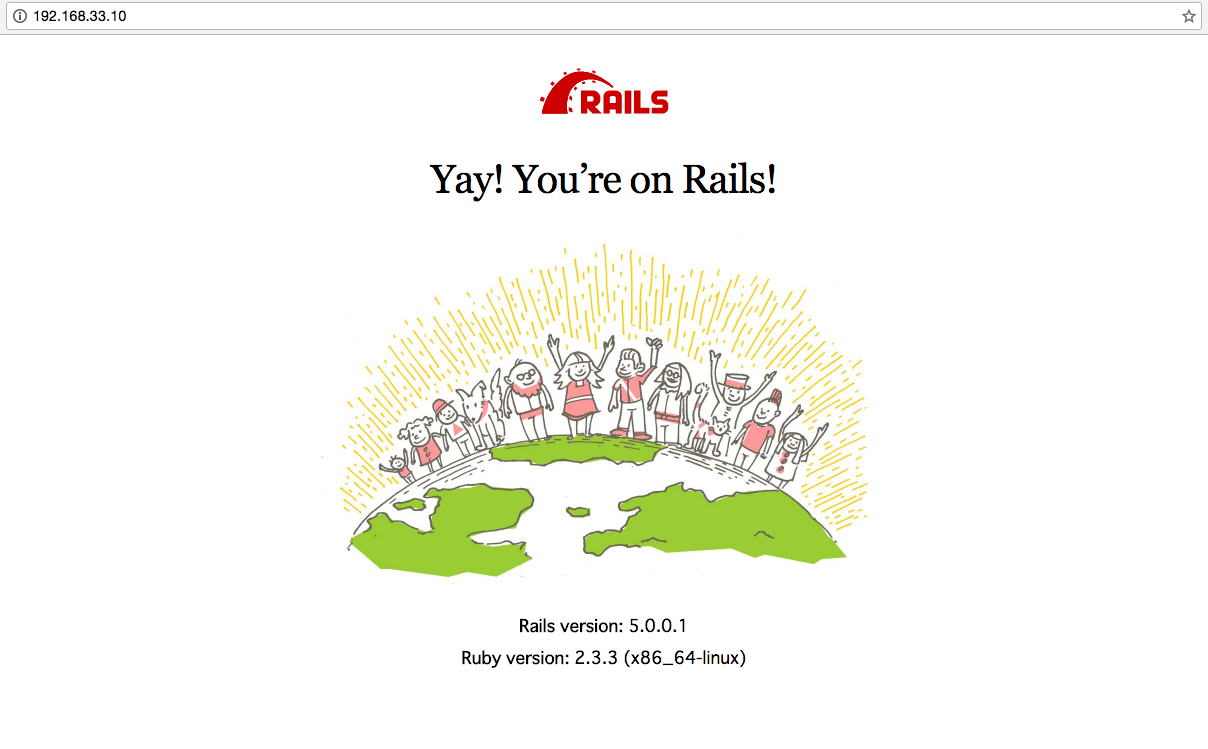
railsアプリを動作させる環境が出来上がりました。