概要
C++ のすごいライブラリ dlib のデモ webcam_face_pose_ex.cpp を参考に、Xcode で作った既存のプロジェクトに dlib を組み込んで顔認識を行います。
背景
OpenCV の CascadeClassifier を使った場合は顔のパーツの位置を認識することはできますが、顔の輪郭や眉の位置などの特徴点を取ることができません。
dlib の get_frontal_face_detector を使うことによってかなり詳細なパーツの特徴点を取得することができます。
環境
- OSX El Capitan (10.11.2)
- Xcode 7.2
- MacBook Air (13-inch, Mid 2013)
準備
OpenCV
OpenCV をインストールします。
brew tap homebrew/science
brew install opencv
/usr/local/Cellar/opencv/2.4.12/lib から必要なライブラリのファイルを Link Binary With Libraries に追加します。
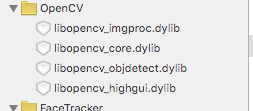
必要なライブラリ
プロジェクトの設定
OpenCVのヘッダファイルを Header Search Paths に追加します。

追記 (2016/3/1)
X11 は追加しなくて大丈夫です
dlib
dlib はソースコードをまるごとプロジェクトのディレクトリにコピーして、 dlib/all/source.cpp だけプロジェクトに追加します。
Header Search Paths に dlib のディレクトリを追加したり、source.cpp をプロジェクトに追加しなかったりすると "_USER_ERROR__missing_dlib_all_source_cpp_file__OR__inconsistent_use_of_DEBUG_or_ENABLE_ASSERTS_preprocessor_directives_" というエラーが出ます。
私はここで詰まってしばらくわからなかったので、Qiita で共有することで解決の助けになれば幸いです。
追記 (2016/3/1)
dlib を X11 なしで使うため、フラグ DLIB_NO_GUI_SUPPORT を設定します。
下記のように source.cpp の先頭に書き込むとか、
# define DLIB_NO_GUI_SUPPORT
...
コード
//
//  main.cpp
//  FaceTracker
//
//  Created by ryohey on 2015/12/11.
//

# include <iostream>
# include <cv.h>
# include <highgui.h>
# include <ctype.h>

# include "dlib/opencv.h"
# include "dlib/image_processing/frontal_face_detector.h"
# include "dlib/image_processing.h"

void drawObjects(cv::Mat& image, std::vector<cv::Rect>& objects, cv::Scalar color, CvPoint offset = cvPoint(0, 0)) {

    for (auto r : objects) {
        cv::rectangle(image,
                      cvPoint(r.x + offset.x,           r.y + offset.y),
                      cvPoint(r.x + offset.x + r.width, r.y + offset.y + r.height),
                      color);
    }
}

int main(int argc, char **argv) {
    std::string path(argv[0]);
    const std::string RESOURCE_DIR = path.substr(0, path.find_last_of("\\/") + 1);
    const std::string FACE_LANDMARK_MODEL = "shape_predictor_68_face_landmarks.dat";

    dlib::frontal_face_detector detector = dlib::get_frontal_face_detector();
    dlib::shape_predictor pose_model;
    dlib::deserialize(RESOURCE_DIR + FACE_LANDMARK_MODEL) >> pose_model;

    const double w = 720, h = 480;

    cv::VideoCapture capture(0);
    capture.set(CV_CAP_PROP_FRAME_WIDTH, w);
    capture.set(CV_CAP_PROP_FRAME_HEIGHT, h);

    cvNamedWindow("Capture", CV_WINDOW_AUTOSIZE);

    while (1)
    {
        cv::Mat frame;
        capture.read(frame);

        // dlib
        {
            dlib::cv_image<dlib::bgr_pixel> cimg(frame);

            // Detect faces
            std::vector<dlib::rectangle> faces = detector(cimg);

            // Find the pose of each face.
            std::vector<dlib::full_object_detection> shapes;

            for (auto face: faces) {
                shapes.push_back(pose_model(cimg, face));
            }

            std::vector<cv::Rect> objects;

            // 点のサイズ
            const int s = 2;

            for (auto shape: shapes) {
                auto rect = shape.get_rect();
                objects.push_back((cv::Rect){
                    (int)rect.left(), (int)rect.top(),
                    (int)rect.width(), (int)rect.height()
                });

                for (auto i = 0; i < shape.num_parts(); i++) {
                    auto part = shape.part(i);

                    objects.push_back((cv::Rect){
                        (int)part.x(), (int)part.y(),
                        s, s
                    });
                }
            }

            if (objects.size() > 0) {
                drawObjects(frame, objects, cv::Scalar(255, 255, 0));
            }
        }

        IplImage frame_ = frame;
        cvShowImage("Capture", &frame_);

        auto c = cvWaitKey(2);
        if (c == '\x1b') {
            break;
        }
    }

    cvDestroyWindow("Capture");

    return 0;
}
結果
Debug ビルドだとかなり遅かったので Release ビルドにしたらすごい速くなりました。Macbook Air ですが解像度 720x480 でスムーズに動きました。
最小の認識サイズがあるのか、320x240 の時は顔をカメラに近づけないと認識しませんでしたが、720x480 の場合だと後ろの方の人もちゃんと認識されました。
横顔は多少弱いようですが、OpenCV の Haar-Like 特徴を使った場合よりもちゃんと追従し、パーツもかなり詳細に取得できています。