はじめに
初めまして。@rueyjyeです。
外国人ですので、日本語は多少おかしいと思いますが、よろしくお願いいたします。
今回は練習でnginx、unicorn、sinatraを使って、APIサーバーを作ってみました。
APIはOpen API(Swagger)という、API定義の仕様を満たされるAPIを作ってみました。
Swagger Editorを使って、APIを定義した後sinatra用のコードを自動生成して実装しました。
nginx + unicorn + sinatraでサーバー起動する
・sinatraの準備
require "rubygems"
require "sinatra"

require File.expand_path '../my_app.rb', __FILE__

run MyApp
require "rubygems"
require "sinatra/base"

class MyApp < Sinatra::Base

  get '/' do
    'Hello, nginx and unicorn!'
  end

end
・unicornの準備
unicorn用のフォルダを作る
mkdir tmp
mkdir tmp/sockets
mkdir tmp/pids
mkdir log
今のディレクトリ
/usr/local/app
├── config.ru
├── my_app.rb
├── log
├── tmp
│   ├── pids
│   └── sockets
└── unicorn.rb
unicorn.rbを作成
# set path to app that will be used to configure unicorn,
# note the trailing slash in this example
@dir = "/usr/local/app/"

worker_processes 2
working_directory @dir

timeout 30

# Specify path to socket unicorn listens to,
# we will use this in our nginx.conf later
listen "#{@dir}tmp/sockets/unicorn.sock", :backlog => 64

# Set process id path
pid "#{@dir}tmp/pids/unicorn.pid"

# Set log file paths
stderr_path "#{@dir}log/unicorn.stderr.log"
stdout_path "#{@dir}log/unicorn.stdout.log"
unicornの起動
unicorn -c /usr/local/app/unicorn.rb -E development -D
-cはunicornの設定ファイル、-EはRackの環境変数、-Dはデーモン起動
unicornの停止
cat /usr/local/app/tmp/pids/unicorn.pid | xargs kill -QUIT
・nginxの準備
nginx.configの設定
# this sets the user nginx will run as,
#and the number of worker processes
user nobody nogroup;
worker_processes  1;

# setup where nginx will log errors to
# and where the nginx process id resides
error_log  /var/log/nginx/error.log;
pid        /var/run/nginx.pid;

events {
  worker_connections  1024;
  # set to on if you have more than 1 worker_processes
  accept_mutex off;
}

http {
  include       /etc/nginx/mime.types;

  default_type application/octet-stream;
  access_log /tmp/nginx.access.log combined;

  # use the kernel sendfile
  sendfile        on;
  # prepend http headers before sendfile()
  tcp_nopush     on;

  keepalive_timeout  5;
  tcp_nodelay        on;

  gzip  on;
  gzip_vary on;
  gzip_min_length 500;

  gzip_disable "MSIE [1-6]\.(?!.*SV1)";
  gzip_types text/plain text/xml text/css
     text/comma-separated-values
     text/javascript application/x-javascript
     application/atom+xml image/x-icon;

  # use the socket we configured in our unicorn.rb
  upstream unicorn_server {
    server unix:/usr/local/app/tmp/sockets/unicorn.sock
        fail_timeout=0;
  }

  # configure the virtual host
  server {
    # replace with your domain name
    server_name my-sinatra-app.com;
    # replace this with your static Sinatra app files, root + public
    root /usr/local/app/public;
    # port to listen for requests on
    listen 80;
    # maximum accepted body size of client request
    client_max_body_size 4G;
    # the server will close connections after this time
    keepalive_timeout 5;

    location / {
      try_files $uri @app;
    }

    location @app {
      proxy_set_header X-Forwarded-For $proxy_add_x_forwarded_for;
      proxy_set_header Host $http_host;
      proxy_redirect off;
      # pass to the upstream unicorn server mentioned above
      proxy_pass http://unicorn_server;
    }
  }
}
nginxの起動
service nginx start
nginxの停止
service nginx stop
・サーバー起動
1.unicorn起動
unicorn -c /usr/local/app/unicorn.rb -E development -D
2.nginx起動
service nginx start
3.サーバーにhttp request、 get / の時、 ”Hello, nginx and unicorn!” 返せば成功
APIの実装
Open APIについて詳細の説明は下記のドキュメントと
SwaggerでRESTful APIの管理を楽にするこの記事を参照してもいいと思います。
Open APIのドキュメントhttps://github.com/OAI/OpenAPI-Specification/blob/master/versions/2.0.md
今回はgithubにあるサンプルを使って実装すると思います。 https://github.com/OAI/OpenAPI-Specification/tree/master/examples/v2.0/yaml
・APIを定義する
swagger: "2.0"
info:
  version: 1.0.0
  title: Swagger Petstore
  description: A sample API that uses a petstore as an example to demonstrate features in the swagger-2.0 specification
  termsOfService: http://swagger.io/terms/
  contact:
    name: Swagger API Team
    email: foo@example.com
    url: http://madskristensen.net
  license:
    name: MIT
    url: http://github.com/gruntjs/grunt/blob/master/LICENSE-MIT
host: petstore.swagger.io
basePath: /api
schemes:
  - http
consumes:
  - application/json
produces:
  - application/json
paths:
  /pets:
    get:
      description: |
        Returns all pets from the system that the user has access to
      operationId: findPets
      parameters:
        - name: tags
          in: query
          description: tags to filter by
          required: false
          type: array
          collectionFormat: csv
          items:
            type: string
        - name: limit
          in: query
          description: maximum number of results to return
          required: false
          type: integer
          format: int32
      responses:
        "200":
          description: pet response
          schema:
            type: array
            items:
              $ref: '#/definitions/Pet'
        default:
          description: unexpected error
          schema:
            $ref: '#/definitions/Error'
    post:
      description: Creates a new pet in the store.  Duplicates are allowed
      operationId: addPet
      parameters:
        - name: pet
          in: body
          description: Pet to add to the store
          required: true
          schema:
            $ref: '#/definitions/NewPet'
      responses:
        "200":
          description: pet response
          schema:
            $ref: '#/definitions/Pet'
        default:
          description: unexpected error
          schema:
            $ref: '#/definitions/Error'
  /pets/{id}:
    get:
      description: Returns a user based on a single ID, if the user does not have access to the pet
      operationId: find pet by id
      parameters:
        - name: id
          in: path
          description: ID of pet to fetch
          required: true
          type: integer
          format: int64
      responses:
        "200":
          description: pet response
          schema:
            $ref: '#/definitions/Pet'
        default:
          description: unexpected error
          schema:
            $ref: '#/definitions/Error'
    delete:
      description: deletes a single pet based on the ID supplied
      operationId: deletePet
      parameters:
        - name: id
          in: path
          description: ID of pet to delete
          required: true
          type: integer
          format: int64
      responses:
        "204":
          description: pet deleted
        default:
          description: unexpected error
          schema:
            $ref: '#/definitions/Error'
definitions:
  Pet:
    allOf:
      - $ref: '#/definitions/NewPet'
      - required:
        - id
        properties:
          id:
            type: integer
            format: int64

  NewPet:
    required:
      - name
    properties:
      name:
        type: string
      tag:
        type: string

  Error:
    required:
      - code
      - message
    properties:
      code:
        type: integer
        format: int32
      message:
        type: string
・sinatraのコードを生成する
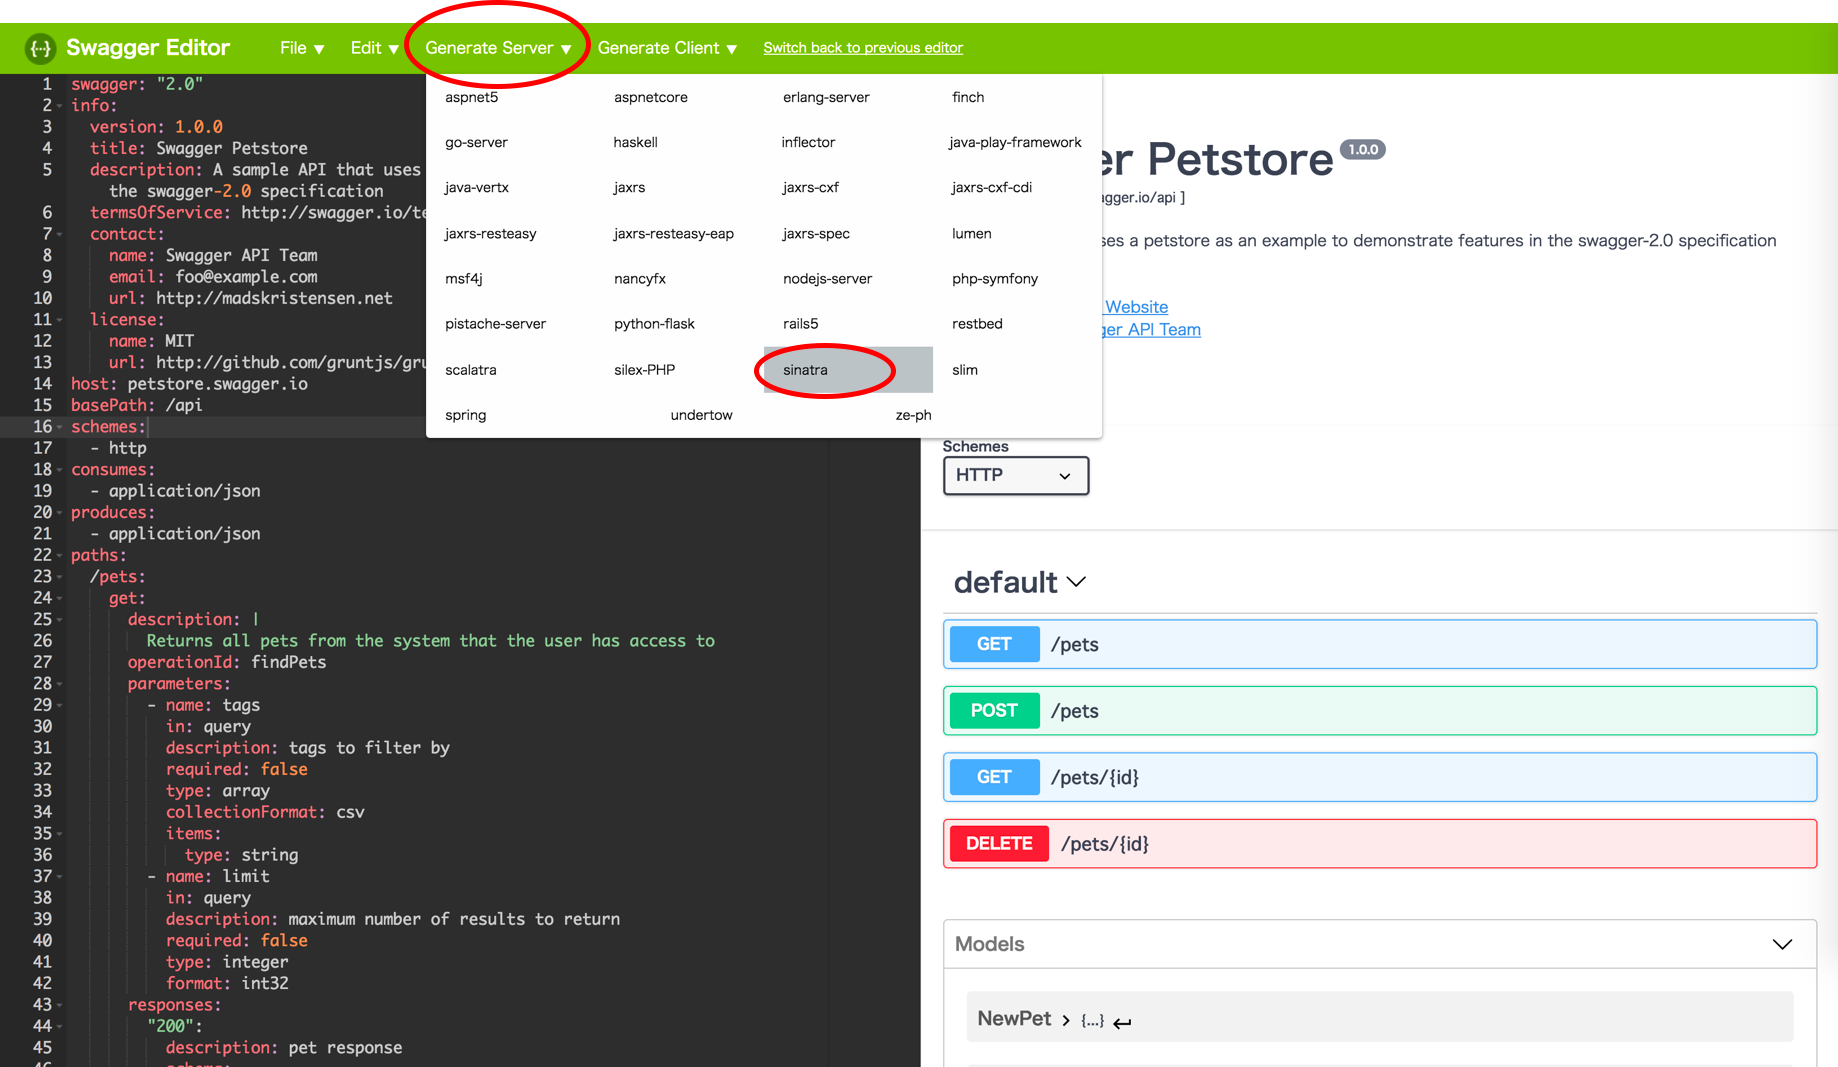
Swagger Editorで、上部のGenerate Serverをクリックし、sinatraをクリック。

・サーバーのディレクトリに置く
/usr/local/app
├── config.ru
├── my_app.rb
├── swagger.yaml
├── Gemfile
├── api
│   └── default_api.rb
├── lib
│   └── swaggering.rb
├── log
├── tmp
│   ├── pids
│   └── sockets
└── unicorn.rb
・サーバー再起動
1.unicorn停止
cat /usr/local/app/tmp/pids/unicorn.pid | xargs kill -QUIT
2.unicorn起動
unicorn -c /usr/local/app/unicorn.rb -E development -D
※ nginxは既に起動すれば、再起動は不要です
・curlで試す
# GET pets/{id}で試す
curl 設定したhost/api/pets/001

{"message":"yes, it worked"}
# 返せば成功です
・APIファイルにやりたい処理を書く
... #上は略

MyApp.add_route('GET', '/api/pets/{id}', {
  "resourcePath" => "/Default",
  "summary" => "",
  "nickname" => "find_pet_by_id",
  "responseClass" => "inline_response_200",
  "endpoint" => "/pets/{id}",
  "notes" => "Returns a user based on a single ID, if the user does not have access to the pet",
  "parameters" => [
    {
      "name" => "id",
      "description" => "ID of pet to fetch",
      "dataType" => "int",
      "paramType" => "path",
    },
    ]}) do
  cross_origin
  # the guts live here
  # ここに処理を書く
  if params[:id] == "001" then
    status 400
    {"message" => "something wrong"}.to_json
  end
end

... #下は略
# GET pets/{id}で試す
curl 設定したhost/api/pets/001

HTTP/1.1 400 Bad Request
# status 400返せば成功です
勉強したこと
・ OpenAPI Specの書き方
・ sinatra, unicornの実装