本記事はKIT AppDeveloper Advent Calendar 2015の18日目の記事です。
みなさん、アニメーションを利用していますか?
画面を引っ張った時のアニメーションや何かをタップして拡大するなど、意識せずに自然に利用しているアニメーションっていっぱいありますよね。
ユーザのアクションに対するフィードバックを与えるためにはアニメーションは重要なことだと思います。
iOSヒューマンインターフェースガイドラインにもこう書いてあります。
引用元:iOSヒューマンインターフェースガイドライン - アニメーション
iOSのUIには気の利いた美しいアニメーションが活用されており、使っていて楽しいという印象を与えるのに役立っています。適切なアニメーションには次のような効果があります。
・状態を伝え、フィードバックを返す
・直接操作の感覚を高める
・ユーザのアクションの結果を視覚化する支援
何故AutoLayoutを利用した方が良いのか
Viewをアニメーションさせる際に端末のバージョンや画面回転などを考慮して
直接Viewの座標やサイズを変更すると、とても管理しやすいとは言えない状況になってくると思います。
また、問題が発生した時にどのアニメーションが悪さをしているのかも分かり辛いです。
そこで、AutoLayoutの登場です。
AutoLayoutの制約の値を変更するだけで、簡単にアニメーションを行うことができます。
Viewの座標やサイズではなく、制約の値を変更してアニメーションさせるため安全で管理しやすくなります。
サンプルコード with デモ
デモ
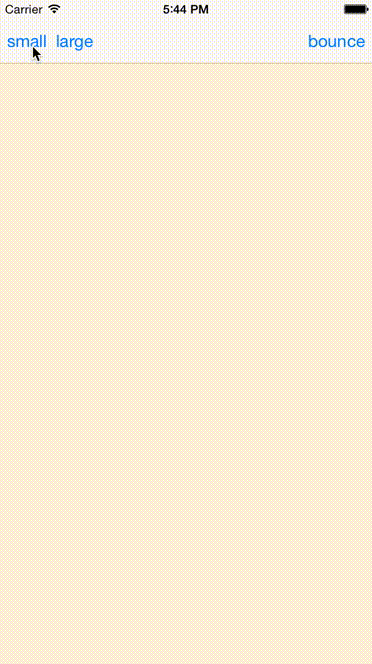
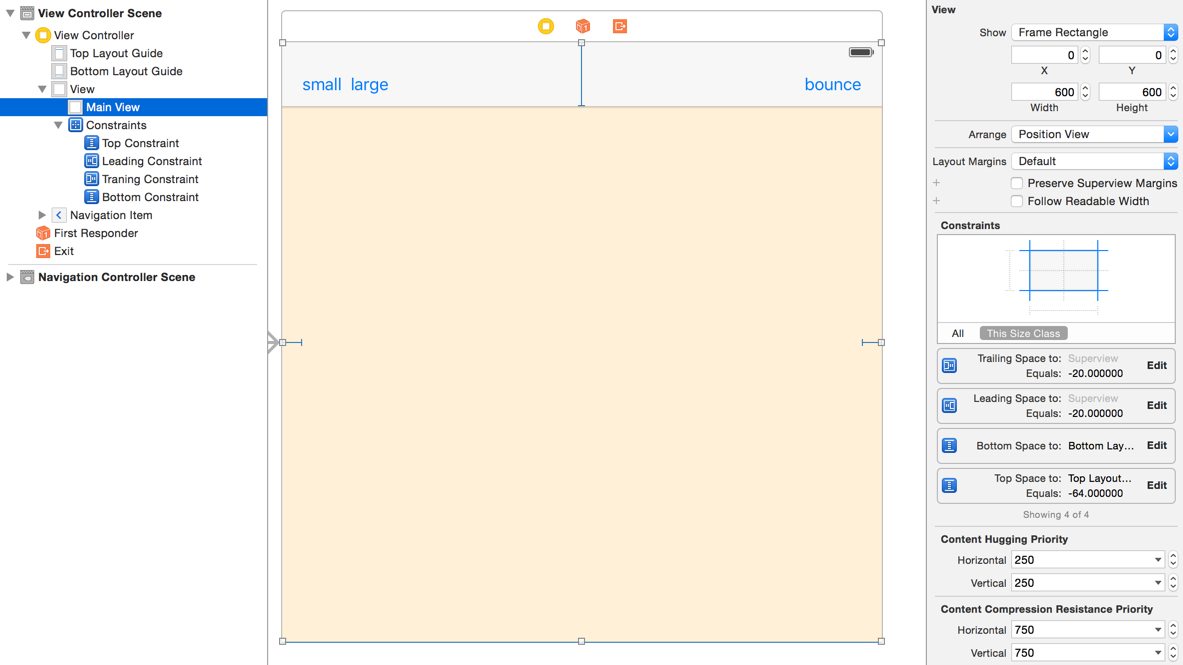
StoryBoard
四方全体に伸ばすようにAutoLayoutを設定しています。
Code
StoryBoardで配置したViewと設定したAutoLayoutをViewControllerへ紐付けています。
それぞれのボタンを押した時にAutoLayoutの制約(constant)を変更してアニメーションするようにしています。
import UIKit

class ViewController: UIViewController {

    @IBOutlet weak var mainView: UIView!
    @IBOutlet weak var topConstraint: NSLayoutConstraint!
    @IBOutlet weak var leadingConstraint: NSLayoutConstraint!
    @IBOutlet weak var traningConstraint: NSLayoutConstraint!
    @IBOutlet weak var bottomConstraint: NSLayoutConstraint!

    override func viewDidLoad() {
        super.viewDidLoad()
    }

    override func didReceiveMemoryWarning() {
        super.didReceiveMemoryWarning()
    }

    @IBAction func actionSmallButton(sender: AnyObject) {

        mainView.layoutIfNeeded()

        topConstraint.constant = view.bounds.size.height/4
        leadingConstraint.constant = view.bounds.size.width/4
        traningConstraint.constant = view.bounds.size.width/4
        bottomConstraint.constant = view.bounds.size.height/4

        UIView.animateWithDuration(0.2, animations: {
            self.mainView.layoutIfNeeded()
        })
    }

    @IBAction func actionLargeButton(sender: AnyObject) {
        mainView.layoutIfNeeded()

        topConstraint.constant = -64
        leadingConstraint.constant = -20
        traningConstraint.constant = -20
        bottomConstraint.constant = 0

        UIView.animateWithDuration(0.2, animations: {
            self.mainView.layoutIfNeeded()
        })
    }

    @IBAction func actionBounceButton(sender: AnyObject) {
        mainView.layoutIfNeeded()

        topConstraint.constant = view.bounds.size.height/4
        leadingConstraint.constant = view.bounds.size.width/4
        traningConstraint.constant = view.bounds.size.width/4
        bottomConstraint.constant = view.bounds.size.height/4

        UIView.animateWithDuration(0.2, animations: {
            self.mainView.layoutIfNeeded()
        }, completion: { (_) in

            self.mainView.layoutIfNeeded()

            self.topConstraint.constant = -64
            self.leadingConstraint.constant = -20
            self.traningConstraint.constant = -20
            self.bottomConstraint.constant = 0

            UIView.animateWithDuration(0.2, animations: {
                self.mainView.layoutIfNeeded()
            }, completion: nil)
        })

    }

}
コード解説
先ほどのViewController.swiftの一部を抜粋しています。
@IBAction func actionSmallButton(sender: AnyObject) {

    // 制約を変更する前に未適用時の表示を更新しておく
    mainView.layoutIfNeeded()

    // アニメーションさせたい値に制約を変更する
    // ここでは画面の1/4になるように変更しています
    topConstraint.constant = view.bounds.size.height/4
    leadingConstraint.constant = view.bounds.size.width/4
    traningConstraint.constant = view.bounds.size.width/4
    bottomConstraint.constant = view.bounds.size.height/4

    // 0.2秒間でアニメーションさせる
    UIView.animateWithDuration(0.2, animations: {
        // 制約の変更を適用させアニメーション実行する
        self.mainView.layoutIfNeeded()
    })
}
今回はサンプルのため一つのViewしか配置しませんでしたが
複数のViewにAutoLayoutの制約が設定されている場合は、影響のあるView全てでlayoutIfNeeded()を呼ぶ必要があります。
小技
今回サンプルコードでは分かりやすくするため、制約を全て紐付けていましたが
Viewが増えてくると、制約を全てViewControllerに紐付けて管理することが難しくなってくると思います。
そのため、StoryBoardで設定した制約のidentifierをKeyとして、Viewから指定した制約を取得できるメソッドを書いてみました。
private func getConstraintFromView(view view: UIView, identifier: String) -> NSLayoutConstraint? {
    if let superView = view.superview {
        for constraint in superView.constraints {
            if let id = constraint.identifier where id == identifier {
                return constraint
            }
        }
    }
    return nil
}
解説で抜粋したコードに適応すると下記の様になります。
@IBAction func actionSmallButton(sender: AnyObject) {

    mainView.layoutIfNeeded()

    if let top = getConstraintFromView(view: mainView, identifier: "mainTop") {
        top.constant = view.bounds.size.height/4
    }
    if let leading = getConstraintFromView(view: mainView, identifier: "mainLeading") {
        leading.constant = view.bounds.size.width/4
    }
    if let traning = getConstraintFromView(view: mainView, identifier: "mainTraning") {
        traning.constant = view.bounds.size.width/4
    }
    if let bottom = getConstraintFromView(view: mainView, identifier: "mainBottom") {
        bottom.constant = view.bounds.size.height/4
    }

    UIView.animateWithDuration(0.2, animations: {
        self.mainView.layoutIfNeeded()
    })
}