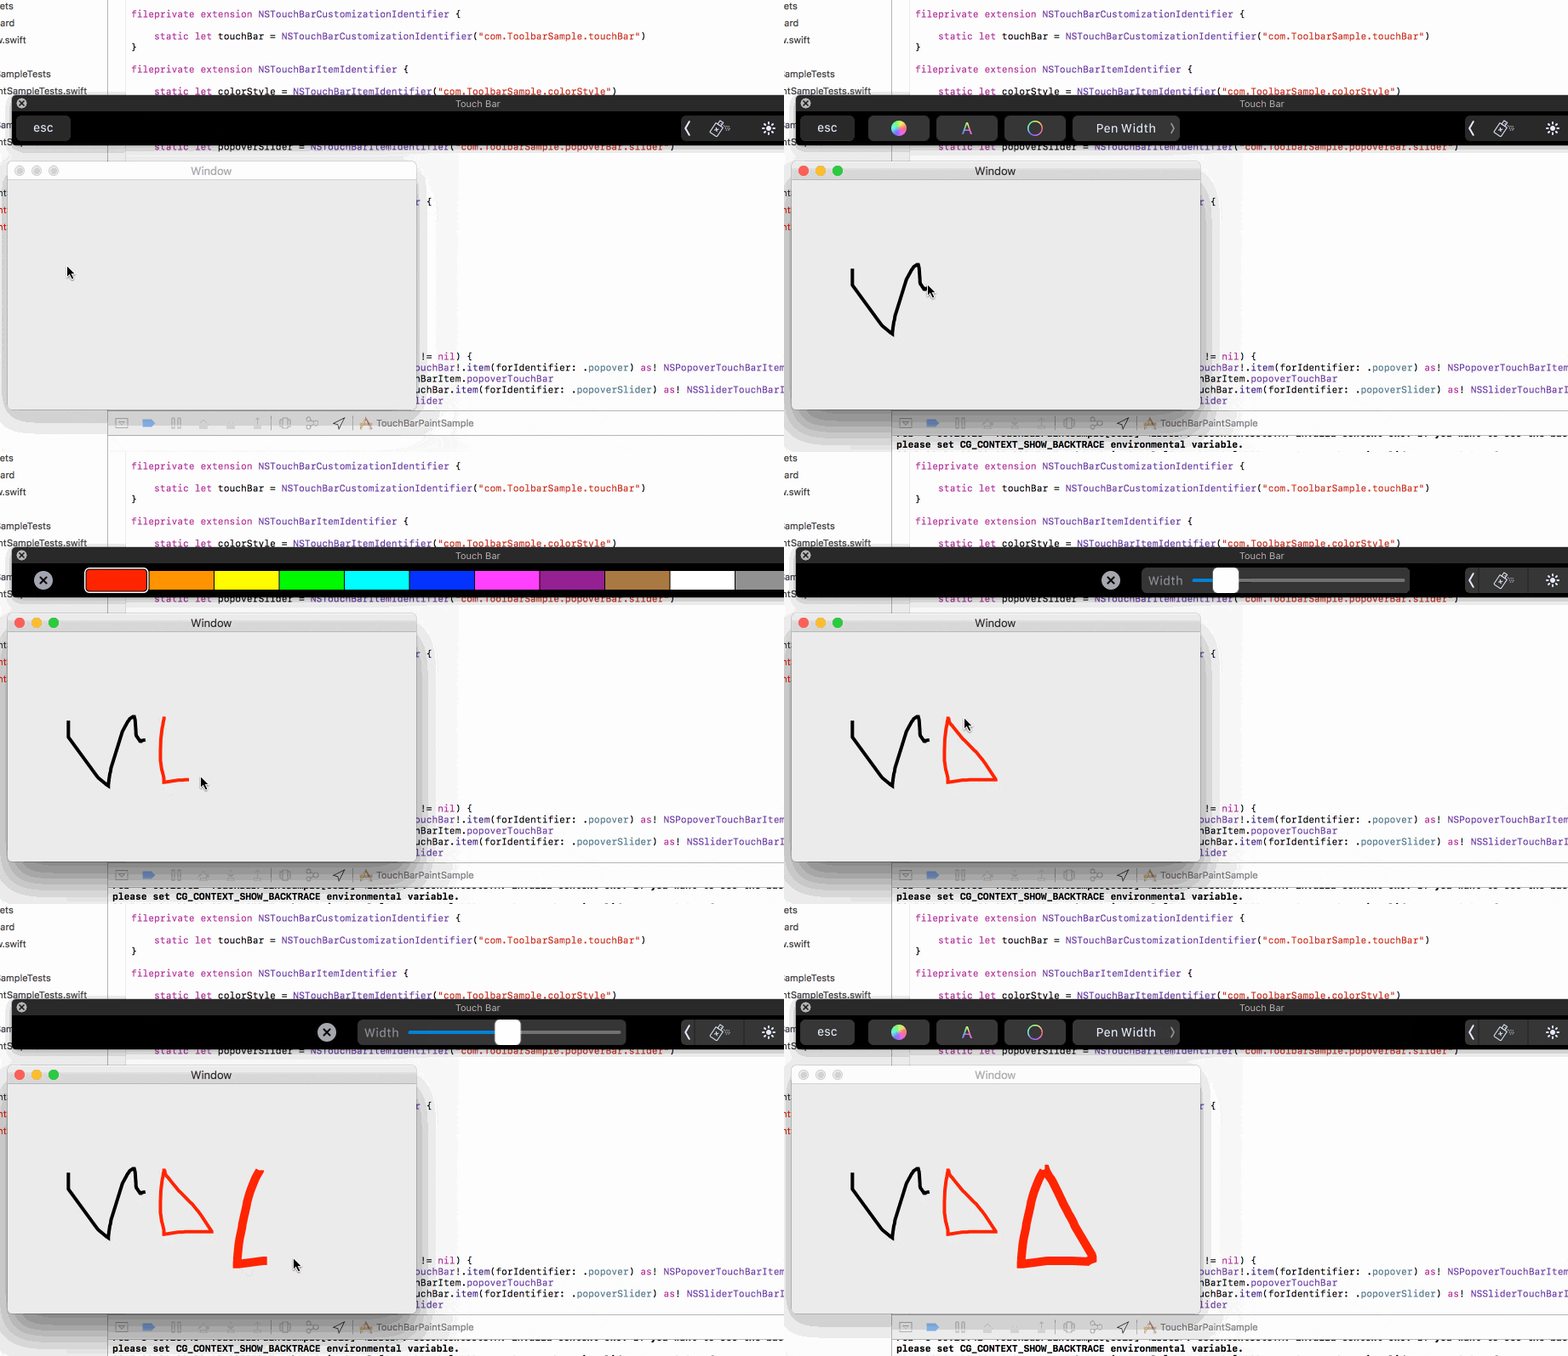
環境
- MacOSX 10.12.3
TouchBarを使ったアプリを今更ながら試してみました。
Appleの提供しているサンプルであるToolbarSampleとNSTouchBar Catalogを読めば結構基本的な動きは使えるようになります。
問題はTouchBarをいかにうまく利用出来るかというところなんですが、そこは今後の課題です・・・。
サンプルはgithubに上げておきました。
TouchBarPaintSample
TouchBarの設定はWindowController上で実装します。
import Cocoa

fileprivate extension NSTouchBarCustomizationIdentifier {

    static let touchBar = NSTouchBarCustomizationIdentifier("com.ToolbarSample.touchBar")
}

fileprivate extension NSTouchBarItemIdentifier {

    static let colorStyle = NSTouchBarItemIdentifier("com.ToolbarSample.colorStyle")
    static let colorStyleText = NSTouchBarItemIdentifier("com.ToolbarSample.colorStyleText")
    static let colorStyleStroke = NSTouchBarItemIdentifier("com.ToolbarSample.colorStyleStroke")

    static let popover = NSTouchBarItemIdentifier("com.ToolbarSample.TouchBarItem.popover")
    static let popoverSlider = NSTouchBarItemIdentifier("com.ToolbarSample.popoverBar.slider")

}


class CustomeWindowController : NSWindowController {

    let DefaultPenWidth : Int   = 4
    var currentPenWidth: Int = 0


    override func windowDidLoad() {

        super.windowDidLoad()

        self.currentPenWidth = DefaultPenWidth


        if #available(OSX 10.12.2, *) {
            if ((NSClassFromString("NSTouchBar")) != nil) {
                let penWidthTouchBarItem = self.touchBar!.item(forIdentifier: .popover) as! NSPopoverTouchBarItem
                let sliderTouchBar = penWidthTouchBarItem.popoverTouchBar
                let sliderTouchBarItem = sliderTouchBar.item(forIdentifier: .popoverSlider) as! NSSliderTouchBarItem
                let slider = sliderTouchBarItem.slider

                // Make the font size slider a bit narrowed, about 250 pixels.
                let views = ["slider" : slider]
                let theConstraints = NSLayoutConstraint.constraints(withVisualFormat: "H:[slider(250)]", options: NSLayoutFormatOptions(), metrics: nil, views:views)
                NSLayoutConstraint.activate(theConstraints)

                // Set the font size for the slider item to the same value as the stepper.
                slider.integerValue = Int(DefaultPenWidth)
            }
        }
    }

    // MARK: - NSTouchBar

    @available(OSX 10.12.2, *)
    override func makeTouchBar() -> NSTouchBar? {

        let touchBar = NSTouchBar()
        touchBar.delegate = self
        touchBar.customizationIdentifier = .touchBar
        touchBar.defaultItemIdentifiers = [.colorStyle, .colorStyleText, .colorStyleStroke, .popover, .otherItemsProxy]
        touchBar.customizationAllowedItemIdentifiers = [.colorStyle, .colorStyleText, .colorStyleStroke, .popover]

        return touchBar
    }


    @available(OSX 10.12.2, *)
    func changeColorWell(sender : NSColorPickerTouchBarItem) -> Void {
        let color = NSColor(calibratedHue: sender.color.hueComponent
            , saturation: sender.color.saturationComponent
            , brightness: sender.color.brightnessComponent
            , alpha: sender.color.alphaComponent)

        let appDelegate: AppDelegate = NSApplication.shared().delegate as! AppDelegate

        appDelegate.penColor = color
    }


    @available(OSX 10.12.2, *)
    func changePenWidthBySlider(_ sender: NSSlider) -> Void {
        let width = CGFloat(sender.floatValue)

        let appDelegate: AppDelegate = NSApplication.shared().delegate as! AppDelegate

        appDelegate.penWidth = Int(width)
    }

}


extension CustomeWindowController: NSTouchBarDelegate {

    @available(OSX 10.12.2, *)
    func touchBar(_ touchBar: NSTouchBar, makeItemForIdentifier identifier: NSTouchBarItemIdentifier) -> NSTouchBarItem? {

        switch identifier {

        case NSTouchBarItemIdentifier.colorStyle:

            let colorStylePicker = NSColorPickerTouchBarItem.colorPicker(withIdentifier: identifier)
            colorStylePicker.customizationLabel = "colorStylePicker"
            colorStylePicker.action = #selector(changeColorWell)

            return colorStylePicker

        case NSTouchBarItemIdentifier.colorStyleText:

            let colorStylePicker = NSColorPickerTouchBarItem.textColorPicker(withIdentifier: identifier)
            colorStylePicker.customizationLabel = "colorStyleText"
            colorStylePicker.action = #selector(changeColorWell)

            return colorStylePicker

        case NSTouchBarItemIdentifier.colorStyleStroke:

            let colorStylePicker = NSColorPickerTouchBarItem.strokeColorPicker(withIdentifier: identifier)
            colorStylePicker.customizationLabel = "colorStyleStroke"
            colorStylePicker.action = #selector(changeColorWell)

            return colorStylePicker

        case NSTouchBarItemIdentifier.popover:

            let popoverItem = NSPopoverTouchBarItem(identifier: identifier)
            popoverItem.customizationLabel = "Pen Width"
            popoverItem.collapsedRepresentationLabel = "Pen Width"

            let secondaryTouchBar = NSTouchBar()
            secondaryTouchBar.delegate = self
            secondaryTouchBar.defaultItemIdentifiers = [.popoverSlider];

            // We can setup a different NSTouchBar instance for popoverTouchBar and pressAndHoldTouchBar property
            // Here we just use the same instance.
            //
            popoverItem.pressAndHoldTouchBar = secondaryTouchBar
            popoverItem.popoverTouchBar = secondaryTouchBar

            return popoverItem


        case NSTouchBarItemIdentifier.popoverSlider:

            let sliderItem = NSSliderTouchBarItem(identifier: identifier)
            sliderItem.label = "Width"
            sliderItem.customizationLabel = "pen Width"

            let slider = sliderItem.slider
            slider.minValue = 2.0
            slider.maxValue = 20.0
            slider.target = self
            slider.action = #selector(changePenWidthBySlider)

            // Set the font size for the slider item to the same value as the stepper.
            slider.integerValue = Int(DefaultPenWidth)

            slider.bind(NSValueBinding, to: self, withKeyPath: "currentPenWidth", options: nil)

            return sliderItem

        default: return nil
        }
    }
}
TouchBarよりむしろ、ペイントの仕組みをiOSじゃなくてMacOSXで作る方に時間がかかったので、そのサンプル。
import Cocoa

class CustomeLine : NSObject {

    var path : NSBezierPath!

    override init() {

    }


    func move(point: NSPoint) {
        path = NSBezierPath()

        path.move(to: point)
    }

    func add(point: NSPoint) {
        if(path == nil){
            path = NSBezierPath()

            path.move(to: point)

            return
        }

        path.line(to: point)
    }


    func draw() {
        if(path == nil){
            return
        }

        let appDelegate: AppDelegate = NSApplication.shared().delegate as! AppDelegate

        let color = appDelegate.penColor
        let width = CGFloat(appDelegate.penWidth)

        color.set()
        path.lineWidth = width
        path.stroke()

    }
}
CustomeView.swift
import Cocoa

class CustomeView : NSView {

    var line : CustomeLine!
    var lastImage : NSImage!

    @IBOutlet weak var imageView: NSImageView!


    override func awakeFromNib() {
        super.awakeFromNib()
        line = CustomeLine()

        configure()
    }

    func configure() {
        let options:NSTrackingAreaOptions = [
            .mouseEnteredAndExited,
            .mouseMoved,
            .cursorUpdate,
            .activeAlways,
            .enabledDuringMouseDrag
        ]
        let trackingArea = NSTrackingArea(rect: bounds, options: options, owner: self, userInfo: nil)
        addTrackingArea(trackingArea)

    }


    override func mouseDown(with event: NSEvent) {
        let locationInView = self.convert(event.locationInWindow, from: nil)

        line.move(point: locationInView)

        drawImage()
    }

    override func mouseUp(with event: NSEvent) {
        let locationInView = self.convert(event.locationInWindow, from: nil)

        line.add(point: locationInView)

        drawImage()

        self.lastImage = imageView.image
    }

    override func mouseDragged(with event: NSEvent) {
        let locationInView = self.convert(event.locationInWindow, from: nil)

        line.add(point: locationInView)

        drawImage()

    }

    override func mouseMoved(with event: NSEvent) {
        //        NSLog("aaa")
    }


    func drawImage() {
        let size = self.frame.size

        let image = NSImage(size: size)

        let blub = NSBitmapImageRep(bitmapDataPlanes: nil,
                                    pixelsWide: Int(size.width),
                                    pixelsHigh: Int(size.height),
                                    bitsPerSample: 8,
                                    samplesPerPixel: 3,
                                    hasAlpha: false,
                                    isPlanar: false,
                                    colorSpaceName: NSCalibratedRGBColorSpace,
                                    bytesPerRow: 0, bitsPerPixel: 0)!

        let ctx = NSGraphicsContext(bitmapImageRep: blub)
        image.lockFocus()

        NSGraphicsContext.saveGraphicsState()

        lastImage?.draw(in: self.frame)

        line.draw()

        NSGraphicsContext.setCurrent(ctx)

        NSGraphicsContext.restoreGraphicsState()

        image.addRepresentation(blub)

        image.unlockFocus()

        imageView.image = image

    }

}
参考
[iOSアプリ開発] タッチでお絵かきしてみる
ここの描画部分をMacOSXに書き換えたのが、今回のサンプル。Undoとかは未実装。
