はじめに
- Vagrantとは、rubyで書かれた仮想マシンを作る為のCIツール
- VirtualBox等の仮想マシンをCIツールで簡単に扱いやすくするものです
-
等と言っているのは、他にもVMWareや、Amazon EC2等の仮想マシンも扱えるためです
※ なお、本記事ではvagrantを導入する際に良く遭遇(するであろう)2つのエラーの対処法についても記載しています。これ以外のエラーが出た場合などは教えていただけると幸いです。
準備
-
- VirtualBoxのインストール
-
- vagrantのインストール
仮想マシンをvagrantで立ち上げる
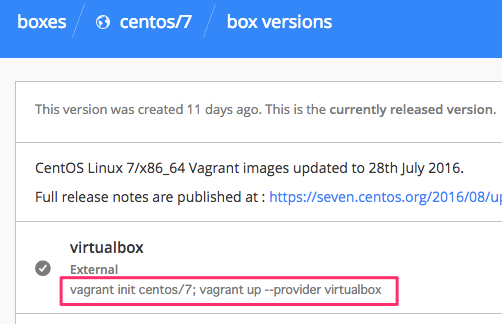
公式サイトに、Boxの一覧が配布されてるので好きなBoxを選びます。
https://atlas.hashicorp.com/boxes/search
今回はcentOS7を使ってみようと思います。
ここに、使っている仮想マシン管理アプリ毎の導入方法が書いてあるのでそれを実行します。
(自分はVirtualBoxを使っているので、下記手順を使います)
仮想マシンの立ち上げ
初期化すると、centos用のVagrantfileが作られる
$ vagrant init bento/centos-6.7
$ ls
Vagrantfile
仮想マシンを起動します
(--providerは、どの仮想化ソフトを使うかを指定してます)
$ vagrant up --provider virtualbox
しばらく時間がかかりますが、完了します。
わずか数分でcentosを自分のmacOS上に作れるなんて最高です。
補足1
この際、Timed out while waiting for the machine to boot..のようなエラーが出る場合があります。
これはvagrant1.8.5のバグで、1.8.6で修正されるようですが、それまでは下記の方法で解消することが出来ます。
補足2
基本的に、vagrantは仮想マシンを立ち上げると、ホストOSのVagrantfileがあるディレクトリと、ゲストOS側の/vagrantが共有されます。
しかし、下記のようなエラーが出て、ディレクトリの共有がうまくいかない場合があります。
Vagrant was unable to mount VirtualBox shared folders. This is usually
because the filesystem "vboxsf" is not available. This filesystem is
made available via the VirtualBox Guest Additions and kernel module.
Please verify that these guest additions are properly installed in the
guest. This is not a bug in Vagrant and is usually caused by a faulty
Vagrant box. For context, the command attemped was:

set -e
mount -t vboxsf -o uid=`id -u vagrant`,gid=`getent group vagrant | cut -d: -f3` vagrant /vagrant
mount -t vboxsf -o uid=`id -u vagrant`,gid=`id -g vagrant` vagrant /vagrant

The error output from the command was:

/sbin/mount.vboxsf: mounting failed with the error: No such device
この場合、一度ゲストOSにログイン(既に仮想マシンの立ち上げには成功しているのでログインは可能です)して、 カーネルのバージョンアップと、必要なパッケージのインストールで解決出来ました。
私は下記記事の、対処法その3:vboxをリビルドするの部分を実行することで解決しました。
$ sudo yum -y update kernel
$ sudo yum -y install kernel-devel kernel-headers dkms gcc gcc-c++
この後、一度ゲストOSを出て、vagrant reloadか、vagrant halt > vagrant upで、うまくできているはずです。
仮想マシンに接続
仮想マシンに接続すうのも非常に簡単です。
Vagrantfileが置いてあるディレクトリで、vagrant sshとするだけでOKです。
$ vagrant ssh
[vagrant@localhost ~]$ whoami
vagrant
簡単ですね。因みにデフォルトではvagrantというユーザでログインし、パスワードはvagrantです。
まとめ
- vagrantを使って、好きなOSを導入する事が出来た
- よくあるエラーに対応出来た
- 次回、よくあるlamp構成をvagrantを使って楽ちんに構成する方法の記事を上げます
