※この記事で使っているUnityのバージョンは Unity5.2.1p3 です。
木構造の表示
まずは木構造を表示させるウィンドウ
NodeEditor.cs
using UnityEngine;
using UnityEditor;
using System.Collections.Generic;

public class NodeEditor : EditorWindow
{
  private Node root;

  [MenuItem("Window/Node Editor")]
  static void Open()
  {
    EditorWindow.GetWindow<NodeEditor>();
  }

  protected void OnGUI()
  {
    if (this.root == null)
    {
      this.Init();
    }

    BeginWindows();
    this.root.Draw();
    EndWindows();
  }

  private void Init()
  {
    // 木構造の初期化
    this.root = new Node(0, new Vector2(200, 200));
    this.root.childs.Add(new Node(1, new Vector2(100, 300)));
    this.root.childs.Add(new Node(2, new Vector2(300, 300)));
    this.root.childs[1].childs.Add(new Node(3, new Vector2(200, 400)));
    this.root.childs[1].childs.Add(new Node(4, new Vector2(400, 400)));
  }

  public class Node
  {
    public int id;
    public Rect window;
    public List<Node> childs = new List<Node>();

    public Node(int id, Vector2 position)
    {
      this.id = id;
      this.window = new Rect(position, new Vector2(100, 50));
    }

    public void Draw()
    {
      this.window = GUI.Window(this.id, this.window, DrawNodeWindow, "Window" + this.id);   // Updates the Rect's when these are dragged

      foreach (var child in this.childs)
      {
        DrawNodeLine(this.window, child.window); // Here the curve is drawn under the windows
        child.Draw();
      }
    }

    void DrawNodeWindow(int id)
    {
      GUI.DragWindow();
      GUI.Label(new Rect(30, 22, 100, 100), "Hoge" + id, EditorStyles.label);
    }

    static void DrawNodeLine(Rect start, Rect end)
    {
      Vector3 startPos = new Vector3(start.x + start.width / 2, start.y + start.height / 2, 0);
      Vector3 endPos = new Vector3(end.x + end.width / 2, end.y + end.height / 2, 0);

      Handles.DrawLine(startPos, endPos);
    }
  }
}
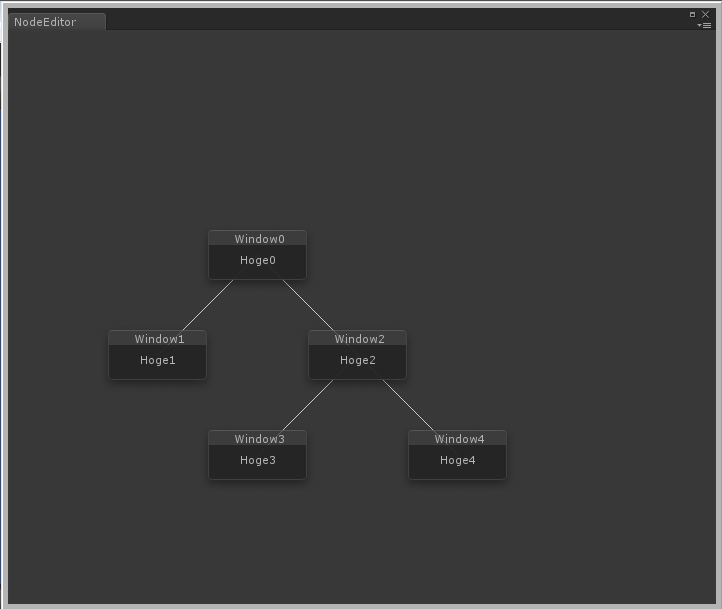
結果
以下のようなウィンドウが出ます。
Animatorウィンドウ化
次にAnimatorウィンドウの背景を描画させ、中ボタンでウィンドウ内をスクロールできるようにします。
Example.cs
using UnityEditor;
using UnityEngine;
using UnityEditor.Graphs;

public class Example : NodeEditor
{
  static Example example;

  Graph stateMachineGraph;
  GraphGUI stateMachineGraphGUI;

  [MenuItem("Window/Example")]
  static void Do()
  {
    example = GetWindow<Example>();
  }

  void OnEnable()
  {
    if (stateMachineGraph == null)
    {
      stateMachineGraph = ScriptableObject.CreateInstance<Graph>();
      stateMachineGraph.hideFlags = HideFlags.HideAndDontSave;
    }
    if (stateMachineGraphGUI == null)
    {
      stateMachineGraphGUI = (GetEditor(stateMachineGraph));
    }
  }

  void OnDisable()
  {
    example = null;
  }

  void OnGUI()
  {
    if (example && stateMachineGraphGUI != null)
    {
      stateMachineGraphGUI.BeginGraphGUI(example, new Rect(0, 0, example.position.width, example.position.height));

      // ノード描画
      base.OnGUI();

      stateMachineGraphGUI.EndGraphGUI();
    }

  }

  GraphGUI GetEditor(Graph graph)
  {
    GraphGUI graphGUI = CreateInstance("GraphGUI") as GraphGUI;
    graphGUI.graph = graph;
    graphGUI.hideFlags = HideFlags.HideAndDontSave;
    return graphGUI;
  }
}
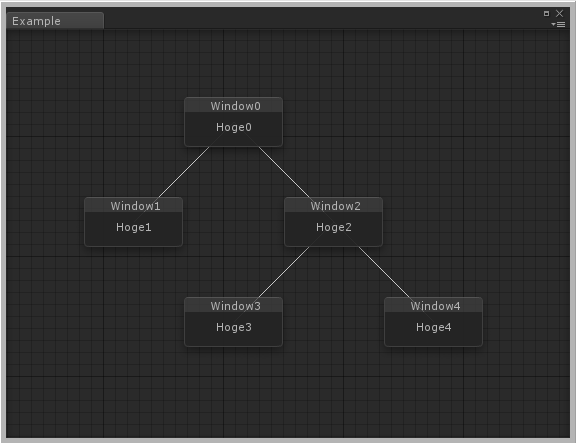
結果
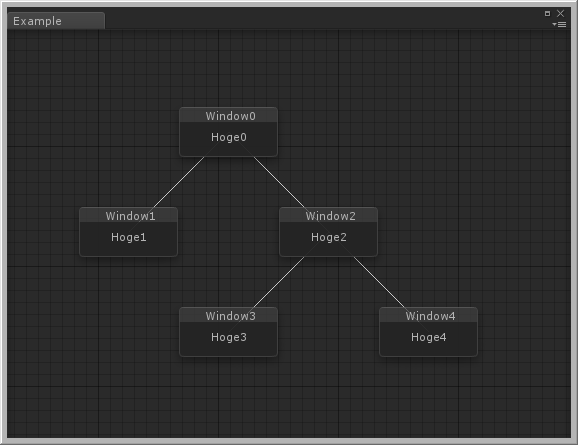
中ボタンでドラッグできるようになります。
参考URL
Simple node editor
http://forum.unity3d.com/threads/simple-node-editor.189230/
けいごのなんとか Animatorウィンドウを自作する ~背景の描画~
http://anchan828.hatenablog.jp/entry/2013/07/16/002320