はじめに
Spring Tool Suite 3.7.3(Eclipse Mars.2 (4.5.2))でSpring Starter ProjectのWizardに従って、最も簡単なWebアプリケーションを新規作成します
環境
JVM: 1.8.0_45 (Oracle Corporation 25.45-b02)
OS: Mac OS X 10.11.3 x86_64
Spring Tool Suite
Version: 3.7.3.RELEASE
Build Id: 201602250940
Platform: Eclipse Mars.2 (4.5.2)
(こちらから入れました https://spring.io/tools/sts/all)
Buildship: Eclipse Plug-ins for Gradle 1.0.12.v20160330-1446
(Help -> Eclipse marketplaceから入れました)
手順
Spring Starter Projectを新規作成する
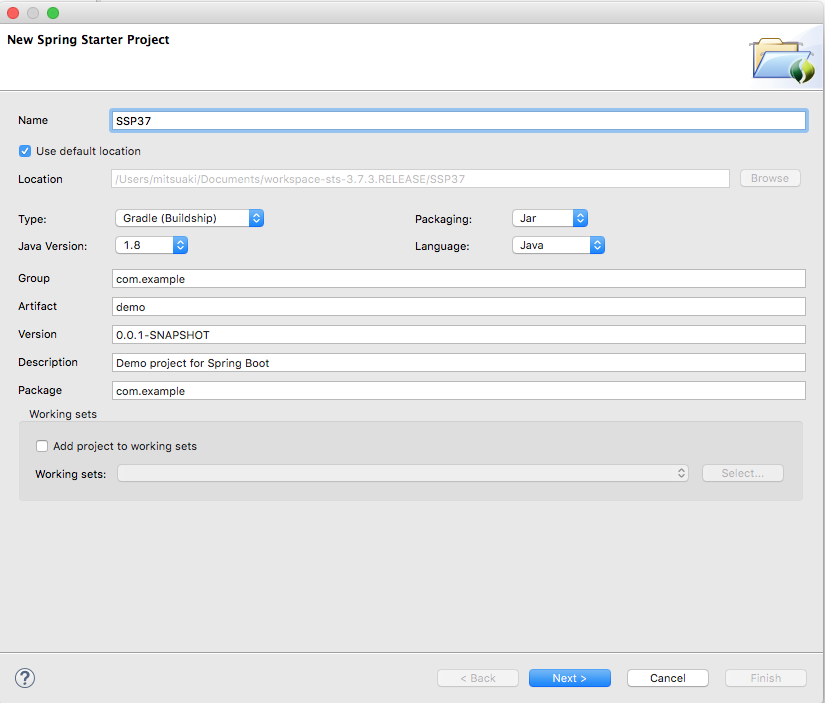
File -> New -> Spring Starter Project
をクリック
Name: に適当なプロジェクト名を指定。ここではSSP37としました。
Type: Gradle(Buildship)を指定 (※ Buildship plug-inがEclipse marketplaceなどから導入されている必要あり)
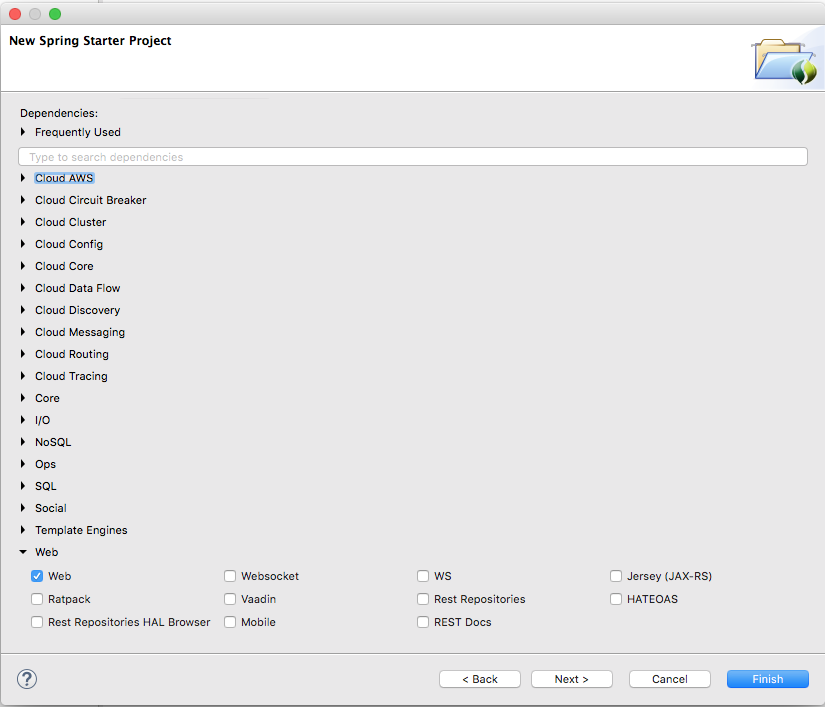
Webアプリケーションを目指すので、Web親項目の下にある、Web子項目をとりあえずチェック
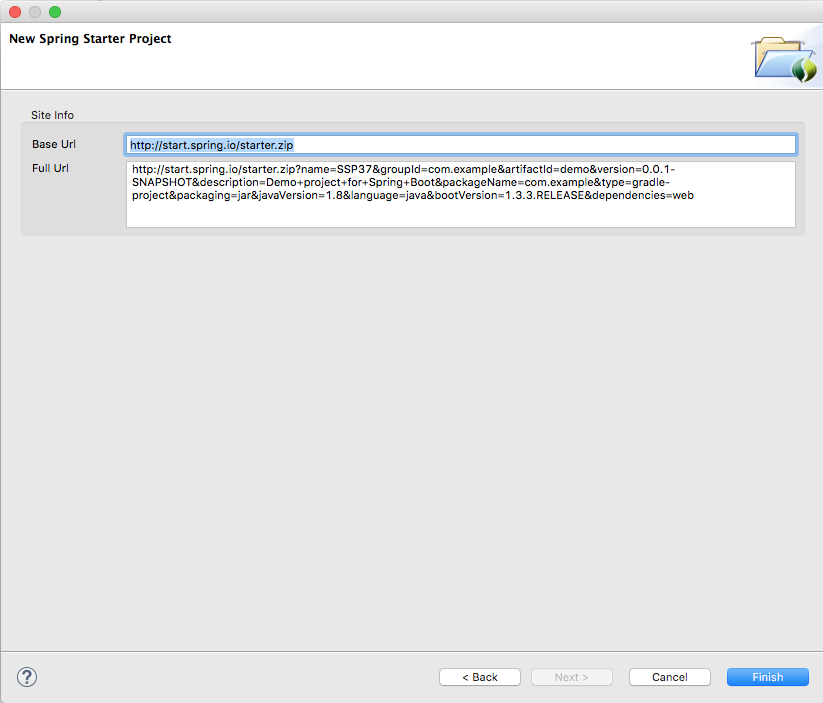
Finishを押す
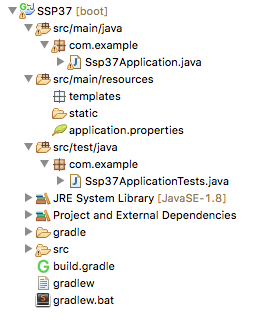
Projectが出来上がる
build.gradleの方はこの様な感じに
buildscript {
	ext {
		springBootVersion = '1.3.3.RELEASE'
	}
	repositories {
		mavenCentral()
	}
	dependencies {
		classpath("org.springframework.boot:spring-boot-gradle-plugin:${springBootVersion}")
	}
}

apply plugin: 'java'
apply plugin: 'eclipse'
apply plugin: 'spring-boot'

jar {
	baseName = 'demo'
	version = '0.0.1-SNAPSHOT'
}
sourceCompatibility = 1.8
targetCompatibility = 1.8

repositories {
	mavenCentral()
}


dependencies {
	compile('org.springframework.boot:spring-boot-starter-web')
	testCompile('org.springframework.boot:spring-boot-starter-test')
}


eclipse {
	classpath {
		 containers.remove('org.eclipse.jdt.launching.JRE_CONTAINER')
		 containers 'org.eclipse.jdt.launching.JRE_CONTAINER/org.eclipse.jdt.internal.debug.ui.launcher.StandardVMType/JavaSE-1.8'
	}
}

task wrapper(type: Wrapper) {
	gradleVersion = '2.12'
}
簡単なWebアプリケーションを実装する
とりあえずブラウザにhiが表示されるように、ソースに追加しましょう。
src/main/java/com/example/controllers/MyController.javaを新規作成します。
package com.example.controllers;

import org.springframework.stereotype.Controller;
import org.springframework.web.bind.annotation.RequestMapping;
import org.springframework.web.bind.annotation.ResponseBody;

@Controller
public class MyController {

    @RequestMapping("/hi")
    @ResponseBody
    public String hi() {
        return "hi";
    }
}
Webアプリケーションを起動する
Package Explorerで
src/main/java -> com.example -> Ssp37Application.java を選び右クリック、Debug As -> Java Applicationをクリック
Webアプリケーションにアクセスする
http://localhost:8080/hi を開いて、"hi"が出たら成功です
ついでに下を参考にSpring IO Platformも導入してみる
http://docs.spring.io/platform/docs/2.0.3.RELEASE/reference/htmlsingle/#getting-started-using-spring-io-platform-gradle
build.gradleに// Addを追記
buildscript {
	ext {
		springBootVersion = '1.3.3.RELEASE'
	}
	repositories {
		mavenCentral()
	}
	dependencies {
		classpath 'io.spring.gradle:dependency-management-plugin:0.5.3.RELEASE'	// Add
		classpath("org.springframework.boot:spring-boot-gradle-plugin:${springBootVersion}")
	}
}

apply plugin: 'java'
apply plugin: 'eclipse'
apply plugin: 'io.spring.dependency-management'	// Add
apply plugin: 'spring-boot'

jar {
	baseName = 'demo'
	version = '0.0.1-SNAPSHOT'
}
sourceCompatibility = 1.8
targetCompatibility = 1.8

repositories {
	mavenCentral()
}

// Add
dependencyManagement {
    imports {
        mavenBom 'io.spring.platform:platform-bom:2.0.3.RELEASE'
    }
}

dependencies {
	compile('org.springframework.boot:spring-boot-starter-web')
	testCompile('org.springframework.boot:spring-boot-starter-test')
}


eclipse {
	classpath {
		 containers.remove('org.eclipse.jdt.launching.JRE_CONTAINER')
		 containers 'org.eclipse.jdt.launching.JRE_CONTAINER/org.eclipse.jdt.internal.debug.ui.launcher.StandardVMType/JavaSE-1.8'
	}
}

task wrapper(type: Wrapper) {
	gradleVersion = '2.12'
}
Package Explorerで
SSP37(プロジェクトルート)を選び右クリック、
Gradle -> Refresh Gradle Project
参考
Sample Repository
https://github.com/quwahara/SSP37/tree/210-new-ssp37


