ReactとReduxが最近ホットということで、自分も触ってみようと思い、入門・チュートリアルと銘打っているドキュメントを読み漁ってみるものの、とりあえず動くものを作るにあたって何をすればいいのかが良く分からなかった。
いったん簡単なものを一から構築して、それから色々いじってみたほうが理論の理解も進む気がしたので、見よう見まねで公式サンプルにあるようなカウンターっぽいものを作ってみる。
必要なnpmパッケージ(2016/04/16現在)
アプリ構築に最低限必要なパッケージはおそらく以下のような感じ。
react用パッケージ
- react
- react-dom
redux&連携用パッケージ
- redux
- react-redux
その他、半必須
- browserify (import文などを使うため)
- babelify (babelトランスコンパイル用)
- babel-preset-react(babelプラグインセット:JSXなどのreact独特の構文をサポート。JSXを使わない場合は必須ではない)
- babel-preset-es2015 (babelプラグインセット:es2015構文をサポート)
~~browserifyはコマンドラインから使うので-gオプションでグローバルインストールする必要あり。~~npm run scriptから実行すれば不要でした...。
現実的にはbrowserifyのみではなく、gulpやwebpackなども使ったほうがいいかもだけど、今回はシンプルにするため省きます。
作業フォルダ構成
appというプロジェクトフォルダを作り、そこにnpm installで上記モジュールをインストール。
まずビューとなるindex.htmlを作る。
<!DOCTYPE html>
<html lang="ja">
  <head>
    <meta charset="utf-8">
    <title>Redux Tutorial</title>
  </head>
  <body>
    <div id="root"></div>
    <script src="dist/bundle.js"></script>
  </body>
</html>
srcというフォルダを作り、その中にさらにactions, components, containers, reducers, storeの5つのファイルを作る。
Redux(flux)では一連の処理を主に5つにパーツに分割していますが、それぞれについてディレクトリを用意するかはアプリの規模に依ります。今回のような初歩レベルのアプリなら本来律儀にフォルダ分けする必要は無いと思いますが、一応やっておきます。
それぞれの役割については、ほかの方々が詳しく書かれているのでここでは割愛します。
各ファイル中に以下のようなjsファイルを作る。
export default {
  increment: () => {
    return { type: 'INCREMENT' }
  }
}
import React from 'react';

export default class App extends React.Component {
  render() {
    return (
        <div>
          <span>{this.props.fuga}</span><br/>
          <button onClick={ () => this.props.handleClick() }>*増加*</button>
        </div>
    );
  }
}
import React from 'react'
import { connect } from 'react-redux'
import App from '../components/app'
import AppActions from '../actions/app'

// グローバルなstateから必要な値をとってきて、コンポーネントのthis.propsとしてセット
// 今回はいずれにしろstateのプロパティには{fuga}しか無いので、stateをまるごと返してます
function mapStateToProps(state) {
  return state
}

// clickでactionを飛ばず
function mapDispatchToProps(dispatch) {
  return {
    handleClick: () => { dispatch(AppActions.increment()) }
  }
}

//connect関数でReduxとReactコンポーネントを繋ぐ
export default connect(
  mapStateToProps,
  mapDispatchToProps
)(App)
// 初期ステート設定
const initialState = {
  fuga: 0
}

// actionに応じてステート変更
export default function reducer(state = initialState, action) {
  switch(action.type) {
    case 'INCREMENT': {
        return { fuga: state.fuga + 1 }
    }
    default:
      return state
  }
}
import { createStore } from 'redux';
import reducer from '../reducers/index';

export default function configureStore() {
    const store = createStore(reducer);
    return store;
}
最後にエントリーポイントとなるindex.jsを用意。
import React from 'react';
import ReactDOM from 'react-dom';
import { Provider } from 'react-redux';
import configureStore from './store/configureStore';
import App from './containers/app'; // componentsの方ではないことに注意

const store = configureStore();
const rootEl = document.getElementById('root') // 流しこむ対象の要素

ReactDOM.render(
  <Provider store={store}>
    <App />
  </Provider>,
  rootEl
);
ビルドする
distというディレクトリを作り、package.jsonのscriptsに以下のコマンドを定義後、
  "scripts": {
...中略
"build": "browserify src/index.js -o dist/bundle.js -t [ babelify --presets [ react es2015 ] ]"
}
コマンドラインでnpm run buildを実行
するとdist下にbundle.jsが生成されるので、最初に作ったindex.htmlにアクセスします。
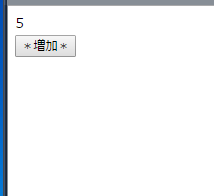
以下のようにカウンタが表示され、ボタンを押して数が増えればOK。
その他
githubリポジトリです。最終的なソース確認にどうぞ
http://github.com/pentamania/react-redux-sample
参考にさせていただきました
React+Redux入門
公式のサンプル集
ReduxとES6でReact.jsのチュートリアルの写経
http://github.com/bokuweb/react-tutorial-with-redux