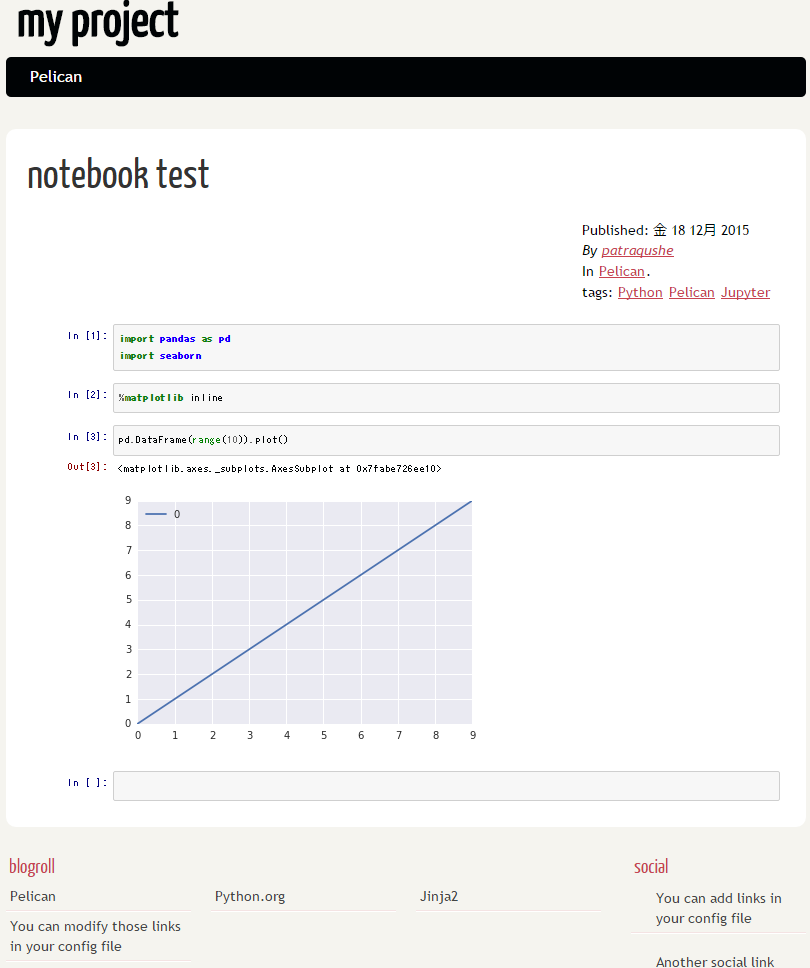
Markdownでブログを書いている方は多いと思いますが、Jupyter Notebookで作成したnotebookをそのままブログに投稿したいということもあるかと思います。
静的サイトジェネレータPelicanとそのプラグインpelican-ipynbを使ってこれを実現してみます。
インストール
virtualenv上に環境を作るのがよいかと思います。
- jupyter、nbconvertをインストール(入ってない場合)
$ pip install jupyter
- PelicanとMarkdownをインストール(入ってない場合)
$ pip install pytz
$ pip install Markdown pelican
プロジェクトの作成
今回はテスト用にmy_projectというディレクトリを作成します。
$ mkdir my_project
$ cd my_project/
$ pelican-quickstart
quickstartはこちらを参考にしました。
titleやauthor、その他設定等はご自身のものに置き換えてください。
> Where do you want to create your new web site? [.]
> What will be the title of this web site? my project
> Who will be the author of this web site? patraqushe
> What will be the default language of this web site? [en] ja
> Do you want to specify a URL prefix? e.g., http://example.com   (Y/n) n
> Do you want to enable article pagination? (Y/n) n
> What is your time zone? [Europe/Paris] Asia/Tokyo
> Do you want to generate a Fabfile/Makefile to automate generation and publishing? (Y/n) y
> Do you want an auto-reload & simpleHTTP script to assist with theme and site development? (Y/n) y
> Do you want to upload your website using FTP? (y/N) n
> Do you want to upload your website using SSH? (y/N) n
> Do you want to upload your website using Dropbox? (y/N) n
> Do you want to upload your website using S3? (y/N) n
> Do you want to upload your website using Rackspace Cloud Files? (y/N) n
> Do you want to upload your website using GitHub Pages? (y/N) n
Done. Your new project is available at /home/driller/pelican/my_project
pelican-ipynbをインストール
my_projectディレクトリにて
$ mkdir plugins
$ git clone https://github.com/danielfrg/pelican-ipynb.git plugins/ipynb
$ vi pelicanconf.py
pelicanconf.pyに以下を追記
MARKUP = ('md', 'ipynb')

PLUGIN_PATH = './plugins'
PLUGINS = ['ipynb']
作成したnotebookを配置
今回はcontentディレクトリに.ipynbファイル用のディレクトリを用意します。
contentディレクトリ直下でも構いません。
my_projectディレクトリにて
$ cd content/
$ mkdir notebook
jupyter notebookにて作成した.ipynbファイルをmy_project/content/notebookディレクトリに置きます。
そして、<同名のファイル名>-metaというファイルを作成します。
今回はtest01.ipynbというファイル名で用意しました。
$ cd notebook/
$ ls
test01.ipynb
$ vi test01.ipynb-meta
test01.ipynb-metaの内容
Title: notebook test
Slug: test01
Date: 2015-12-18 0:00
Category: Pelican
Tags: Python, Pelican, Jupyter
Author: patraqushe
Summary: jupyter notebook article
サイトのビルド/確認
my_projectディレクトリに戻って、make htmlでサイトをビルドし、make serveでサーバを起動します。
$ ls
test01.ipynb  test01.ipynb-meta
$ cd ../..
$ make html
$ make serve
ブラウザでhttp://localhost:8000にアクセスするとこのような画面になります。
あとはテーマや設定を色々と変えてお好みに調整します。
