Vert.xとは、公式ページより
JVM上にリアクティブアプリケーションを構築するためのツールキットです
@timfox氏が中心となって、現在2015年6月22日を目標にversion 3が開発されています。この投稿含め何回かに分けてVert.x 3の動くサンプルを実装していこうと思います。
概要
今回は、公式によるWebアプリケーションフレームワークApexを用いてシンプルなRESTサーバを動かしてみます。
Vert.x coreはHTTP、TCP、ファイルシステムへのアクセス等低レベルの機能のみを実現しており、このうえにウェブアプリケーションを構築する際に必要となる多くの機能を提供するのがApexです。Node.jsでいうところのExpress、RubyでいうところのSinatraのようなライブラリです。
今回は簡便のためにデータはオンメモリに保存します、データをデータベースに保存するサンプルは引き続く投稿で紹介します。
前提
Vert.x 3はJava 8が必須となります、あらかじめJava 8をインストールしておいてください。Java 8がインストールできているかは以下コマンドで確認できます:
$ java -version
java version "1.8.0_45"
Java(TM) SE Runtime Environment (build 1.8.0_45-b14)
Java HotSpot(TM) 64-Bit Server VM (build 25.45-b02, mixed mode)
また、IntelliJを前提に解説しています、Eclipse等他のIDEの場合適宜読み替えてください。
手順
ひな形のクローン
まずひな形となるプロジェクトをクローンします。
$ git clone https://github.com/p-baleine/vertx-gradle-template.git simple-rest-server
$ cd simple-rest-server
$ git remote rm origin # origin削除
IntelliJでインポート
IntelliJを起動してWelcomeダイアログで[Import Project]を選択し、クローンした際にできたディレクトリを選択します。
Import Projectのダイアログで、[Import project from external model]にチェックを入れて、[Gradle]を選択し[Next]をクリックし、次に表示される画面で[Finish]をクリックします。
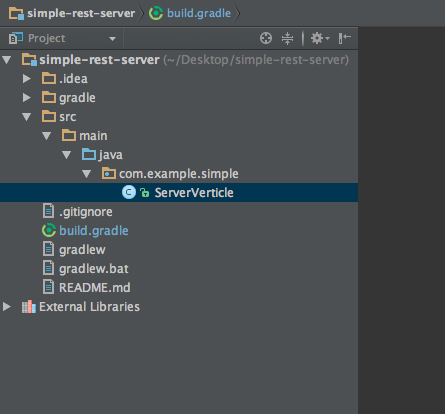
ServerVerticle
起点となるServerVerticleを実装します。
IntelliJでProjectヒエラルキーにてcom.example.helloworldパッケージを右クリックして[Refactor]→[Rename]を選択、com.example.simpleにリネームします。
IntelliJでProjectヒエラルキーにてcom.example.simpleパッケージ下のHelloWorldVerticleを右クリックして[Refactor]→[Rename]を選択、ServerVerticleにリネームします。
Apexを利用するので、build.gradleを開いてdependenciesにApexを追加します。
...
dependencies {
    compile 'io.vertx:vertx-core:3.0.0-milestone4'
    compile 'io.vertx:vertx-apex:3.0.0-milestone4' // 追加
}
...
IntelliJで[View]→[Tool Windows]→[Gradle]を選択してGradle Projectsビューを表示したら、同期アイコンをクリックして依存関係を読み込みます。
com.example.simple下のServerVerticleを開いて内容を以下の通り編集します。
package com.example.simple;

import io.vertx.core.AbstractVerticle;
import io.vertx.core.json.JsonArray;
import io.vertx.core.json.JsonObject;
import io.vertx.ext.apex.Router;
import io.vertx.ext.apex.RoutingContext;
import io.vertx.ext.apex.handler.BodyHandler;

import java.util.HashMap;
import java.util.Map;

public class ServerVerticle extends AbstractVerticle {

  private Map<String, JsonObject> store = new HashMap<String, JsonObject>() {
    {
      put("1", new JsonObject().put("id", "1").put("name", "Egg Whisk").put("price", 150));
      put("2", new JsonObject().put("id", "2").put("name", "Tea Cosy").put("price", 100));
      put("3", new JsonObject().put("id", "3").put("name", "Spatula").put("price", 30));
    }
  };

  @Override
  public void start() throws Exception {
    Router router = Router.router(vertx);

    router.route().handler(BodyHandler.create());

    router.get("/products").handler(this::handleListProduct);

    vertx.createHttpServer().requestHandler(router::accept).listen(8080);
  }

  private void handleListProduct(RoutingContext routingContext) {
    JsonArray result = new JsonArray();
    store.values().forEach(result::add);
    routingContext.response()
        .putHeader("Content-Type", "application/json")
        .end(result.encode());
  }
}
アプリの起動
IntelliJの[Run]→[Edit Configurations...]を選択します。
Run/Debug Configurationsダイアログで[+]→[Application]を選択します。
以下の通り入力して、[OK]をクリックします:
- Name: Simple
- Main classs: io.vertx.core.Starter
- Program arguments: run com.example.simple.ServerVerticle
IntelliJの[Run]→[Run 'Simple']を選択します、IntelliJ上のコンソールで、エラーなく起動することを確認します
IntelliJの[Run]→[Edit Configurations...]を選択します。
確認
以下コマンドを実行して、プロダクト一覧が返却されることを確認します:
$ curl -D - localhost:8080/products                                    ⬡ 0.10.30 [±master]
HTTP/1.1 200 OK
Content-Type: application/json
Content-Length: 123

[{"id":"1","name":"Egg Whisk","price":150},{"id":"2","name":"Tea Cosy","price":100},{"id":"3","name":"Spatula","price":30}]
解説
src/main/java/com/example/simple/ServerVerticleのstartメソッドの中ではRouterのインスタンスを生成した後、BodyHandlerの登録、ルーティングの登録を行っています。Expressを利用したことのある人には見慣れたコードだと思います。BodyHandlerの他にもApexには組み込みでログ出力するハンドラやテンプレートエンジンを登録するハンドラがあり、またカスタムのハンドラを実装して登録することも可能です。またルーティングもExpressと同様の感覚で設定できます、詳しくはApexのドキュメントを参照してください。
今回はServerVerticleが唯一のVerticleです。デフォルトの挙動に従いこのVerticleはevent-loop threadがひとつのみ割り当てられることが保証されます。そのためこのVerticleのstoreフィールドはこのスレッドにローカルなフィールドとなります。実際にはスケールするためにServerVerticleは複数インスタンス起動することになり、その場合Verticle間でのデータの共有が必要になりますが、そのためには別の機構ーデータベースやShared Data等を用いる必要があります。
一覧表示以外を実装した完全なコードはこちらに置いてあります。