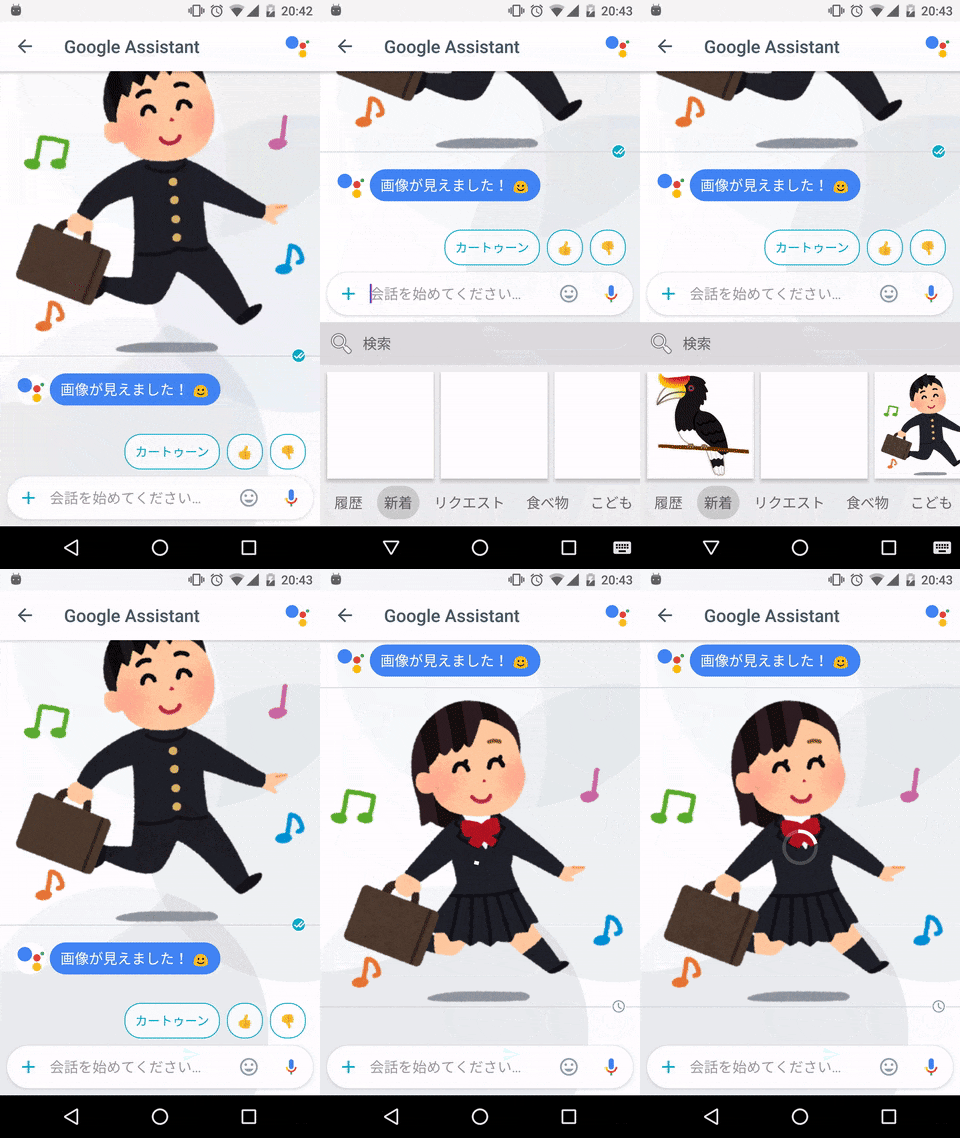
作ったもの
手っ取り早く試したい場合はapkをどうぞ。
Image Keyboard
前回はこんな記事を書きました。
App ShortcutsはいいからまずはImage Keyboardをサポートしたほうがいい
http://qiita.com/oxsoft/items/47337bfa137e2b03b66c
サポートライブラリを使うことで、キーボードから画像を入力することができるようになりました。
今回はこれを、みんな大好きいらすとやで作ってみました ![]()
キーボードの作成
Serviceの作成
キーボードを作るので、InputMethodServiceを継承したクラスを作成します。
public class MainService extends InputMethodService {
    @Override
    public View onCreateInputView() {
        View inputView = getLayoutInflater().inflate(R.layout.view_keyboard, null);
        // inputViewの設定
        return inputView;
    }

    @Override
    public void onStartInputView(EditorInfo editorInfo, boolean restarting) {
        // 入力欄に応じた処理
    }
}
xmlの作成
キーボードの情報をシステムに伝えるために、res/xmlにmethod.xmlを作成します。
<?xml version="1.0" encoding="utf-8"?>
<input-method xmlns:android="http://schemas.android.com/apk/res/android">
    <subtype
        android:imeSubtypeLocale="jp_JP"
        android:imeSubtypeMode="keyboard"
        android:label="@string/label" />
</input-method>
AndroidManifestの修正
作成したServiceとxmlをAndroidManifestで宣言します。
<manifest ...>
    <application ...>
        ...
        <service
            android:name=".MainService"
            android:label="@string/app_name"
            android:permission="android.permission.BIND_INPUT_METHOD">
            <meta-data
                android:name="android.view.im"
                android:resource="@xml/method" />
            <intent-filter>
                <action android:name="android.view.InputMethod" />
            </intent-filter>
        </service>
    </application>
</manifest>
ここまでは、今までのキーボード作成と同じですね。
Image Keyboardをサポートしているかチェック
入力欄がImage Keyboardをサポートしていなければ何もできないので、onStartInputView内でチェックします。
基本的にはAdding Image Support to IMEsに書いてある通りですが、今回扱う画像はpngなので、そこだけ修正します。
@Override
public void onStartInputView(EditorInfo editorInfo, boolean restarting) {
    String[] mimeTypes = EditorInfoCompat.getContentMimeTypes(editorInfo);

    boolean pngSupported = false;
    for (String mimeType : mimeTypes) {
        if (ClipDescription.compareMimeTypes(mimeType, "image/png")) {
            pngSupported = true;
        }
    }

    // サポートしていない場合はその旨を表示
    unsupported.setVisibility(pngSupported ? View.GONE : View.VISIBLE);
}
画像を送信
これもAdding Image Support to IMEsに書いてある通りですが、gifをpngにしました。
ただ今回は、web上にある画像を使っているので、付加情報としてlinkUriを付けるようにしました。(Gboardもそうなっていたので)
private void commitPngImage(Uri contentUri, String imageDescription, Uri linkUri) {
    InputContentInfoCompat inputContentInfo = new InputContentInfoCompat(contentUri, new ClipDescription(imageDescription, new String[]{"image/png"}), linkUri);
    InputConnection inputConnection = getCurrentInputConnection();
    EditorInfo editorInfo = getCurrentInputEditorInfo();
    int flags = 0;
    if (android.os.Build.VERSION.SDK_INT >= 25) {
        flags |= InputConnectionCompat.INPUT_CONTENT_GRANT_READ_URI_PERMISSION;
    }
    InputConnectionCompat.commitContent(inputConnection, editorInfo, inputContentInfo, flags, null);
}
画像の取得
今回はいらすとやを題材にしているので、クロールして画像をアプリ内にキャッシュします。okhttp3を使うと以下のような感じです。詳しくはGitHubの方を参照してください。
Request request = new Request.Builder().url("画像のURL").build();
Response response = new OkHttpClient().newCall(request).execute();
InputStream input = response.body().byteStream();
OutputStream output = openFileOutput("画像のファイル名", MODE_PRIVATE);
byte[] buffer = new byte[65536];
int bytesRead;
while ((bytesRead = input.read(buffer)) != -1) {
    output.write(buffer, 0, bytesRead);
}
response.body().close();
ContentProviderの設定
ContentProviderを用意することで、アプリ内のデータを外部に提供することができます。FileProviderを使うことで、独自クラスを作成することなく、簡単に実装できます。
file_pathsの用意
xml/file_paths.xmlを以下のように作成します。
<?xml version="1.0" encoding="utf-8"?>
<paths>
    <files-path
        name="images"
        path="/" />
</paths>
今回はルートディレクトリにしていますが、ディレクトリを分けた方がいいかもしれません。
AndroidManifestの修正
FileProviderのauthoritiesを設定し、先ほどのxmlを指定します。
<manifest ...>
    <application ...>
        ...
        <provider
            android:name="android.support.v4.content.FileProvider"
            android:authorities="com.oxsoft.irasutoya.content"
            android:exported="false"
            android:grantUriPermissions="true">
            <meta-data
                android:name="android.support.FILE_PROVIDER_PATHS"
                android:resource="@xml/file_paths" />
        </provider>
    </application>
</manifest>
uriの取得
以上の設定をすることで、以下のように画像のuriを取得することができます。authoritiesをAndroidManifestに書いたものと一致させる必要があります。
File file = getFileStreamPath("画像のファイル名");
Uri uri = FileProvider.getUriForFile(this, "com.oxsoft.irasutoya.content", file);
このuriを、上で作成したcommitPngImageに渡せば、画像が入力できるというわけです。
まとめ
意外と簡単に画像入力を実装できることが分かりました。とはいえまだまだ画像入力に対応しているアプリが少ないですね ![]()
また、日本語入力を独自に実装することが難しかったため、Gboardにあるような検索機能をつけることができませんでした ![]()
何か間違いがあれば指摘していただけると幸いです ![]()
