主役:Nginx-rtmp-module
参考にさせて頂いたURL様:
AWS EC2サーバを適当に立てる
- ssh接続できるようにしておきます
- Amazon Linuxで作ってます
EC2のセキュリティグループでポートの許可
- Amazon Management ConsoleからEC2へ移動
- 左ペインのインスタンス
- 起動してる対象サーバのセキュリティグループを確認
- 左ペインのセキュリティグループ
- 先ほど確認したセキュリティグループを選択
- inboundを編集
- ルールの追加より↓
[カスタムTCPルール] | TCP | 1935 | 0.0.0.0/0
で保存します
AWS EC2にnginx-rtmp-module入れる
EC2へ接続後
sudo su -
yum update
yum groupinstall "Development Tools"
yum -y install pcre-devel zlib-devel openssl-devel

# Nginx, Nginx-rtmp-module Download
cd /usr/local/src/
wget http://nginx.org/download/nginx-1.8.0.tar.gz
tar -zxvf nginx-1.8.0.tar.gz
wget https://github.com/arut/nginx-rtmp-module/archive/master.zip
unzip master.zip

# build
cd nginx-1.8.0
./configure --with-http_ssl_module --add-module=../nginx-rtmp-module-master
make
make install
これでnginx-rtmp-moduleインストール完了です
nginx.confの編集
# 最後に下記rtmpの記述を追加

rtmp_auto_push on;
rtmp {
   server {
      listen 1935;
      chunk_size 4096;

      access_log logs/rtmp_access.log;

      ping 30s;
      ping_timeout 10s;

        application src {
            live on;
            push rtmp://localhost/hls;
        }
        application hls {
            live on;
            hls on;
            hls_path /usr/local/nginx/html/hls;
            hls_fragment 3s;
        }
   }
}
-
mkdirコマンドで /usr/local/nginx/html/hls フォルダを作成しておいてください
※ HLS用の.tsファイルは hls_path に保存され、一定時間経つと削除されていくようです。
index.htmlの編集
<!DOCTYPE html>
<html lang="en" class="">
<head>
  <link href="http://vjs.zencdn.net/4.2.0/video-js.css" rel="stylesheet">
  <script src="http://vjs.zencdn.net/4.2.0/video.js"></script>
</head>
<body>
  <video id="live test" class="video-js vjs-default-skin" controls autoplay
   preload="auto" width="640" height="360" data-setup='{}'>
    <source src="hls/<適当なkey>.m3u8" type='application/x-mpegURL'>
    <source src="rtmp://<サーバのIP>/src/<適当なkey>" type='rtmp/mp4'>
    <p class="vjs-no-js">
      To view this video please enable JavaScript, and consider upgrading to a web browser
      that <a href="http://videojs.com/html5-video-support/" target="_blank">supports HTML5 video</a>
    </p>
  </video>
</body>
</html>
- こんな感じでVideo.jsのCDNを噛ませます。
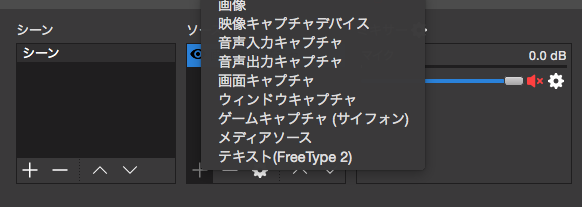
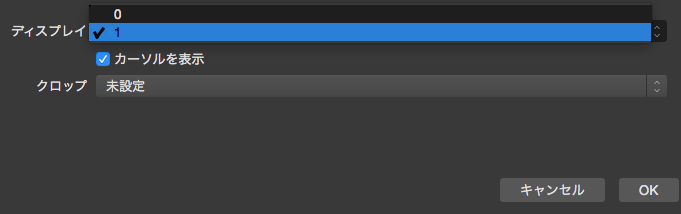
OBSインストール (配信, エンコードソフト)
OBS側の設定
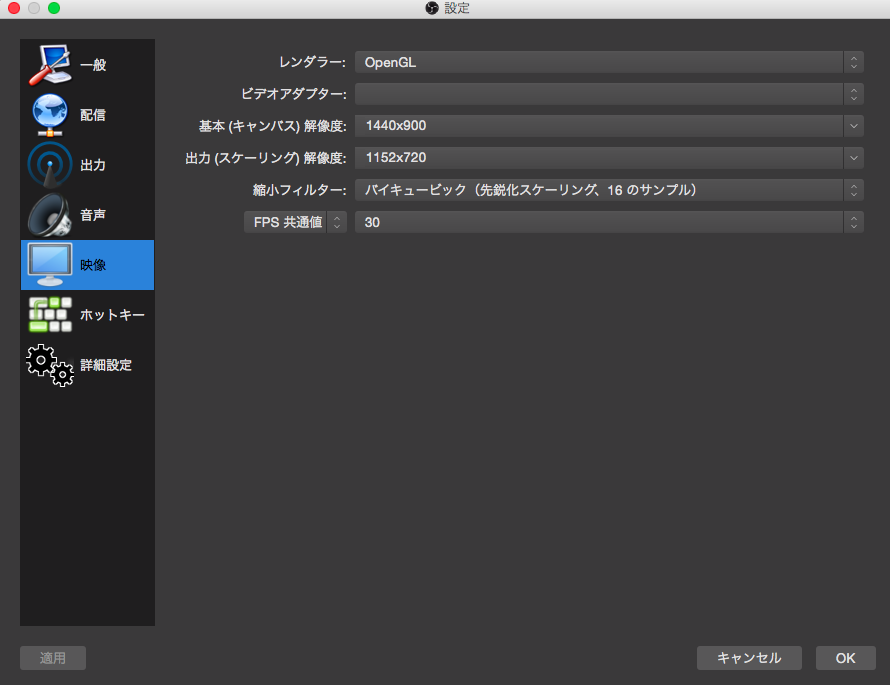
設定 -> 配信より 最低限、これだけは設定します
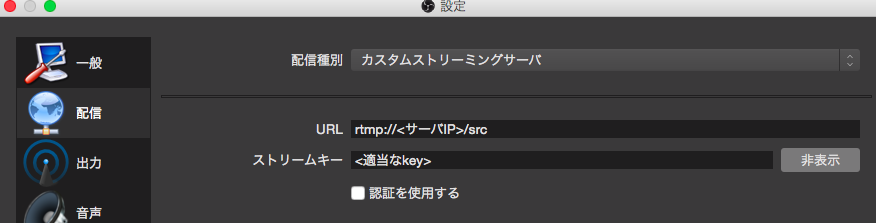
※それ以外(以下)はご参考程度まで

配信
あとはOBSで配信ボタンを押し接続エラーがでなければ、 ブラウザ(chromeとsafariなど)からhttp://<サーバIP>/ へアクセスして確認します。
- Chrome, Firefox(flash使う系) -> (RTMP)
- iOS系, Android -> (HLS)
に対応。

その他 Nginxの操作とか
- Nginx起動
/usr/local/src/nginx
- 停止
nginx -s stop
- リロード
nginx -s reload
- プロセス確認
ps -ef | grep nginx | grep -v grep
- 自分以外誰が見てるかなーコマンド(ただのaccess.logのtailです)
tail -f /usr/local/nginx/html/logs/access.log | grep -v "自分のIP"
- HLS用の.tsファイルがある場所とか
/usr/local/nginx/html/hls
- ディスク容量チェック(.tsファイルがちゃんと消えてくれるか最初不安な場合)
df
他 rtmp-moduleの機能などご紹介
- nginx-rtmp-module wiki > Directives > Table of Contents に使い方がたくさん載っています。
# 適当に引用例:
- record(録画モード)
syntax: record [off|all|audio|video|keyframes|manual]*
context: rtmp, server, application, recorder
Toggles record mode. Stream can be recorded in flv file. This directive specifies what exactly should be recorded:
- off - no recording at all
- all - audio & video (everything)
- audio - audio
- video - video
- keyframes - only key video frames
- manual - never start recorder automatically, use control interface to start/stop
There can be any compatible combination of keys in a single record directive.
record all;
record audio keyframes;
- [exec_push](https://github.com/arut/nginx-rtmp-module/wiki/Directives#exec_push)(コマンド実行)

 → ffmpegなどをexec_pushで実行させてhlsに変換しつつライブ配信、ということもできるようです。

>```
application myapp {
    live on;
    exec_pull ffmpeg -i http://example.com/video_$name.ts -c copy -f flv rtmp://localhost/$app/$name;
}
→ 他のストリーミングサーバへもpushできるようです。(UstreamとかYoutubeとかTwitchとか)
Syntax: push url [key=value]*
Context: application
Push has the same syntax as pull. Unlike pull push directive publishes stream to remote server.
参考:http://seesaawiki.jp/jaijai/d/Nginx%A4%C7RTMP%C6%B1%BB%FE%C7%DB%BF%AE
その他
-
html内にstream keyもろだしだけどいいの
→あまりよくはありませんので考え中です -
コメント機能とかつけてみたい
-
アクセス多い時とかCloudFrontとか意味あるのでしょうか
-
Nginxサードパーティモジュール:RTMPに限らず他にもいろんなmoduleがあるようです ヮ(゚д゚)ォ
以上殴り書きですが、見てくださってありがとうございました。