Crowi
Markdownで簡単に書けるWikiのようなものを探していたらよさげなのを見つけました
Crowi
Crowi - The Simple & Powerful Communication Tool Based on Wiki (github)
この記事を書いた時のCrowiのバージョンは1.4でした。
最新バージョンでの導入とは差異があるみたいです。
- Markdownがリアルタイムプレビューで書ける
- 投稿ユーザが設定できる
- nodejsとmongodbで動いて軽量
- 動作も軽快
インストール
環境
- Ubuntu 16.04.1 LTS (VirtualBox)
- MongoDB 3.2.10
- Node.js 4.6.1
- Crowi 1.4
準備
Crowiはgithubで管理されてるのでgitをインストール
Node.jsのモジュールのコンパイルのためにbuild-essentialとpythonをインストール
またkerberosというモジュールにlibkrb5-devが必要みたいなのでインストールしておきます
sudo apt-get update
sudo apt-get install build-essential python git libkrb5-dev
MongoDB
ここに書いてあるとおりに進めます
Install MongoDB Community Edition on Ubuntu
# 1 Import the public key used by the package management system
sudo apt-key adv --keyserver hkp://keyserver.ubuntu.com:80 --recv EA312927
# 2 Create a list file for MongoDB
echo "deb http://repo.mongodb.org/apt/ubuntu trusty/mongodb-org/3.2 multiverse" | sudo tee /etc/apt/sources.list.d/mongodb-org-3.2.list
# 3 Reload local package database
sudo apt-get update
# 4 Install the MongoDB packages.
sudo apt-get install mongodb-org
ちなみにここで使うapt-keyですがProxyがあるとそのまま動きません
--keyserver-optionを使ってProxyを指定する必要があります
ubuntuで認証プロキシ配下からapt-keyを使うとき
さらに16.04の場合、systemdが採用された関係からそのままだとmongodbが起動しないことがあります
この場合はmongodb.serviceを自分で書けばちゃんと動くようになります
How to Install MongoDB on Ubuntu 16.04
インストールできたらCrowi用のユーザを作っておきます
ユーザ名,パスワード,データベース名は適当に入力してください
後でCrowiのセットアップに使用します
$ mongo
> use DBNAME
switched to db DBNAME
> db.createUser({user: "USERNAME", pwd: "PASSWORD", roles: [{role: "readWrite", db: "DBNAME"}]})
Successfully added user: {
        "user" : "USERNAME",
        "roles" : [
                {
                        "role" : "readWrite",
                        "db" : "DBNAME"
                }
        ]
}
一応ユーザがちゃんとできてるか確認します
> use admin
switched to db admin
> db.system.users.find()
{ "_id" : "DBNAME.USERNAME", "user" : "USERNAME", "db" : "DBNAME", ~中略~ "roles" : [ { "role" : "readWrite", "db" : "DBNAME" } ] }
> exit
Node.js
Crowiは4.xのNode.jsが必要です.
しかしtrustyのapt-getだと0.10.xの古いバージョンが入ってしまいます.
apt searchするとこんな感じです.
apt search nodejs | grep nodejs

WARNING: apt does not have a stable CLI interface yet. Use with caution in scripts.

  unobtrusive notification system for nodejs
nodejs/trusty 0.10.25~dfsg2-2ubuntu1 amd64
nodejs-dbg/trusty 0.10.25~dfsg2-2ubuntu1 amd64
nodejs-dev/trusty 0.10.25~dfsg2-2ubuntu1 amd64
nodejs-legacy/trusty 0.10.25~dfsg2-2ubuntu1 all
リポジトリを追加してインストール
Ubuntuにリポジトリを追加して4.xをインストールする方法がここに書いてあります
NodeSource Node.js Binary Distributions
curlでもwgetでもどっちでもできると思います
wget -qO- https://deb.nodesource.com/setup_4.x | sudo -E bash -
ここでもう一度apt search nodejsするとちゃんと4.xのNode.jsが居るのが確認できます
apt search nodejs | grep nodejs

WARNING: apt does not have a stable CLI interface yet. Use with caution in scripts.

  unobtrusive notification system for nodejs
nodejs/unknown 4.4.7-1nodesource1~trusty1 amd64
nodejs-dbg/unknown 4.4.7-1nodesource1~trusty1 amd64
nodejs-dev/trusty 0.10.25~dfsg2-2ubuntu1 amd64
nodejs-legacy/trusty 0.10.25~dfsg2-2ubuntu1 all
あとはインストールするだけです
sudo apt-get install nodejs
ちゃんと4.xのNode.jsが入りました
nodejs -v
v4.6.1
Crowi
git cloneしてnpm installするだけです
結構時間がかかるので待ちます
git clone --depth 1 https://github.com/crowi/crowi.git
cd crowi
npm install
ちなみにやっぱりProxy環境下だとnpm installがができません
プロキシ環境下でnpm installを実行する
libkrb5-devのインストールを行っておけば以下のエラーは出ません
kerberosのビルドでエラーを吐いてしまっている
make: Entering directory `/usr/lib/node_modules/kerberos/build'
CXX(target) Release/obj.target/kerberos/lib/kerberos.o
In file included from ../lib/kerberos.cc:1:0:
../lib/kerberos.h:5:27: fatal error: gssapi/gssapi.h: No such file or directory
#include
> libkrb5-devをインストールすればいいらしいのでインストール

> ```bash
sudo apt-get install libkrb5-dev
libkrb5-devをインストール後kerberosを単体でインストールするとちゃんとできます
sudo npm install -g kerberos
kerberos@0.0.21 /usr/lib/node_modules/kerberos
└── nan@2.3.5
もう一度crowiをnpm installしたらちゃんとできました

```bash
npm install
/
> crowi@1.4.0 postinstall /home/USERNAME/crowi
> gulp

[02:12:57] Using gulpfile ~/crowi/gulpfile.js
[02:12:57] Starting 'css:sass'...
[02:12:57] Starting 'js:del'...
[02:12:57] Finished 'js:del' after 106 ms
[02:12:57] Starting 'js:concat'...
[02:12:57] Finished 'js:concat' after 178 ms
[02:12:57] Starting 'webpack'...
[02:13:03] Finished 'css:sass' after 6.04 s
[02:13:03] Starting 'css:concat'...
[02:15:26] Finished 'css:concat' after 2.38 min
[02:15:26] Starting 'css:min'...
[02:15:39] Finished 'css:min' after 13 s
[02:16:31] Version: webpack 1.13.1
          Asset       Size  Chunks             Chunk Names
       admin.js  611 bytes       0  [emitted]  admin
         app.js     687 kB       1  [emitted]  app
       crowi.js     591 kB       2  [emitted]  crowi
        form.js    6.34 kB       3  [emitted]  form
presentation.js    52.6 kB       4  [emitted]  presentation
[02:16:32] Finished 'webpack' after 3.57 min
[02:16:32] Starting 'js:min'...
[02:16:32] Finished 'js:min' after 222 ms
[02:16:32] Starting 'default'...
[02:16:32] Finished 'default' after 33 μs
inline-attachment@2.0.2 node_modules/inline-attachment
実行
環境変数で設定を行い,最後にnode app.jsを実行してCrowiを立ち上げます
PASSWORD_SEED=somesecretstring MONGO_URI=mongodb://USERNAME:PASSWORD@localhost/DBNAME node app.js
とりあえず最低限MONGO_URIだけ設定すればその他はデフォルト値が入って動くみたいです
PASSWORD_SEEDに値がない場合は自動生成されるようです
詳しくはCrowiのgithubを参照
ただ,PASSWORD_SEEDはユーザ登録時のパスワードからハッシュを生成するためのシード値ですので,
これを変えると既存ユーザがログインできなくなってしまうので注意が必要です
crowiディレクトリ直下にこんなスクリプトを書いて置いておけば簡単かも
export PASSWORD_SEED=somesecretstring
export MONGO_URI=mongodb://USERNAME:PASSWORD@localhost/DBNAME
node app.js
あとは実行するだけです
chmod +x crowi.sh
./crowi.sh
デフォルトポートは3000です
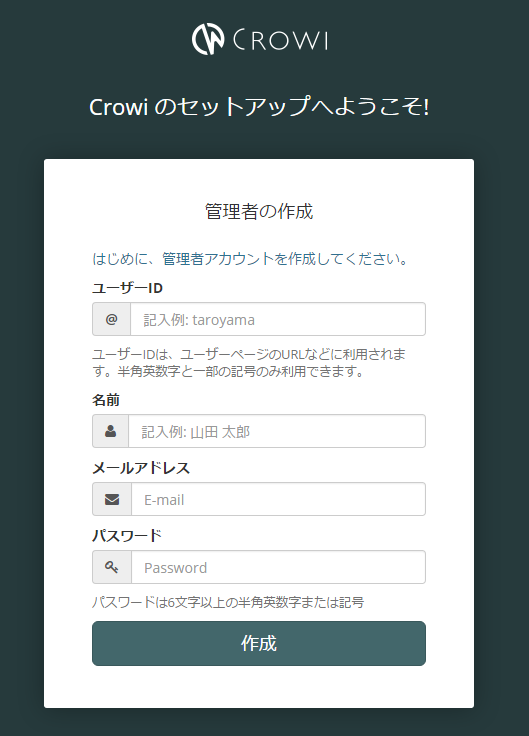
http://localhost:3000/でcrowiにアクセスできます
詳しくはCrowiのgithubに書いてあります
systemdで自動起動
crowiをsystemdで自動起動できるようにします
以下のサイトを参考にさせていただきました
Crowi を CentOS7 にインストール
Systemdを使ってさくっと自作コマンドをサービス化してみる
systemdでユーザーの環境変数を読み込むようにする
まずcrowiディレクトリを適当に移動します
sudo mv crowi /usr/local/bin/
次にsystemdのための定義ファイルを作成します
絶対パスで指定してください
[Unit]
Description=Crowi - The Simple & Powerful Communication Tool Based on Wiki
After=network.target mongod.service

[Service]
WorkingDirectory=/usr/local/bin/crowi
EnvironmentFile=/etc/systemd/system/crowi.conf
ExecStart=/usr/bin/node app.js

[Install]
WantedBy=multi-user.target
| 変数 | |
|---|---|
| Description | この.serviceファイルの説明 |
| After | ネットワーク起動後、mongodbの起動後に開始 |
| WorkingDirectory | コマンドを実行する場所(作業ディレクトリ) |
| EnvironmentFile | 環境変数を読み込むファイル |
| ExecStart | 実行するコマンド |
こちらが環境変数を設定するEnvironmentFileです
PORT=3000
MONGO_URI="mongodb://USERNAME:PASSWORD@localhost/DBNAME"
PASSWORD_SEED=somesecretstring
FILE_UPLOAD=local
ファイルが用意出来たら認識されているか確認します
sudo systemctl list-unit-files --type=service |grep crowi
crowi.service                              disabled
問題なさそうです
enableで自動起動を有効にし、startで開始します
sudo systemctl enable crowi
sudo systemctl start crowi
再起動して自動起動できているか確認します
$ sudo systemctl list-unit-files --type=service |grep crowi
crowi.service                              enabled

$ systemctl status crowi.service
● crowi.service - Crowi - The Simple & Powerful Communication Tool Based on Wiki
   Loaded: loaded (/etc/systemd/system/crowi.service; enabled; vendor preset: enabled)
   Active: active (running) since 火 2016-07-19 13:37:27 JST; 13min ago
 Main PID: 769 (node)
    Tasks: 9
   Memory: 87.0M
      CPU: 1.477s
   CGroup: /system.slice/crowi.service
           └─769 /usr/bin/node app.js

 7月 19 13:37:27 ubuntuVM systemd[1]: Started Crowi - The Simple & Powerful Communication Tool Based on Wiki.
 7月 19 13:37:51 ubuntuVM node[769]: [development] Express server listening on port 3000
正しく起動できているようです
最後にブラウザからアクセスを確認して終了です
