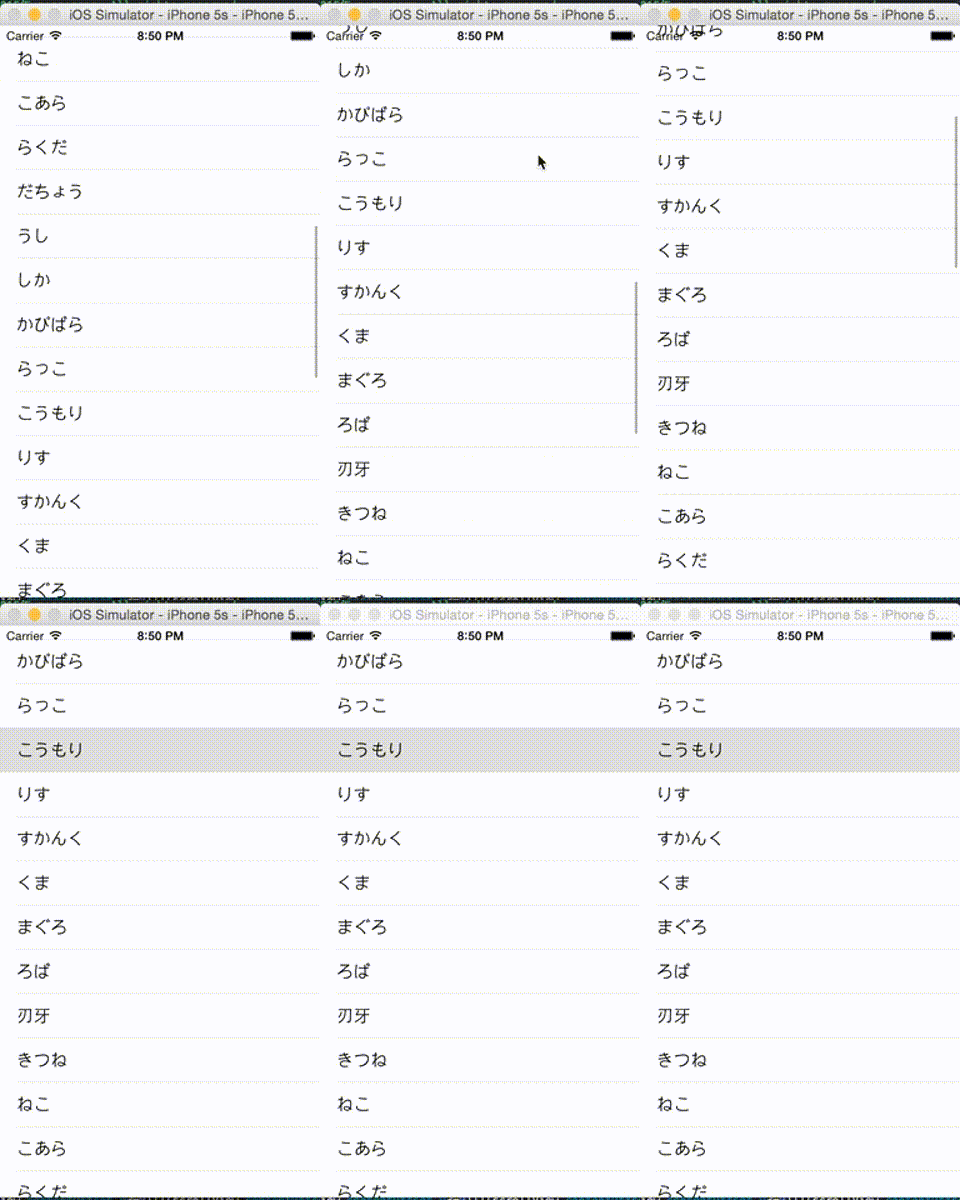
無限スクロールしたいですか?
したい。
概要
- 通常表示する要素群の上下に同じ要素群を付け足す
- 上下の要素群より先に行こうとした場合、中心の要素群にワープさせる
条件
セルの描画が画面をはみ出す量ある
セクションが1つ
方法
まずは普通にUITableviewを作る
class ViewController: UITableViewController {

    private var messages:[String] = ["きつね","ねこ","こあら","らくだ","だちょう","うし","しか","かぴばら","らっこ","こうもり","りす","すかんく","くま","まぐろ","ろば","刃牙"]

    override func viewDidLoad() {
        super.viewDidLoad()
    }

    // MARK: - Table view data source

    override func numberOfSectionsInTableView(tableView: UITableView) -> Int {
        return 1//必ず1
    }

    override func tableView(tableView: UITableView, numberOfRowsInSection section: Int) -> Int {
        return messages.count
    }

    override func tableView(tableView: UITableView, cellForRowAtIndexPath indexPath: NSIndexPath) -> UITableViewCell {
        let cell = UITableViewCell(style: .Default, reuseIdentifier: "cell")
        cell.textLabel?.text = "\(messages[indexPath.row])"
        return cell
    }
}
次に、上下の要素をつけるので以下を修正
    override func tableView(tableView: UITableView, numberOfRowsInSection section: Int) -> Int {
        return messages.count * 3//上下を追加するので数は3倍
    }

    override func tableView(tableView: UITableView, cellForRowAtIndexPath indexPath: NSIndexPath) -> UITableViewCell {
        let cell = UITableViewCell(style: .Default, reuseIdentifier: "cell")
        //要素の中身を合わせる
        let fixedIndex = NSIndexPath(forRow: indexPath.row%messages.count, inSection: 0)
        cell.textLabel?.text = "\(messages[fixedIndex.row])"
        return cell
    }
これで
[要素群T]
[要素群C]
[要素群B]
という並びになる。
このままだと表示時に要素群Tが初めに表示されてしまうので、表示群Cに合わせる
    //通常の表示の場合のcontentSizeの高さ
    private var aTableCellsHeight:CGFloat{
        get {return CGFloat(messages.count)*44.0}
    }

    override func viewDidLoad() {
        super.viewDidLoad()

        tableView.contentOffset.y = aTableCellsHeight
    }
この44.0というのはデフォルトの高さなので、任意に設定している場合はheightForRowAtIndexPathなどで取ると良い
viewDidLoadに記述したが、もっと適切な場所がありそう。
これで
[要素群T]
[要素群C]◀︎
[要素群B]
のように起動時に中心の要素群が表示される。
最後にscrollViewDidScrollではみ出しそうになったら中心に戻す処理を施せばループができる
    override func scrollViewDidScroll(scrollView: UIScrollView) {
        /**端に行った際に中央にセットしなおす*/
        if (scrollView.contentOffset.y<=0)||(scrollView.contentOffset.y>=aTableCellsHeight*2.0) {
            scrollView.contentOffset.y = aTableCellsHeight
        }
    }
横のインジケーターを見ると動きがわかりやすい。
実際に使う場合はインジケーターは隠そう。
注意点として、setContentOffsetなどで上下の要素群へ移動しようとすると場所がズレたりするのでその場合は移動前に中心の要素群の同じ要素の場所にジャンプさせてから行うと良い。
以上!
以下は今回のソースコードの全文(githubにわざわざあげるのめんどいので直張り)
import UIKit

class ViewController: UITableViewController {

    private var messages:[String] = ["きつね","ねこ","こあら","らくだ","だちょう","うし","しか","かぴばら","らっこ","こうもり","りす","すかんく","くま","まぐろ","ろば","刃牙"]

    //通常の表示の場合のcontentSizeの高さ
    private var aTableCellsHeight:CGFloat{
        get {return CGFloat(messages.count)*44.0}
    }

    override func viewDidLoad() {
        super.viewDidLoad()

        tableView.contentOffset.y = aTableCellsHeight
    }

    // MARK: - Table view data source

    override func numberOfSectionsInTableView(tableView: UITableView) -> Int {
        //必ず1
        return 1
    }

    override func tableView(tableView: UITableView, numberOfRowsInSection section: Int) -> Int {
        //上下を追加するので数は3倍
        return messages.count * 3
    }

    override func tableView(tableView: UITableView, cellForRowAtIndexPath indexPath: NSIndexPath) -> UITableViewCell {
        let cell = UITableViewCell(style: .Default, reuseIdentifier: "cell")
        //要素の中身を合わせる
        let fixedIndex = NSIndexPath(forRow: indexPath.row%messages.count, inSection: 0)
        cell.textLabel?.text = "\(messages[fixedIndex.row])"
        return cell
    }

    override func scrollViewDidScroll(scrollView: UIScrollView) {
        /**端に行った際に中央にセットしなおす*/
        if (scrollView.contentOffset.y<=0)||(scrollView.contentOffset.y>=aTableCellsHeight*2.0) {
            scrollView.contentOffset.y = aTableCellsHeight
        }
    }
}
