NetBeansでのxdebug設定方法
開発環境:Windows7 php5.5.19
自分の環境にあったxdebug.dllを探す方法
-
下記ソースでphpinfoを表示する。
<?php phpinfo() php?> -
http://xdebug.org/wizard.phpへ出力されたphpinfoをコピーして貼り付け、実行すると下記画面のようになる。
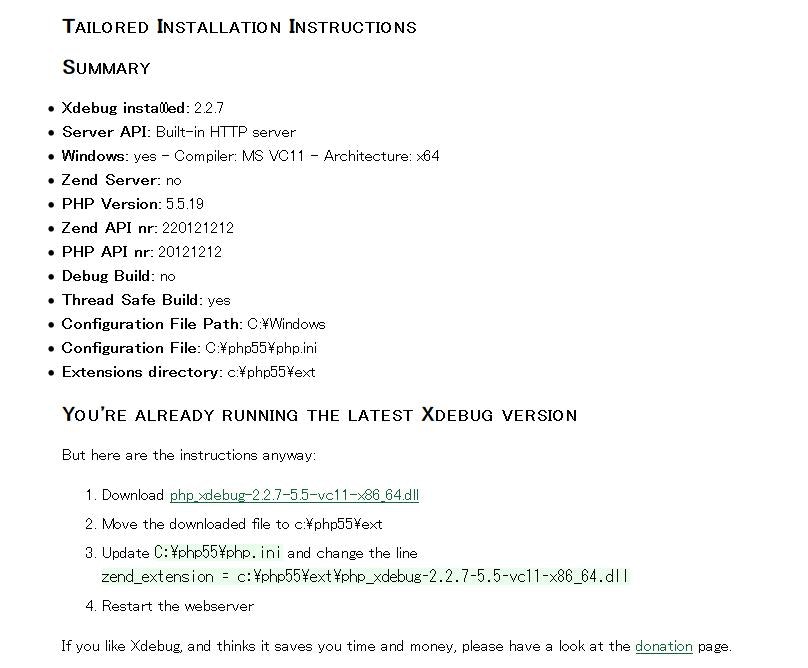
-
出力画面のdllダウンロードリンクからダウンロードして、記載の場所へdllを格納する。
-
php.iniファイルを変更する。
-
php.iniファイルの変更箇所(下記項目を追加した)
[XDebug] zend_extension="C:\php55\ext\php_xdebug-2.2.7-5.5-vc11-x86_64.dll" xdebug.remote_enable=1 xdebug.remote_host="127.0.0.1" xdebug.remote_port=9000 xdebug.remote_handler="dbgp" xdebug.idekey="netbeans-xdebug" xdebug.profiler_output_dir="C:\php55\tmp"
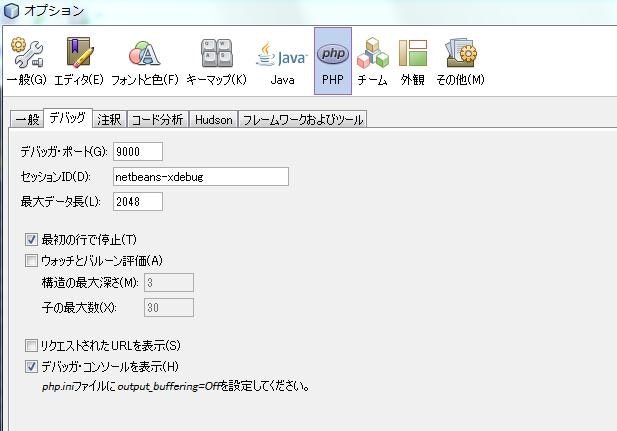
NetBeansでの変更箇所
- [ツール]-[オプション]-[php]を選択し、デバッグタブを選択する。(下記画面参照)
- デバッグポート、セッションIDをphp.iniへ記載したものへ変更する。
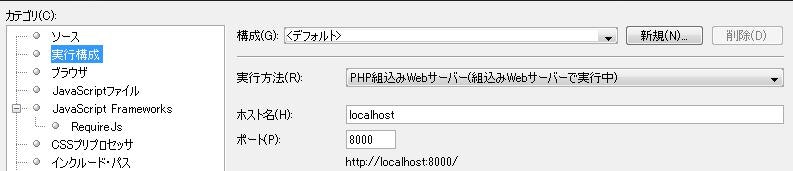
NetBeansプロジェクトを「PHP組込みWebサーバー」で実行する場合はアパッチの再起動は不要でNetBeansの再起動でOK。ローカルにインストールしたアパッチで動かす場合はアパッチ再起動が必要。