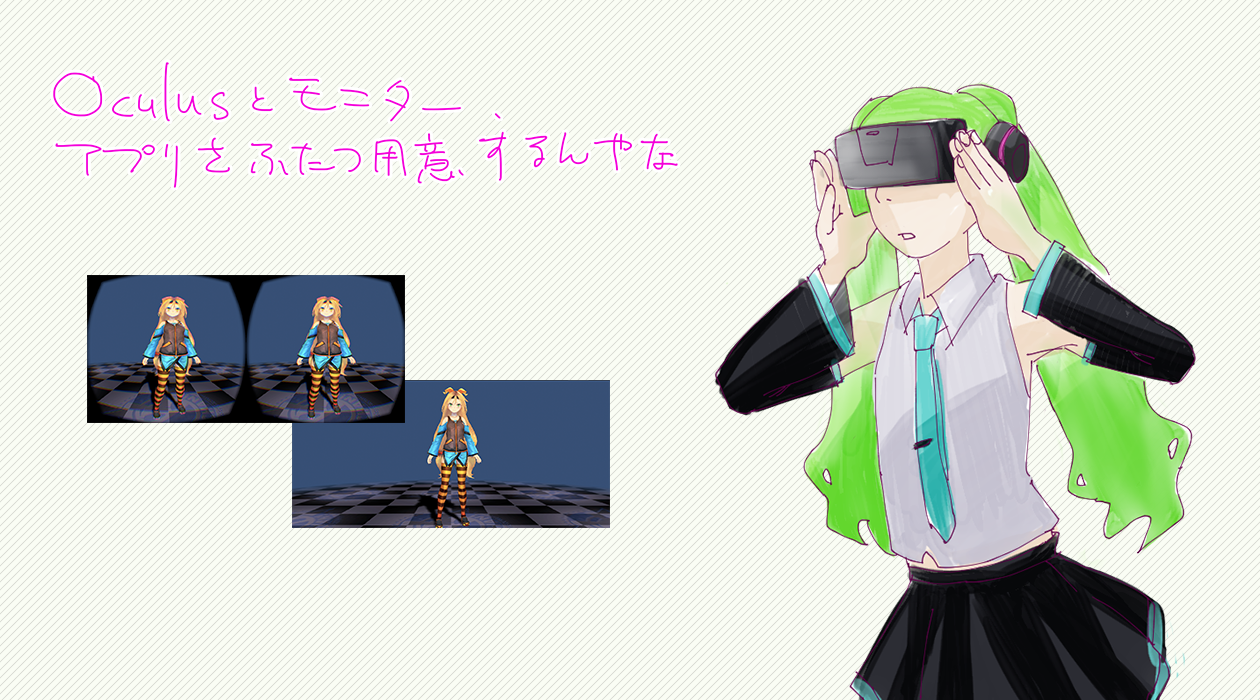
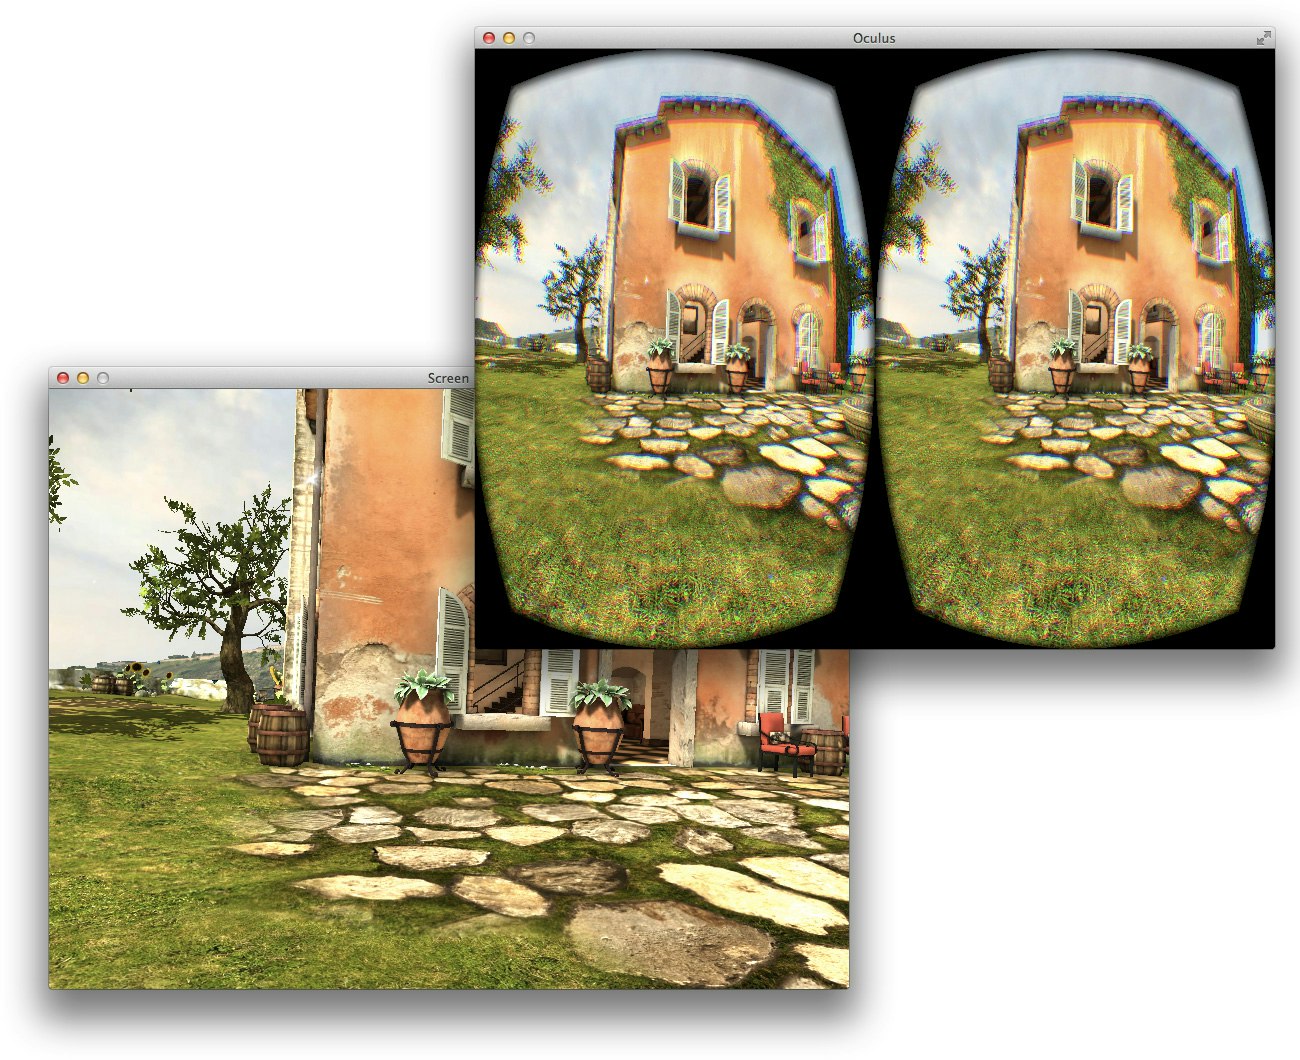
Oculus は体験者にしか映像が見えないため、イベントなどの場合は、Oculus の映像をミラーリングで出力するのが一般的かと思います。
しかし Oculus は二眼の映像になっていて、そのまま表示してもあまり見栄えが良くないです。
そこで出力用のアプリを用意して、きれいな一眼映像を表示できるようにします。
2つのアプリのカメラを同期させる
Oculus用と出力用アプリ、それぞれのカメラの位置と角度を OSC、WebSocket などで同期させます。
Unity の NetworkView であればスクリプトをほぼ書かずに済むので、今回はこの方法を紹介します。
(OculusUnityIntegration)[https://developer.oculus.com/downloads/] をインポートしたプロジェクトを例にして進めます。
基本的には、同期させたいものに NetworkView を追加していくことになります。
Oculus カメラ側シーンをつくる
まずは、Oculsu カメラ側の制御として、Tuscany/Scenes/VRDemo_Tuscany を開きます。
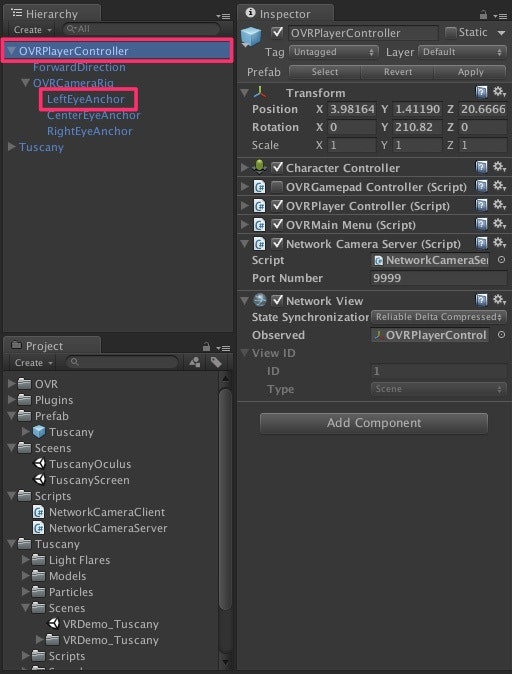
ヒエラルキーの OVRPlayerController と、OVRPlayerController/OVRCameraRig/LeftEyeAnchor に NetworkView コンポーネントを追加します。
赤枠の GameObject が同期される
次に、Oculus カメラ側をサーバーとする、スクリプトを作成します。
NetworkCameraServer.cs を新規作成し、OVRPlayerController に追加します。
using UnityEngine;
using System.Collections;

public class NetworkCameraServer : MonoBehaviour
{
    public int portNumber =  9999;

    void Start ()
    {
        Network.InitializeServer (4, portNumber, true);
    }
}
Screen カメラ側シーンをつくる
続いてプロジェクトペインの Tuscany/Scenes/VRDemo_Tuscany を複製し、出力用シーンを作ります。
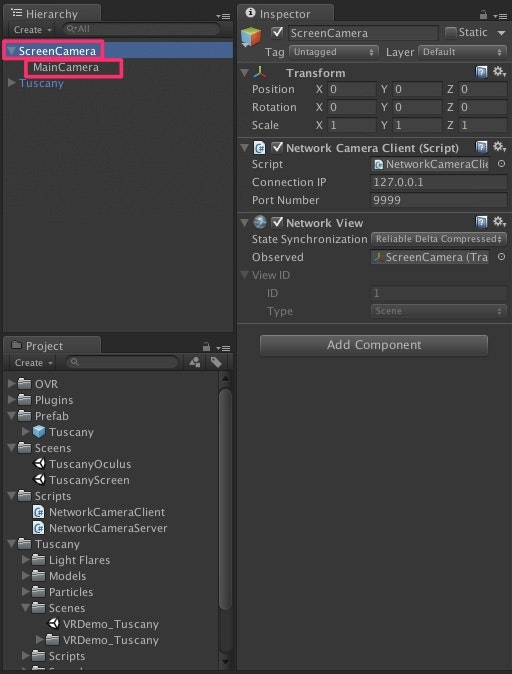
複製したシーンのヒエラルキーにある OVRカメラを削除し、通常のカメラを配置します。
空の GameObject を作成し、構造を OVRカメラと似せておきます。
そして先ほどと同様に NetworkView コンポーネントを追加します。
クライアント用スクリプトを作成し、追加します。
IPとポートは適宜変更してください
using UnityEngine;
using System.Collections;

public class NetworkCameraClient : MonoBehaviour
{
    public string connectionIP =  "127.0.0.1";
    public int portNumber =  9999;

    void Start ()
    {
        Network.Connect (connectionIP, portNumber);
    }
}
以上で準備は完了です。
アプリケーションにする
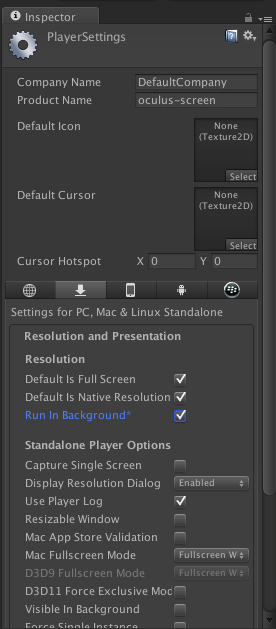
それぞれのシーンを別々のアプリとして書き出します。
同一PCで使用するのであれば、バックグラウンドで実行できるようにしておきます。
サーバーとなる、Oculus カメラのほうから起動させます。
接続が成功していると、Oculus の動きに合わせて、出力用カメラが回転します。
