Dialogの実装は面倒
AndroidのDialog実装は割りと面倒くさい。
API level 13でshowDialogが非推奨となってからはDialogFragmentを使うのが一般的になったためだ。
DialogFragmentを使うとコールバックや非同期処理に気を使わなくてはいけないため、どうしても直感的でない実装になることがある。
単純なダイアログ表示してボタンが押されたタイミングを知りたい、というだけの時には面倒に感じることもある。
この記事では面倒なダイアログ表示のかわりにPopupWindowによって表示する方法を紹介する。
PopupWindow
PopupWindowは文字通り画面の上にポップアップして表示される要素となる。
挙動としてはSpinnerやActionBarのOverflowボタンを押した時に出てくるリストに近い。
通常はViewのonClickなどに対応してそのViewの近くに表示したりするが、今回は画面中央に表示する。
実装
PopupWindowはAPI level 1から存在し、あまり変更が加えられていないため、実装も見た目も2.x系と4.x系でほとんど差がない。
背景Drawableの用意
PopupWindowには標準の背景が用意されているため、あまり拘りがなければ用意する必要はない。
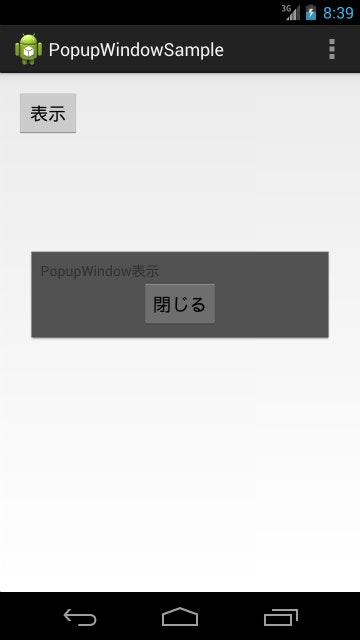
背景に何も指定しなかった場合、以下の様な灰色の背景色で表示される。

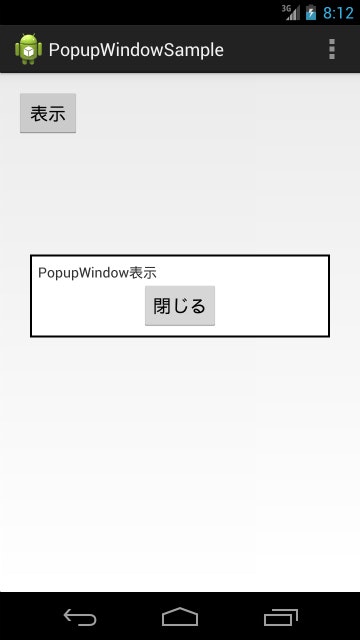
この標準の灰色背景のまま使うのは微妙、という場合には以下の様な背景Drawableを用意する。
ここでは単純に白背景に黒枠にした。
<?xml version="1.0" encoding="utf-8"?>
<shape xmlns:android="http://schemas.android.com/apk/res/android"
    android:shape="rectangle">
    <solid android:color="@android:color/white" />
    <stroke
        android:width="2dp"
        android:color="@android:color/black" />
</shape>
レイアウトの用意
ダイアログ同様、PopupWindowの中にもViewを配置することができる。
今回は以下のようなレイアウトを用意することにした。
親レイアウトでlayout_widthを指定してもPopupWindowの表示には反映されないので注意が必要。
後述するが、PopupWindowの幅はコード側で表示しなくてはいけない。
<LinearLayout xmlns:android="http://schemas.android.com/apk/res/android"
    android:layout_width="match_parent"
    android:layout_height="match_parent"
    android:orientation="vertical"
    android:padding="8dp">
    <TextView
        android:layout_width="match_parent"
        android:layout_height="wrap_content"
        android:text="PopupWindow表示" />
    <Button
        android:id="@+id/close_button"
        android:layout_width="wrap_content"
        android:layout_height="wrap_content"
        android:layout_gravity="center_horizontal"
        android:text="閉じる" />
</LinearLayout>
ソースコード
説明が長いので先にコードを貼る。
    private PopupWindow mPopupWindow;

    @Override
    public void onClick(View v) {

        mPopupWindow = new PopupWindow(MyActivity.this);

        // レイアウト設定
        View popupView = getLayoutInflater().inflate(R.layout.popup_layout, null);
        popupView.findViewById(R.id.close_button).setOnClickListener(new View.OnClickListener() {
            @Override
            public void onClick(View v) {
                if (mPopupWindow.isShowing()) {
                    mPopupWindow.dismiss();
                }
            }
        });
        mPopupWindow.setContentView(popupView);

        // 背景設定
        mPopupWindow.setBackgroundDrawable(getResources().getDrawable(R.drawable.popup_background));

        // タップ時に他のViewでキャッチされないための設定
        mPopupWindow.setOutsideTouchable(true);
        mPopupWindow.setFocusable(true);

        // 表示サイズの設定 今回は幅300dp
        float width = TypedValue.applyDimension(TypedValue.COMPLEX_UNIT_DIP, 300, getResources().getDisplayMetrics());
        mPopupWindow.setWindowLayoutMode((int) width, WindowManager.LayoutParams.WRAP_CONTENT);
        mPopupWindow.setWidth((int) width);
        mPopupWindow.setHeight(WindowManager.LayoutParams.WRAP_CONTENT);

        // 画面中央に表示
        mPopupWindow.showAtLocation(findViewById(R.id.show_button), Gravity.CENTER, 0, 0);
    }

    @Override
    protected void onDestroy() {
        if (mPopupWindow != null && mPopupWindow.isShowing()) {
            mPopupWindow.dismiss();
        }
        super.onDestroy();
    }
流れとしては、PopupWindowに設定するViewをinflateしてsetContentViewし、背景やフォーカス、表示サイズの設定後に表示処理となる。
Viewの生成~setContentViewまでは特に変わった処理ではないので割愛する。
背景は先ほど用意したDrawableをPopupWindow.setBackgroundDrawableで指定する。
レイアウト側で指定したい場合、以下のように透明Drawableを設定するとレイアウト側で定義したもののみ表示される。
mPopupWindow.setBackgroundDrawable(new ColorDrawable(android.R.color.transparent));
フォーカスについてはPopupWindow.setFocus(true)していない場合、直下のViewにタッチイベントが伝わってしまうため、ダイアログ風に使うときは必須となる。
PopupWindow.setOutsideTouchable(true)も同様の理由で設定。
一番面倒なのは表示サイズの設定。これはレイアウト側で指定することができない。
しかもsetWindowLayoutModeとsetWidth/setHeightの両方で指定する必要があった。
今回は幅300dpで表示することにしたが、pxで指定する必要が有るためTypedValueを使って変換している。
このソースコード上でサイズ設定をするというのがダイアログを置き換える上で一番のネックになりそう。
その他の注意点としては以下
- dissmissしないまま画面が終了すると落ちる(
onDestroyでPopupWindow.dismissする) -
PopupWindow.setWindowLayoutModeは2.x系には適用されない(っぽい) -
PopupWindow.setWidth、PopupWindow.setHeightは2.x系では必須。 -
PopupWindow.showAtLocationの第一引数は画面内のViewならなんでもいいっぽい
結果
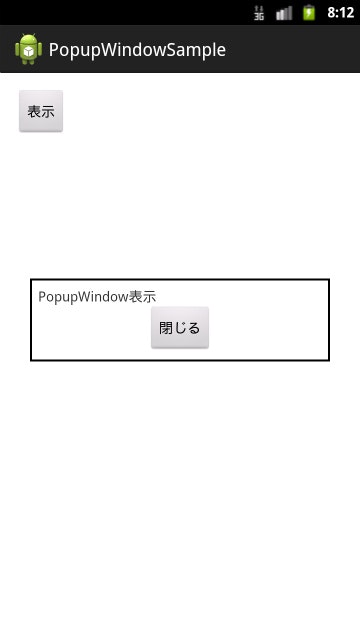
それぞれ、Android 4.2と2.3での表示例。
PopupWindowそのものにはほとんど差異はない。


まとめ
結構簡単な実装で表示できてコールバックも楽に取れるのは良い。
ソースコードで表示幅指定しなければいけない問題も、工夫すればできるんじゃないかという気はする。
でもDialogと違ってバージョンごとにボタン配置とかが最適化されていない問題もあるので、結局Dialogの代わりにはならないだろうなー。