Live2D Advent Calendar 2015の7日目の記事です。
Unity上でキャラクターの透明度をフェードイン・フェードアウトする方法を書きます。
ADVのキャラクター登場・退場時によくある表現ですねっ!
開発環境
・Live2D_SDK_Unity_2.1.00_1_jp
・Unity 5.1.1f1
フェードイン・アウトのやり方
パーツごとの透明度は変更できますが、モデル全体はRenderTextureを使う必要があります。
RenderTextureは、カメラの描画を投影してくれるテレビのようなテクスチャです。
(参考ページ:Live2Dの透明度とテクスチャカラー変更)
1から作るやり方をざらっと解説すると以下のような手順になります。
1)RenderTextreを作る
2)Live2Dモデルだけ映す専用カメラを作る
3)Live2D専用カメラに1で作ったレンダーテクスチャをセットする
4)Planeを作り、RenderTextureをテクスチャとして指定する
5)RenderTextureのシェーダーをUI/Defaultにすると透明度が変更できる
2015/12/09追記
Unity5.3からUI/Defaultの仕様が変わったのでSprites/Defaultを使って下さい
(Upgrading to Unity 5.3より)
あと綺麗にLive2Dモデルを描画するためには、以下どちらかの設定にする必要があります。
◆PlaneからQuadに変更し、Quadのscaleを2にする。メインカメラのorthographicSize=1にする
◆Live2DモデルのScaleを5にし、メインカメラのorthographicSize=5にする
→ Live2D SDKサンプルのRenderTexureプロジェクトの設定はこうなってた
メインカメラのorthographicSizeを変更するため、作り込んでいるアプリに組み込む場合には背景サイズなども合わせて修正が必要になるかと思います。
はい、ずらずらと解説しましたが少し手順が面倒くさいですねっ!!
こういうのはズバッとスクリプトを作って解決しましょう。
スクリプトで簡単に1ステップ実装する
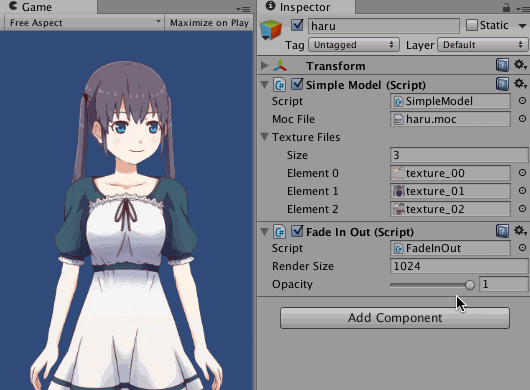
FaceInOut.csというスクリプトを作ったので、これをアタッチすればスライダーをいじるだけフェードインアウトできます(実行時のみ)
Live2D専用カメラを作成するので、メインカメラのorthographicSizeは変更なしです。
Quadなので、Particleなど半透明オブジェクトもLive2Dモデルの前に表示できます。
また、レンズフレアなどの表現と組み合わせる事もできます♪

左がRenderTextureなしデフォルト、右がRenderTexture使った場合
透明度を変更するスクリプト
ソースの仕組みはシンプルです。
Live2D専用カメラとQuadを動的に作成し、Live2DモデルはY軸をずらしてます。
ずらしたモデルをRenderTextureでQuadに表示しています。
また、RenderTextureのテクスチャサイズを変更すればより綺麗に表示されます。
using UnityEngine;
using System.Collections;

public class FadeInOut : MonoBehaviour {

	private RenderTexture renderTex;
	private GameObject Live2D_Quad;
	private GameObject Live2D_Cam;
	private Renderer Quad_render;
	private Camera dummyCam;
	// CameraとLive2DモデルのY軸ずらす
	private float transY =  60.0f;
	// ぼやける場合は2048にする
	public int renderSize = 1024;
	// シーンのLive2Dモデル数
	public static int Live2D_Count = 0;
	// 透明度調整用
	[Range(0.0f, 1.0f)]
	public float opacity = 1.0f;


	void Awake () {
		// モデル数カウント
		Live2D_Count++;
		// モデルごとにY軸をずらす
		transY = transY * Live2D_Count;

		// RenderTextureを生成
//		renderTex = new RenderTexture(renderSize, renderSize, 16, RenderTextureFormat.ARGB32);
		// 一時的なレンダリングテクスチャを割り当てます(迅速にRenderTextureを表示したい場合)
		renderTex = RenderTexture.GetTemporary(renderSize, renderSize, 16, RenderTextureFormat.ARGB32);

		// Quadを生成(RenderTexture描画用)
		Live2D_Quad = GameObject.CreatePrimitive(PrimitiveType.Quad);

		// Live2Dモデルの座標をセット
		Live2D_Quad.transform.position = gameObject.transform.position;

		// シェーダー指定とRenderTextureをセット
		Quad_render = Live2D_Quad.GetComponent<Renderer>();
		// Unity5.3からUI/Defaultが上手く機能しなくなったのでSpritesにする
		// Quad_render.material.shader = Shader.Find("UI/Default");
		Quad_render.material.shader = Shader.Find("Sprites/Default");
		Quad_render.material.SetTexture("_MainTex", renderTex);
		Quad_render.name = gameObject.name + "_Quad";

		// Live2DモデルのY軸をずらす
		gameObject.transform.position = new Vector3(0.0f, transY + gameObject.transform.position.y, 0.0f);

		// Live2Dを映す第2カメラ
		Live2D_Cam = new GameObject("Live2D Camera");
		Live2D_Cam.transform.position = new Vector3(0.0f, transY, -10.0f);
		Live2D_Cam.AddComponent<Camera>();

		// カメラの設定とRenderTextureをセット
		dummyCam = Live2D_Cam.GetComponent<Camera>();
		dummyCam.orthographic = true;
		dummyCam.orthographicSize = 1;
		dummyCam.clearFlags = CameraClearFlags.SolidColor;
		dummyCam.targetTexture = renderTex;

	}

	void Update () {
		// QuadとLive2Dモデルサイズを同期
		Live2D_Quad.transform.localScale = gameObject.transform.localScale * 4.0f;
		// orthographicSizeとLive2Dモデルサイズを同期
		dummyCam.orthographicSize = Mathf.Max(gameObject.transform.localScale.x, gameObject.transform.localScale.y) * 2.0f;

		if(Live2D_Quad){
			// Quadの透明度を動的に変更
			Quad_render.material.color = new Color(1.0f,1.0f,1.0f, opacity);
		}
	}

	void OnDestroy(){
		// Live2DのGameObjectが削除されたらダミーで作ったものも削除
		RenderTexture.ReleaseTemporary(renderTex);
		Destroy(Live2D_Cam);
		Destroy(Live2D_Quad);
		Live2D_Count--;
	}
}
その他のポイントなど
SDKサンプルのSampleApp1プロジェクトでは若干のカメラ位置やQuadサイズを変更してやる必要があります。
(SampleApp1のMainCameraがSize=9になっているので、Live2D専用カメラのorthographicSize=9にしてやる)
また、マウスのタッチ判定がY軸移動した分、ずれるのでタッチ判定もずらしてやる必要があります
(Demoプロジェクトのタッチは問題ないです)
明日はnoshipuさんのARネタですね、宜しくお願いしま〜す!
タイマーでフェードインアウト操作
------ 2015/12/10追記 ------
上記ソースでスライダー操作でフェードインできますが、一応タイマー表示版も公開しておきます。
以下のスクリプトはtestcode.csをuGUIボタンなどにアタッチして、ボタンイベントとして呼べば以下のように使えます。
using UnityEngine;
using System.Collections;
public class testcode : MonoBehaviour {
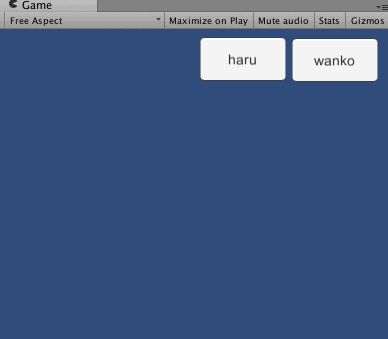
public GameObject haru; // Live2Dハルモデルのprefabをセット
public GameObject wanko; // Live2Dワンコモデルのprefabをセット
public void makeharu(){
FadeInOut_custom fadeScript = haru.GetComponent<FadeInOut_custom> ();
fadeScript.timerCnt = 0.0f;
fadeScript.opacity = 0.0f;
fadeScript.pause = false;
fadeScript.fadeIn = true;
// ハルを生成
Instantiate(haru);
}
public void makewanko(){
FadeInOut_custom fadeScript = wanko.GetComponent<FadeInOut_custom> ();
fadeScript.timerCnt = 0.0f;
fadeScript.opacity = 0.0f;
fadeScript.pause = false;
fadeScript.fadeIn = true;
// ワンコを生成
Instantiate(wanko);
}
}
using UnityEngine;
using System.Collections;

public class FadeInOut_custom : MonoBehaviour {

	private RenderTexture renderTex;
	private GameObject Live2D_Quad;
	private GameObject Live2D_Cam;
	private Renderer Quad_render;
	private Camera dummyCam;
	// CameraとLive2DモデルのY軸ずらす
	private float transY =  60.0f;
	// ぼやける場合は2048にする
	public int renderSize = 1024;
	// シーンのLive2Dモデル数
	public static int Live2D_Count = 0;
	// 透明度調整用
	[Range(0.0f, 1.0f)]
	public float opacity = 1.0f;

	// FedeInOut用のタイマー
	public float timerCnt = 0.0f;
	public float fadespeed = 0.9f;
	public bool fadeIn = true;
	public bool pause = true;


	void Awake () {
		Live2D_Count++;
		// モデルごとにY軸をずらす
		transY = transY * Live2D_Count;

		// RenderTextureを生成
		// 一時的なレンダリングテクスチャを割り当てます(迅速にRenderTextureを表示したい場合)
		renderTex = RenderTexture.GetTemporary(renderSize, renderSize, 16, RenderTextureFormat.ARGB32);

		// Quadを生成(RenderTexture描画用)
		Live2D_Quad = GameObject.CreatePrimitive(PrimitiveType.Quad);

		// Live2Dモデルの座標をセット
		Live2D_Quad.transform.position = gameObject.transform.position;

		// シェーダー指定とRenderTextureをセット
		Quad_render = Live2D_Quad.GetComponent<Renderer>();
		Quad_render.material.shader = Shader.Find("Sprites/Default");
		Quad_render.material.SetTexture("_MainTex", renderTex);
		Quad_render.name = gameObject.name + "_Quad";

		// Live2DモデルのY軸をずらす
		gameObject.transform.position = new Vector3(0.0f, transY + gameObject.transform.position.y, 0.0f);

		// Live2Dを映す第2カメラ
		Live2D_Cam = new GameObject("Live2D Camera");
		Live2D_Cam.transform.position = new Vector3(0.0f, transY, -10.0f);
		Live2D_Cam.AddComponent<Camera>();

		// カメラの設定とRenderTextureをセット
		dummyCam = Live2D_Cam.GetComponent<Camera>();
		dummyCam.orthographic = true;
		dummyCam.orthographicSize = 1;
		dummyCam.clearFlags = CameraClearFlags.SolidColor;
		dummyCam.targetTexture = renderTex;

	}

	void Update () {
		// QuadとLive2Dモデルサイズを同期
		Live2D_Quad.transform.localScale = gameObject.transform.localScale * 4.0f;
		// orthographicSizeとLive2Dモデルサイズを同期
		dummyCam.orthographicSize = Mathf.Max(gameObject.transform.localScale.x, gameObject.transform.localScale.y) * 2.0f;
		if(Live2D_Quad){
			// Quadの透明度を動的に変更
			Quad_render.material.color = new Color(1.0f,1.0f,1.0f, opacity);

			// タイマーでFadeIn, FadeOut処理
			if(pause == false){
				if(fadeIn){
					timerCnt += Time.deltaTime * fadespeed;
					if (timerCnt >= 1.0f) {
						timerCnt = 1.0f;
						pause = true;
						fadeIn = false;
					}
				}else{
					timerCnt -= Time.deltaTime * fadespeed;
					if(timerCnt <= 0.0f){
						timerCnt = 0.0f;
						pause = true;
						fadeIn = true;
					}
				}
				opacity = timerCnt;
			}
		}
	}


	void OnDestroy(){
		// Live2DのGameObjectが削除されたらダミーで作ったものも削除
		RenderTexture.ReleaseTemporary(renderTex);
		Destroy(Live2D_Cam);
		Destroy(Live2D_Quad);
		Live2D_Count--;
	}

}
2倍になったsetPass削減
------ 2016/04/16追記 ------
ちなみにこのままだと通常の2倍描画されていまいます。

という訳で以下のようにSimpleModel.csも修正してやればドローコールは気になりません!
→ 【小ネタ】Live2Dの描画処理を軽くする
void OnRenderObject()
{
    if (live2DModel == null) return;
        // MainCamera以外で描画する
        if(Camera.current.tag == "MainCamera") return;
        live2DModel.draw();
    }
}
