忘備録
【OS】
今回はCentOS6.6_x86_64版を使用。詳細は以下を参照。
http://centos.server-manual.com/
事前準備
セットアップに必要なパッケージを事前に設定しておく必要がある。以下を全て設定する。
システム変更が発生するので管理者権限が必須。rootにsuしておく事。
【YUMパッケージ管理】
yum -y install yum-plugin-fastestmirror
yum -y update
yum -y groupinstall "Base" "Development tools" "Japanese Support"
[RPMforgeリポジトリ追加]
rpm --import http://apt.sw.be/RPM-GPG-KEY.dag.txt
rpm -ivh http://apt.sw.be/redhat/el6/en/x86_64/rpmforge/RPMS/rpmforge-release-0.5.3-1.el6.rf.x86_64.rpm
[EPELリポジトリ追加]
rpm --import http://dl.fedoraproject.org/pub/epel/RPM-GPG-KEY-EPEL-6
rpm -ivh http://dl.fedoraproject.org/pub/epel/6/x86_64/epel-release-6-8.noarch.rpm
[ELRepoリポジトリ追加]
rpm --import https://www.elrepo.org/RPM-GPG-KEY-elrepo.org
rpm -Uvh http://www.elrepo.org/elrepo-release-6-6.el6.elrepo.noarch.rpm
[Remiリポジトリ追加]
rpm --import http://rpms.famillecollet.com/RPM-GPG-KEY-remi
rpm -ivh http://rpms.famillecollet.com/enterprise/remi-release-6.rpm
【SELinux無効化】
getenforce
Enforcing ←SELinux有効
setenforce 0
getenforce
Permissive ←SELinux無効
vi /etc/sysconfig/selinux
SELINUX=enforcing
SELINUX=disabled ←変更(起動時に無効にする)
【iptablesでHTTPを許可】
vi /etc/sysconfig/iptables
-A INPUT -m state --state NEW -m tcp -p tcp --dport 22 -j ACCEPT
-A INPUT -m state --state NEW -m tcp -p tcp --dport 9000 -j ACCEPT ←追加
-A INPUT -j REJECT --reject-with icmp-host-prohibited
-A FORWARD -j REJECT --reject-with icmp-host-prohibited
COMMIT
Iptables再起動
service iptables restart
【MySQL設定】
CentOS構築時にデフォルトでインストールされたバージョンをアンインストール。
yum erase mysql*
rpmの追加
yum install http://dev.mysql.com/get/mysql-community-release-el6-5.noarch.rpm
MySQL5.6のインストール
yum install mysql mysql-devel mysql-server mysql-utilities
確認
mysql –-version
mysql Ver 14.14 Distrib 5.6.15, for Linux (x86_64) using EditLine wrapper
デフォルトキャラクタセットをutf8に設定
vi /etc/my.cnf
[mysqld]
datadir=/var/lib/mysql
socket=/var/lib/mysql/mysql.sock
symbolic-links=0
sql_mode=NO_ENGINE_SUBSTITUTION,STRICT_TRANS_TABLES
character-set-server=utf8
"# 任意設定"
innodb_file_per_table
query-cache-size=16M
[mysqld_safe]
log-error=/var/log/mysqld.log
pid-file=/var/run/mysqld/mysqld.pid
[mysql]
default-character-set=utf8
起動・自動起動設定
service mysqld start
chkconfig mysqld on
MySQL初期設定
[root@www ~]# mysql_secure_installation

NOTE: RUNNING ALL PARTS OF THIS SCRIPT IS RECOMMENDED FOR ALL MySQL
      SERVERS IN PRODUCTION USE!  PLEASE READ EACH STEP CAREFULLY!

In order to log into MySQL to secure it, we'll need the current
password for the root user.  If you've just installed MySQL, and
you haven't set the root password yet, the password will be blank,
so you should just press enter here.

Enter

Enter current password for root (enter for none):
OK, successfully used password, moving on...

Setting the root password ensures that nobody can log into the MySQL
root user without the proper authorisation.

root パスワードを設定

Set root password? [Y/n] y
New password: # 設定するパスワードを入力
Re-enter new password:
Password updated successfully!
Reloading privilege tables..
 ... Success!

By default, a MySQL installation has an anonymous user, allowing anyone
to log into MySQL without having to have a user account created for
them.  This is intended only for testing, and to make the installation
go a bit smoother.  You should remove them before moving into a
production environment.

匿名ユーザーは削除

Remove anonymous users? [Y/n] y
 ... Success!

Normally, root should only be allowed to connect from 'localhost'.  This
ensures that someone cannot guess at the root password from the network.

root のリモートログインは無効

Disallow root login remotely? [Y/n] y
 ... Success!

By default, MySQL comes with a database named 'test' that anyone can
access.  This is also intended only for testing, and should be removed
before moving into a production environment.

テストデータベースは削除

Remove test database and access to it? [Y/n] y
 - Dropping test database...
 ... Success!
 - Removing privileges on test database...
 ... Success!

Reloading the privilege tables will ensure that all changes made so far
will take effect immediately.

特権情報リロード

Reload privilege tables now? [Y/n] y
 ... Success!

Cleaning up...

All done!  If you've completed all of the above steps, your MySQL
installation should now be secure.

Thanks for using MySQL!

root で接続確認

[root@www ~]# mysql -u root -p
Enter password:# 設定したパスワードで認証
Welcome to the MySQL monitor.  Commands end with ; or \g.
Your MySQL connection id is 11
Server version: 5.1.73 Source distribution

Copyright (c) 2000, 2013, Oracle and/or its affiliates. All rights reserved.

Oracle is a registered trademark of Oracle Corporation and/or its
affiliates. Other names may be trademarks of their respective
owners.

Type 'help;' or '\h' for help. Type '\c' to clear the current input statement.

ユーザ一覧表示

mysql> select user,host,password from mysql.user;
+------+-----------+-------------------------------------------+
| user | host      | password                                  |
+------+-----------+-------------------------------------------+
| root | localhost | ***************************************** |
| root | 127.0.0.1 | ***************************************** |
+------+-----------+-------------------------------------------+
2 rows in set (0.00 sec)

データベース一覧表示

mysql> show databases;
+--------------------+
| Database           |
+--------------------+
| information_schema |
| mysql              |
+--------------------+
2 rows in set (0.00 sec)

mysql> exit
Bye
DB設定
rootパスワード変更
mysql -u root
SET PASSWORD FOR root@localhost=password('***'); ←rootパスワード設定
EXIT;
SonarQube用設定
mysql -u root -p パスワード
CREATE DATABASE sonar CHARACTER SET utf8mb4 COLLATE utf8mb4_general_ci;
CREATE USER 'sonar' IDENTIFIED BY 'sonar';
GRANT ALL ON sonar.* TO 'sonar'@'%' IDENTIFIED BY 'sonar';
GRANT ALL ON sonar.* TO 'sonar'@'localhost' IDENTIFIED BY 'sonar';
FLUSH PRIVILEGES;
exit;
【JAVA】
CentOS構築時にデフォルトでインストールされたバージョンをアンインストール。
yum erase java*
最新版をネットより入手(rpm版)しインストール
rpm –ivh jdk-8u45-linux-x64.rpm
バージョン確認
java –version
java version "1.8.0_45"
Java(TM) SE Runtime Environment (build 1.8.0_45-b14)
Java HotSpot(TM) 64-Bit Server VM (build 25.45-b02, mixed mode)
■JAVA_HOME設定
vi /etc/profile
export JAVA_HOME=/usr/java/default
export PATH=$PATH:$JAVA_HOME/bin
export CLASSPATH=.:$JAVA_HOME/jre/lib:$JAVA_HOME/lib:$JAVA_HOME/lib/tools.jar
【Maven】
最新版をネットより入手し/optに配置
tar zxvf apache-maven-3.3.3.tar.gz
mv apache-maven-3.3.3 /opt
■MAVEN_HOME設定
vi /etc/profile
export M3_HOME=/opt/apache-maven-3.3.3
M3=$M3_HOME/bin
export PATH=$M3:$PATH
【Tomcat】
最新版をネットより入手し/usr/local/tomcatに配置
tar zxvf apache-tomcat-8.0.23.tar.gz
mv apache-tomcat-8.0.23 /usr/local/tomcat
■TOMCAT_HOME設定
vi /etc/profile
JAVA_HOME=/usr/java/default
CATALINA_HOME=/usr/local/tomcat
export JAVA_HOME CATALINA_HOME
■管理ユーザ作成・権限付与
useradd -s /sbin/nologin tomcat
chown -R tomcat:tomcat /usr/local/tomcat
■自動スクリプト作成
vi /etc/init.d/tomcat
"#!/bin/bash"
"#"
"#Startup script for the Tomcat Servlet Container"
"#"
"#chkconfig: 2345 35 65"
"#description: Tomcat is the servlet container that is used in the official \"
"#             Reference Implementation for the Java Servlet and JavaServer \"
"#             Pages technologies"

TOMCAT_USER=tomcat
CATALINA_HOME=/usr/local/tomcat

. /etc/rc.d/init.d/functions
prog=tomcat

start() {
    echo -n $"Starting $prog: "
    daemon --user $TOMCAT_USER $CATALINA_HOME/bin/startup.sh > /dev/null
    RETVAL=$?
    if [ $RETVAL -eq 0 ]; then
        echo_success
    else
        echo_failure
    fi
    echo
    [ $RETVAL = 0 ] && touch /var/lock/subsys/$prog
    return $RETVAL
}
stop() {
    echo -n $"Stopping $prog: "
    daemon --user $TOMCAT_USER $CATALINA_HOME/bin/shutdown.sh > /dev/null
    RETVAL=$?
    if [ $RETVAL -eq 0 ]; then
        echo_success
    else
        echo_failure
    fi
    echo
    [ $RETVAL = 0 ] && rm -f /var/lock/subsys/$prog
    return $RETVAL
}

"# See how we were called."
case "$1" in
  start)
    start
    ;;
  stop)
    stop
    ;;
  restart)
    stop
    start
    ;;
  status)
    INSTANCES=ps --columns 512 -aef|grep java|grep tomcat|grep org.apache.catalina.startup.Bootstrap|wc -l
    if [ $INSTANCES -eq 0 ]; then
        echo $prog is stopped
        RETVAL=3
    else
        if [ $INSTANCES -eq 1 ]; then
            echo $prog is running 1 instance...
        else
            echo $prog is running $INSTANCES instances...
        fi
        RETVAL=0
    fi
    ;;
  *)
    echo $"Usage: $prog {start|stop|restart|status|help}"
    exit 1
esac

exit $RETVAL
cd /etc/init.d
chmod +x tomcat
./tomcat start
自動起動
/sbin/chkconfig --add tomcat
【SonarQube】
リポジトリ追加
wget -O /etc/yum.repos.d/sonar.repo http://downloads.sourceforge.net/project/sonar-pkg/rpm/sonar.repo
インストール
yum -y install sonar
■Config設定
vi /opt/sonar/conf/sonar.properties
"# User credentials."
"# Permissions to create tables, indices and triggers must be granted to JDBC user."
"# The schema must be created first."
"#sonar.jdbc.username=sonar←コメントを外す"
sonar.jdbc.username=sonar
"#sonar.jdbc.password=sonar←コメントを外す"
sonar.jdbc.password=sonar
"#"
"#"
"#----- MySQL 5.x"
"# Only InnoDB storage engine is supported (not myISAM)."
"# Only the bundled driver is supported."
"#sonar.jdbc.url=jdbc:mysql://localhost:3306/sonar?useUnicode=true&characterEncoding=utf8&rewriteBatchedStatements=true&useConfigs=maxPerformance←コメントを外す"
sonar.jdbc.url=jdbc:mysql://localhost:3306/sonar?useUnicode=true&characterEncoding=utf8&rewriteBatchedStatements=true&useConfigs=maxPerformance
"#"
"#"
"#----- WEB SERVER"
"# By default, ports will be used on all IP addresses associated with the server."
"#sonar.web.host=0.0.0.0←コメントを外し、IPを設定"
sonar.web.host=192.168.194.39
"#"
"# TCP port for incoming HTTP connections. Disabled when value is -1."
"#sonar.web.port=9000←コメントを外す"
sonar.web.port=9000
■SONAR_HOME設定
vi /etc/profile
SONAR_HOME=/opt/sonar
PLATFORM=linux-x86-64
■SonarQube起動
service sonar start
chkconfig sonar on
ブラウザで接続確認。ID:admin PW:adminでログオンを実施し、各種設定を実施する。
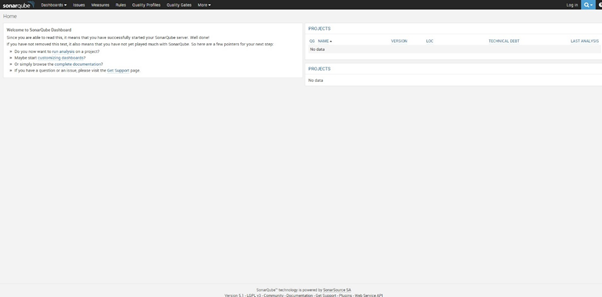
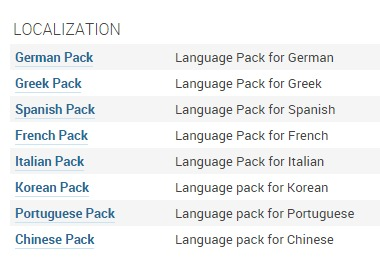
[settings]→[updatecenter]よりJapanese Packを選択し、[インストール]ボタンをクリック
SonarQubeを再起動(service sonar restart)
再度ログオン実施で、日本語表記に変更される。
使用方法は別途作成します。