Reduxのちょっとした小ネタ記事です。
- stateをjsonでdump
- レンダリング時にそのjsonをreduxに喰わせる
- stateを復元!
という内容です。
準備
Reduxのboilerplateはいろいろありますが、個人的にお気に入りのリポジトリをサンプルにやってみたいと思います。
お気に入りのReduxサンプル
https://github.com/erikras/react-redux-universal-hot-example
なにはともあれ、まずは上記のリポジトリをcloneして
npm install
して
npm run dev
してます
方法
src/client.js 21行目 あたりを弄ります。
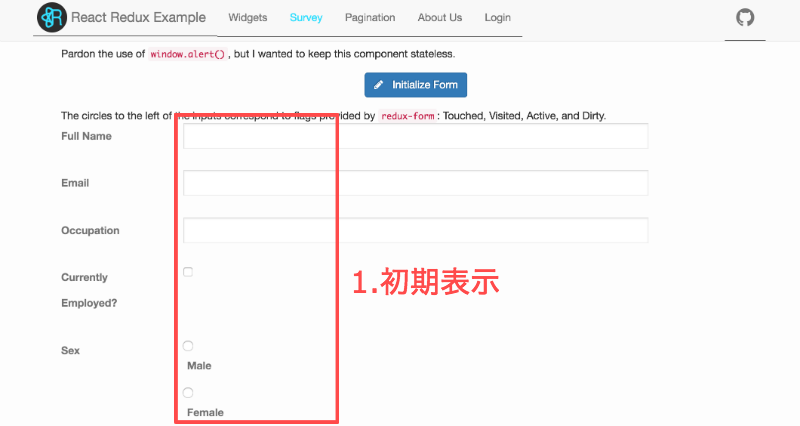
1.stateを参照できるようにいじる
src/client.js
const client = new ApiClient();
const _browserHistory = useScroll(() => browserHistory)();
const dest = document.getElementById('content');
const store = createStore(_browserHistory, client, window.__data);
// storeを参照できるように、windowに追加
window.getState = ()=>(JSON.stringify(store.getState()));
const history = syncHistoryWithStore(_browserHistory, store);
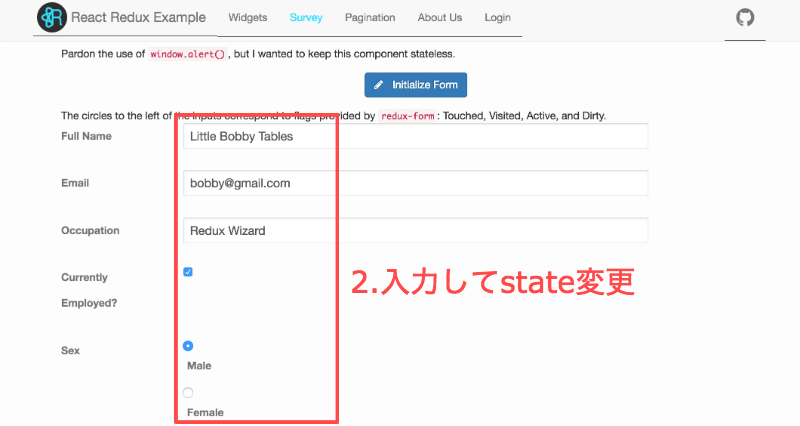
2.stateを保存する
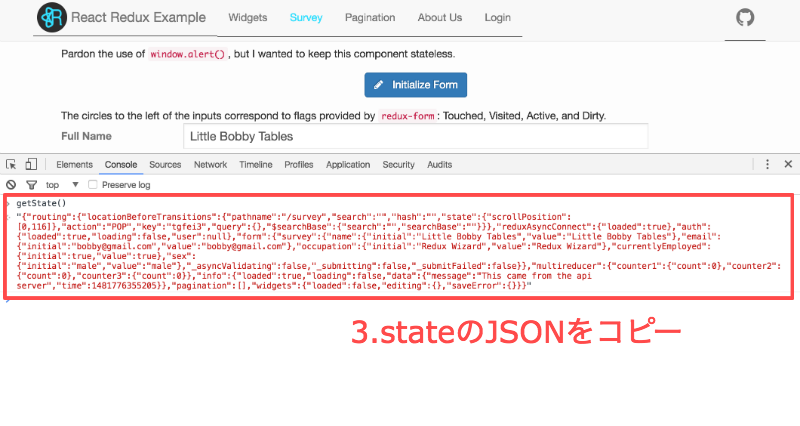
3.初期stateを乗っ取る
コピーしたJSON文字列をパースして、storeを作るときの引数に喰わせます。
こんな感じ。
src/client.js
const lient = new ApiClient();
const _browserHistory = useScroll(() => browserHistory)();
const dest = document.getElementById('content');
// JSON.stringify(store.getState()) したJSONを__dataに入れる
window.__data = JSON.parse('{"routing":{"locationBeforeTransitions":{"pathname":"/survey","search":"","hash":"","state":{"scrollPosition":[0,116]},"action":"POP","key":"tgfei3","query":{},"$searchBase":{"search":"","searchBase":""}}},"reduxAsyncConnect":{"loaded":true},"auth":{"loaded":true,"loading":false,"user":null},"form":{"survey":{"name":{"initial":"Little Bobby Tables","value":"Little Bobby Tables"},"email":{"initial":"bobby@gmail.com","value":"bobby@gmail.com"},"occupation":{"initial":"Redux Wizard","value":"Redux Wizard"},"currentlyEmployed":{"initial":true,"value":true},"sex":{"initial":"male","value":"male"},"_asyncValidating":false,"_submitting":false,"_submitFailed":false}},"multireducer":{"counter1":{"count":0},"counter2":{"count":0},"counter3":{"count":0}},"info":{"loaded":true,"loading":false,"data":{"message":"This came from the api server","time":1481776355205}},"pagination":[],"widgets":{"loaded":false,"editing":{},"saveError":{}}}');
const store = createStore(_browserHistory, client, window.__data);
window.getState = ()=>(JSON.stringify(store.getState()));
const history = syncHistoryWithStore(_browserHistory, store);
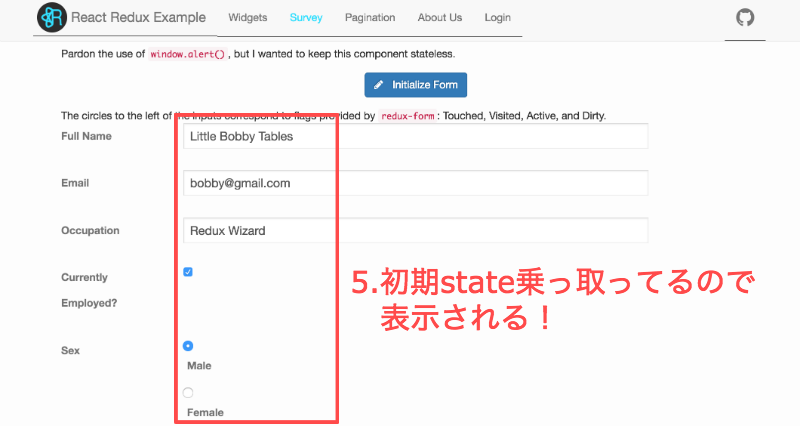
4.乗っ取ったstateで表示してみる
そしてF5でリロードしてみます。
このとき、本来であればstateが空なのでなにも表示されないはずですが・・・
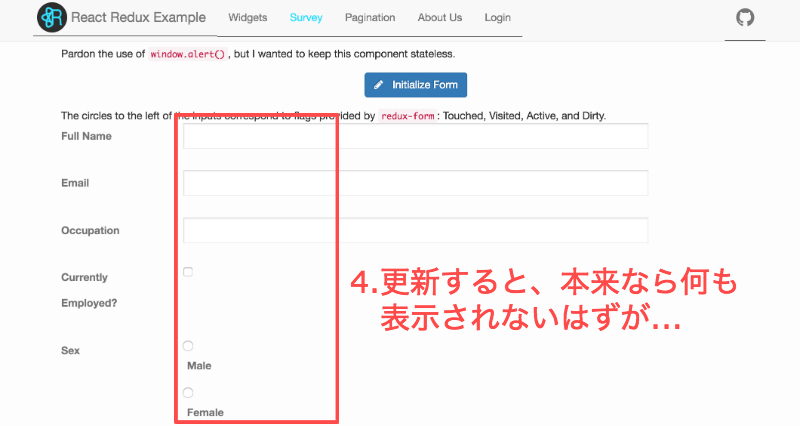
初期stateを乗っ取ってるので、
F5でリロードしても入力済みの画面が復元されて表示されます!
使いどころ
Reduxは1つのstateだけ使ったstateパターンなのでこういうことが可能です。
このようにすると、マークアップ時にstateを変えて表示を試すことができます。
また、複雑な手順を踏む必要がある画面でもすぐに確認できるようになるので作業効率があがります。
あとはスマホページをPCで作業して、実機でみる場合はこの方法を使う、なんてこともできますし、ログインが必要な画面もログインを必要とせず見ることができるので便利です。
以上、小ネタ記事でした。