3. Node.jsでBot開発
ここからは手元のターミナルなどでの作業がメインになります。
Node.jsのインストールがまだの方は参考記事などをもとに準備をして下さい。
ちなみに、筆者の環境は以下になります。
- Node.js v7.4.0
- npm v4.0.5
- macOS Sierra 10.12
プロジェクトを作成とハローワールド
Node.jsのプロジェクトはpackage.jsonがあるディレクトリが起点となります。
まずはnpm initコマンドでpackage.jsonを作成します。
$ npm init --yes
Wrote to /Users/n0bisuke/dotstudio/2_events/20170127gs/linesample/package.json:

{
  "name": "linesample",
  "version": "1.0.0",
  "description": "",
  "main": "index.js",
  "scripts": {
    "test": "echo \"Error: no test specified\" && exit 1"
  },
  "keywords": [],
  "author": "",
  "license": "ISC"
}
次にプログラムのメインとなるapp.jsを作成します。
$ touch app.js
ディレクトリ内にapp.jsとpackage.jsonの二つのファイルがあることを確認しましょう。
$ ls
app.js       package.json
エディタでapp.jsを編集します。
以下をコピー&ペーストしましょう。
'use strict';

const http = require('http');
const https = require('https');
const crypto = require('crypto');

const HOST = 'api.line.me';
const REPLY_PATH = '/v2/bot/message/reply';//リプライ用
const CH_SECRET = 'xxxxxxxx'; //Channel Secretを指定
const CH_ACCESS_TOKEN = 'xxxxxx'; //Channel Access Tokenを指定
const SIGNATURE = crypto.createHmac('sha256', CH_SECRET);
const PORT = 3000;

/**
 * httpリクエスト部分
 */
const client = (replyToken, SendMessageObject) => {
    let postDataStr = JSON.stringify({ replyToken: replyToken, messages: SendMessageObject });
    let options = {
        host: HOST,
        port: 443,
        path: REPLY_PATH,
        method: 'POST',
        headers: {
            'Content-Type': 'application/json; charset=UTF-8',
            'X-Line-Signature': SIGNATURE,
            'Authorization': `Bearer ${CH_ACCESS_TOKEN}`,
            'Content-Length': Buffer.byteLength(postDataStr)
        }
    };

    return new Promise((resolve, reject) => {
        let req = https.request(options, (res) => {
                    let body = '';
                    res.setEncoding('utf8');
                    res.on('data', (chunk) => {
                        body += chunk;
                    });
                    res.on('end', () => {
                        resolve(body);
                    });
        });

        req.on('error', (e) => {
            reject(e);
        });
        req.write(postDataStr);
        req.end();
    });
};

http.createServer((req, res) => {
    if(req.url !== '/' || req.method !== 'POST'){
        res.writeHead(200, {'Content-Type': 'text/plain'});
        res.end('こんにちは');
    }

    let body = '';
    req.on('data', (chunk) => {
        body += chunk;
    });
    req.on('end', () => {
        if(body === ''){
          console.log('bodyが空です。');
          return;
        }

        let WebhookEventObject = JSON.parse(body).events[0];
        console.log(WebhookEventObject);
        //メッセージが送られて来た場合
        if(WebhookEventObject.type === 'message'){
            let SendMessageObject;
            if(WebhookEventObject.message.type === 'text'){
                SendMessageObject = [{
                    type: 'text',
                    text: WebhookEventObject.message.text
                }];
            }
            client(WebhookEventObject.replyToken, SendMessageObject)
            .then((body)=>{
                console.log(body);
            },(e)=>{console.log(e)});
        }

        res.writeHead(200, {'Content-Type': 'text/plain'});
        res.end('su');
    });

}).listen(PORT);

console.log(`Server running at ${PORT}`);
先ほどの「LINE developers」の画面で表示されたChannel SecretとChannel Access Tokenをソースコードのconst CH_SECRET = 'xxxxxxxx';とconst CH_ACCESS_TOKEN = 'xxxxxx';の部分に値を指定しましょう。
ここで表示される
Channel SecretとChannel Access Tokenは後で利用するので留意しておいて下さい。
アプリケーションを起動してみます。
$ node app.js
起動すると以下がターミナルに表示されます。
Server running at 3000
http://localhost:3000/にブラウザでアクセスしてこんにちはと表示されることを確認しましょう。
ngrokでトンネリング
LINE Botを作るためにはWebhookURLをLINE developersに登録する必要があります。
PaaSなどにホスティングして試すのはデバッグが大変なので、手元のPCのlocalhostにグローバルからアクセスできるようにするトンネリングツールを利用しましょう。
などが有名です。今回はngrokを利用します。

まずはngrokのサイトにいき、本体をダウンロードして解凍します。

Macの場合、デフォルトでダウンロードフォルダ(~/Downloads)に保存されます。
$ cd ~/Downloads
$ pwd
/Users/n0bisuke/Downloads
$ ./ngrok help
エラーが出なければOKです。
次に、ngrokにユーザー登録をします。サイトからユーザー登録をしましょう。
ユーザー登録後のページで表示されるコマンドを実行します。
$ ./ngrok authtoken xxxxxxxxxxxxxxxxxxx
Authtoken saved to configuration file: /Users/n0bisuke/.ngrok2/ngrok.yml
これでユーザーアカウントとPCが紐付けられます。この作業は最初の1回だけです。
次にトンネリングサーバーを起動します。 ./ngrok http ポート名と指定します。
今回はNode.jsアプリケーションを3000番ポートで利用するので3000を指定しましょう。
$ ./ngrok http 3000
ngrok by @inconshreveable                                    (Ctrl+C to quit)

Session Status                online
Account                       n0bisuke (Plan: Free)
Version                       2.1.18
Region                        United States (us)
Web Interface                 http://127.0.0.1:4040
Forwarding                    http://1148cbd9.ngrok.io -> localhost:3000
Forwarding                    https://1148cbd9.ngrok.io -> localhost:3000

Connections                   ttl     opn     rt1     rt5     p50     p90
                              0       0       0.00    0.00    0.00    0.00
起動すると表示されるhttps://で始まるアドレスを利用します。
この場合はhttps://1148cbd9.ngrok.ioです。このアドレスは起動の度に変わるため、ngrokは起動し続けて開発を行うことをおススメします。
以下のように、ngrokのプロセスとNode.jsアプリケーションのプロセスを並行して実行しての開発になります。

おうむ返しBot
LINE developersの画面下部の 「EDIT」を選択します。

ここに先ほどのアドレスを指定しましょう。
この状態でBotに話しかけてみて下さい。
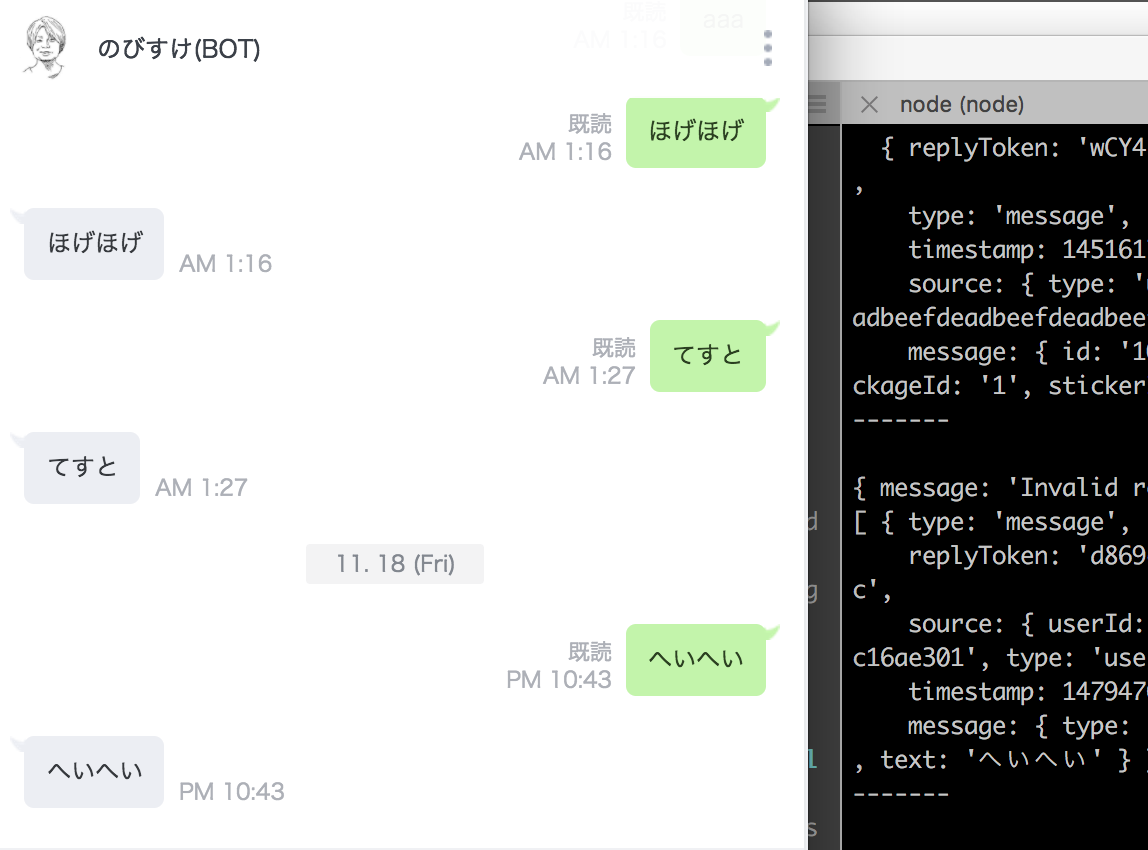
Botがおうむ返ししてくれます。
また、おうむ返しの際にコンソールに表示される、userIdをメモしておきましょう。