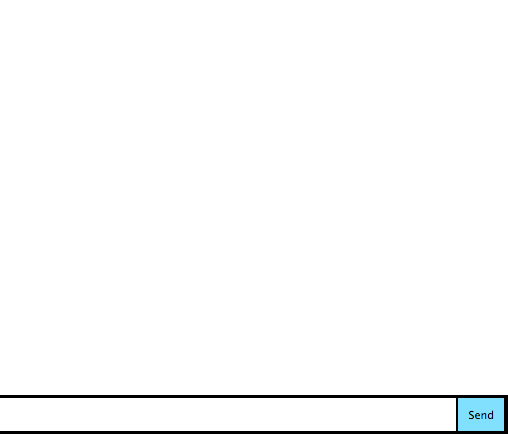
つまるところ、これをやってみます。
http://socket.io/get-started/chat/
モチベーション
Webで調べると割とExpress3系+Socket.io 0.9系の記事が多いイメージです。
Express4とSocket.io1は前バージョンと大分違う造りになっているので、そろそろExpress4系+Socket.io1系を試して記録しておこうと思いました。
環境
- express 4.10.4
- socket.io 1.2.1
モジュール用意
$ mkdir myapp
$ cd myapp
$ npm init
$ npm i --save express
$ npm i --save socket.io
とりあえずサーバー起動してみる
チュートリアルではファイル名はindex.jsとなってますが、感覚的に違和感があるのでapp.jsにしておきます笑
var app = require('express')();
var http = require('http').Server(app);

app.get('/', function(req, res){
  res.send('<h1>Hello world</h1>');
});

http.listen(3000, function(){
  console.log('listening on *:3000');
});
$ node app
Hello world
と表示されればOKです。
こうしてみると、Expressって4系になって中身すかすかになってますね。(ジェネレーターを使って作るとまた違いますけど笑)
Serving HTML
viewにhtmlを利用します。
app.jsを編集しましょう。対称箇所以外は省略しています。
app.get('/', function(req, res){
  res.sendFile(__dirname + '/index.html');
});
<!doctype html>
<html>
  <head>
    <title>Socket.IO chat</title>
    <style>
      * { margin: 0; padding: 0; box-sizing: border-box; }
      body { font: 13px Helvetica, Arial; }
      form { background: #000; padding: 3px; position: fixed; bottom: 0; width: 100%; }
      form input { border: 0; padding: 10px; width: 90%; margin-right: .5%; }
      form button { width: 9%; background: rgb(130, 224, 255); border: none; padding: 10px; }
      #messages { list-style-type: none; margin: 0; padding: 0; }
      #messages li { padding: 5px 10px; }
      #messages li:nth-child(odd) { background: #eee; }
    </style>
  </head>
  <body>
    <ul id="messages"></ul>
    <form action="">
      <input id="m" autocomplete="off" /><button>Send</button>
    </form>
  </body>
</html>
http://localhost:3000 にアクセスしてみましょう。以下のような画面が表示さればOKです。
Webサーバーとチャットの画面が出来ました。
socket.io実装
Socket.ioを使ってチャット機能を作ってみます。
app.jsを編集しましょう。
三行目のvar io = require('socket.io')(http);でsocket.ioの読み込みを忘れずに。
io.on()の辺りを追記しましょう。 io.on('connection' 〜で接続開始時の処理を書きます。
var app = require('express')();
var http = require('http').Server(app);
var io = require('socket.io')(http);

app.get('/', function(req, res){
  res.sendfile('index.html');
});

io.on('connection', function(socket){
  console.log('a user connected');
});

http.listen(3000, function(){
  console.log('listening on *:3000');
});
<!doctype html>
<html>
  <head>
    <title>Socket.IO chat</title>
    <style>
      * { margin: 0; padding: 0; box-sizing: border-box; }
      body { font: 13px Helvetica, Arial; }
      form { background: #000; padding: 3px; position: fixed; bottom: 0; width: 100%; }
      form input { border: 0; padding: 10px; width: 90%; margin-right: .5%; }
      form button { width: 9%; background: rgb(130, 224, 255); border: none; padding: 10px; }
      #messages { list-style-type: none; margin: 0; padding: 0; }
      #messages li { padding: 5px 10px; }
      #messages li:nth-child(odd) { background: #eee; }
    </style>
  </head>
  <body>
    <ul id="messages"></ul>
    <form action="">
      <input id="m" autocomplete="off" /><button>Send</button>
    </form>

    <script src="/socket.io/socket.io.js"></script>
    <script>
      var socket = io();
    </script>

  </body>
</html>
実際にメッセージを共有する部分
var app = require('express')();
var http = require('http').Server(app);
var io = require('socket.io')(http);

app.get('/', function(req, res){
  res.sendfile('index.html');
});

io.on('connection', function(socket){
  socket.on('chat message', function(msg){
    console.log('message: ' + msg);
  });
});


http.listen(3000, function(){
  console.log('listening on *:3000');
});
<!doctype html>
<html>
  <head>
    <title>Socket.IO chat</title>
    <style>
      * { margin: 0; padding: 0; box-sizing: border-box; }
      body { font: 13px Helvetica, Arial; }
      form { background: #000; padding: 3px; position: fixed; bottom: 0; width: 100%; }
      form input { border: 0; padding: 10px; width: 90%; margin-right: .5%; }
      form button { width: 9%; background: rgb(130, 224, 255); border: none; padding: 10px; }
      #messages { list-style-type: none; margin: 0; padding: 0; }
      #messages li { padding: 5px 10px; }
      #messages li:nth-child(odd) { background: #eee; }
    </style>
  </head>
  <body>
    <ul id="messages"></ul>
    <form action="">
      <input id="m" autocomplete="off" /><button>Send</button>
    </form>

    <script src="https://cdn.socket.io/socket.io-1.2.0.js"></script>
    <script src="http://code.jquery.com/jquery-1.11.1.js"></script>
    <script>
      var socket = io();
      $('form').submit(function(){
        socket.emit('chat message', $('#m').val());
        $('#m').val('');
        return false;
      });
    </script>

  </body>
</html>
これで クライアント側 -> サーバー側 への連携が出来ました。
双方向なブロードキャスト
10行目でchat messageというイベントを受け取り、11行目のio.emit()で接続してるクライアントに情報を送っています。
var app = require('express')();
var http = require('http').Server(app);
var io = require('socket.io')(http);

app.get('/', function(req, res){
  res.sendfile('index.html');
});

io.on('connection', function(socket){
  socket.on('chat message', function(msg){
    io.emit('chat message', msg);
  });
});

http.listen(3000, function(){
  console.log('listening on *:3000');
});
<!doctype html>
<html>
  <head>
    <title>Socket.IO chat</title>
    <style>
      * { margin: 0; padding: 0; box-sizing: border-box; }
      body { font: 13px Helvetica, Arial; }
      form { background: #000; padding: 3px; position: fixed; bottom: 0; width: 100%; }
      form input { border: 0; padding: 10px; width: 90%; margin-right: .5%; }
      form button { width: 9%; background: rgb(130, 224, 255); border: none; padding: 10px; }
      #messages { list-style-type: none; margin: 0; padding: 0; }
      #messages li { padding: 5px 10px; }
      #messages li:nth-child(odd) { background: #eee; }
    </style>
  </head>
  <body>
    <ul id="messages"></ul>
    <form action="">
      <input id="m" autocomplete="off" /><button>Send</button>
    </form>

    <script src="https://cdn.socket.io/socket.io-1.2.0.js"></script>
    <script src="http://code.jquery.com/jquery-1.11.1.js"></script>
    <script>
  var socket = io();
  $('form').submit(function(){
    socket.emit('chat message', $('#m').val());
    $('#m').val('');
    return false;
  });
  socket.on('chat message', function(msg){
    $('#messages').append($('<li>').text(msg));
  });
</script>

  </body>
</html>
実行してみる
これでひとまずチャットサンプルが完成しました!!
まとめ
今回は、Socket.ioのサイト (http://socket.io/get-started/chat/) をもとにチュートリアルをしただけですが、割とカンタンにチャットワプリが出来そうで良いですね。
話はズレますが、Expressがジェネレーターを使わずにこんな感じの導入だとカンタンでいいなぁって思いました。
(ジェネレーターを使って入ってくるミドルウェアはブラックボックスっぽいものもあるので汗)


