はじめに
zabbix_senderコマンドからサーバーへのデータの送信に使われているプロトコルは比較的シンプルな物で、ネットワークに接続できるマイコンであれば充分に実装できるものです。
このプロトコルをESP-WROOM-02なモジュールと組み合わせると各種センサーのデータをZabbixサーバーで収集するデバイスがお手軽に作れそうだったので、まずはZabbix senderプロトコルの仕組みでサーバーに値を登録できるところまで試してみました。
なお、本稿の例ではZabbix 3.0から実装された通信の暗号化には対応していません。
本稿の内容を実際に試す際には充分に信用のおけるネットワーク内で実行する事をお勧めします。
環境
- Zabbixサーバー
- Zabbix 3.0.4 (CentOS7.2)
- ESP-WROOM-02モジュール
- スイッチサイエンス ESPr Developer
- Arduino IDE
- バージョン1.6.10
ソースコード
ESP8266_zabbix-sender
# include <ESP8266WiFi.h>
# include <Ticker.h>
# include <ArduinoJson.h>

const char* ssid     = "YourAccessPointName";
const char* password = "YourAccessPointPassword";
const char* zbx_server = "YourZabbixServerIPaddr";

Ticker ticker;
bool readyForTicker = false;

void setReadyForTicker() {
  // A flag
  readyForTicker = true;
}

int value = 0;
void doBlockingIO() {

  uint64_t payloadsize ;

  // dummy value increment
  ++value;

  // create "zabbix sender format" json data for sending zabbix server
  StaticJsonBuffer<200> jsonBuffer;
  JsonObject& root = jsonBuffer.createObject();
  root["request"] = "sender data";

  JsonArray& data = root.createNestedArray("data");

  JsonObject& item = jsonBuffer.createObject();
  item["host"] = "Home Network";
  item["key"] = "test";
  item["value"] = value;
  data.add(item);

  /*
    // zabbix sender can send more items at once
    JsonObject& item2 = jsonBuffer.createObject();
    item2["host"] = "Home Network";
    item2["key"] = "test2";
    item2["value"] = "hello";
    data.add(item2);
  */

  Serial.println();
  Serial.println("== request  ================");
  root.printTo(Serial);

  Serial.println("");
  Serial.println("============================");
  char buffer[256];
  root.printTo(buffer, sizeof(buffer));
  Serial.print("payload json size: ");
  Serial.println(strlen(buffer));
  Serial.println("============================");


  //////////////////////////////
  // connect to zabbix server
  Serial.print("connecting to ");
  Serial.println(zabbix_server);

  // Use WiFiClient class to create TCP connections
  WiFiClient client;
  const int zabbixPort = 10051 ;
  if (!client.connect(zabbix_server, zabbixPort)) {
    Serial.println("connection failed");
    return;
  }


  //////////////////////////////
  // send the zabbix_sender's format data to server

  // send fixed header to zabbix server
  client.print(String("ZBXD") );
  client.write(0x01);

  // send json size to zabbix server
  payloadsize = strlen(buffer);
  for (int i = 0; i < 64; i += 8) {
    client.write(lowByte(payloadsize >> i));
  }

  // send json to zabbix server
  client.print(buffer);
  //////////////////////////////


  unsigned long timeout = millis();
  while (client.available() == 0) {
    if (millis() - timeout > 5000) {
      Serial.println(">>> Client Timeout !");
      client.stop();
      return;
    }
  }

  // Read all the lines of the reply from server and print them to Serial
  while (client.available()) {
    String line = client.readStringUntil('\r');
    Serial.println("== response ================");
    Serial.print(line);
    Serial.println("");
    Serial.println("============================");
  }

  Serial.println();
  Serial.println("closing connection");

  // Drop the flag
  readyForTicker = false;
}

void setup() {
  Serial.begin(115200);
  delay(10);

  // We start by connecting to a WiFi network

  Serial.println();
  Serial.println();
  Serial.print("Connecting to ");
  Serial.println(ssid);

  WiFi.begin(ssid, password);

  while (WiFi.status() != WL_CONNECTED) {
    delay(500);
    Serial.print(".");
  }

  Serial.println("");
  Serial.println("WiFi connected");
  Serial.println("IP address: ");
  Serial.println(WiFi.localIP());


  // call setReadyForTicker() every 60 seconds
  ticker.attach(60, setReadyForTicker);
}

void loop() {
  if (readyForTicker) {
    doBlockingIO();
  }
}
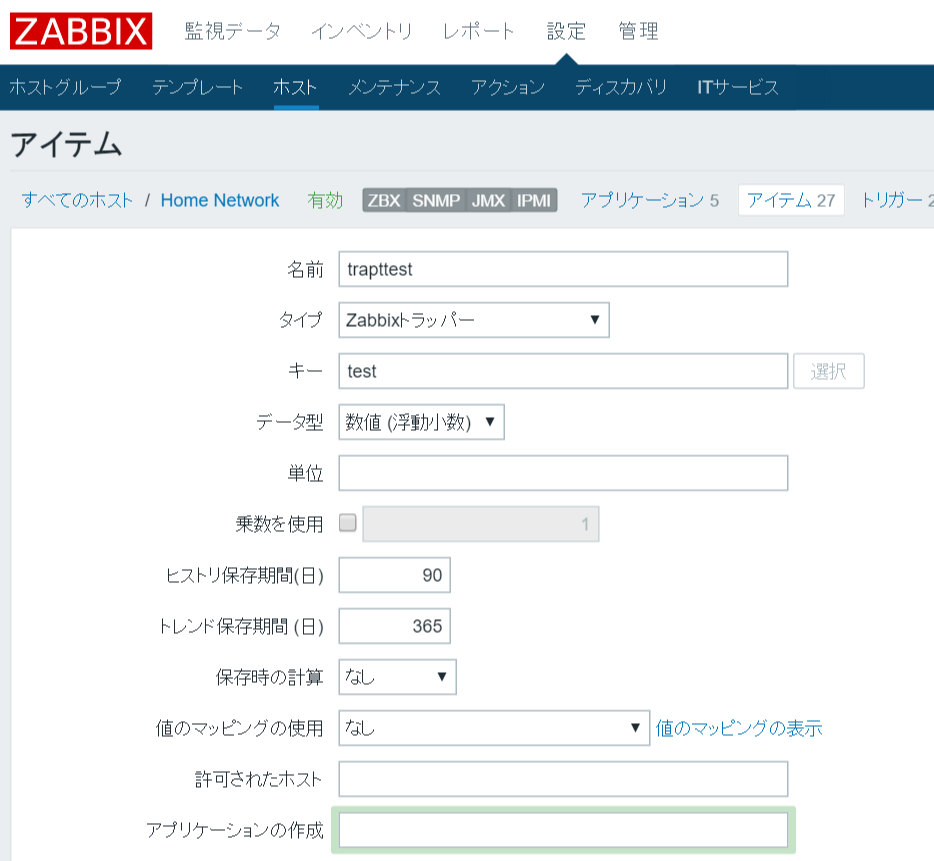
サーバー側の設定
- ZabbixサーバーのWeb UI上で"Home Network"という名前のホストを作成
- Zabbixトラッパー型のtestというキーのアイテムを作成
※ホスト名、アイテムキーはソースコード内で設定しているものに揃える
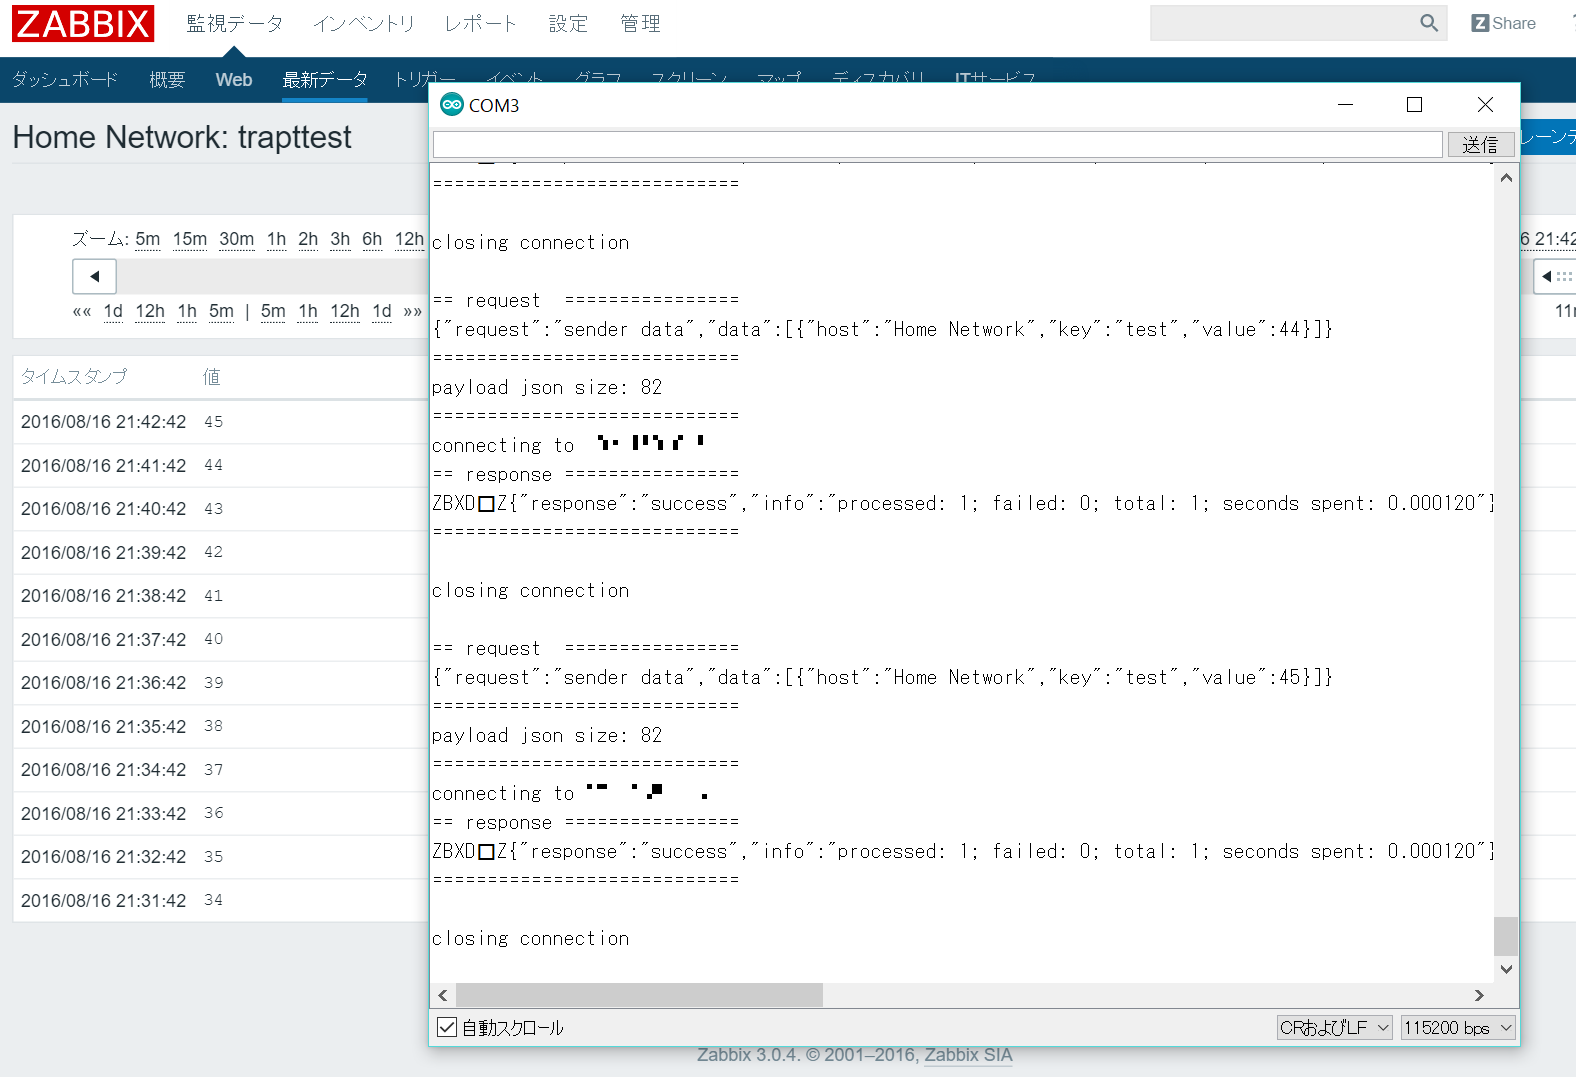
実際にやってみた様子
インクリメントされる数値が1分おきにサーバーに登録されるところまで出来ました。
おわりに
さきほどI2C接続のセンサーをいくつかポチったので、それらが届き次第上述の内容と組み合わせてみたいと思います。
参考
- ESP-WROOM-02の基本的な使い方
- http://trac.switch-science.com/wiki/esp_dev_arduino_ide
- http://qiita.com/azusa9/items/264165005aefaa3e8d7d
- 一定時間ごとに処理を行う方法
- https://www.sglabs.jp/esp-wroom-02-ticker/
- ArduinoJsonライブラリの使い方
- http://hawksnowlog.tumblr.com/post/141582097010/arduino-%E3%81%A7-json-%E3%83%A9%E3%82%A4%E3%83%96%E3%83%A9%E3%83%AA%E3%82%92%E4%BD%BF%E3%81%A3%E3%81%A6%E3%81%BF%E3%81%9F
- Zabbix senderプロトコルの内容
- http://www.slideshare.net/BlueSkyDetector/zabbix-meeting-20101218022-takanori-suzuki
- WiFiClient サンプルプログラム