はじめに
この記事は、EV3にev3devをインストールし、SSH接続できている状態であることを前提にしています。環境構築ができていない方はこちらの記事を参考にしてください。
mindstorm-EV3をLinuxで制御しよう! ev3dev OSのインストールとSSH接続
つくるもの
mindstorm-EV3のインテリジェントブロックの画面(LCD)をキャプチャーし、画像として保存するプログラムをつくります。Pythonのev3devAPIであるev3dev-lang-pythonを使います。
ev3dev-lang-pythonの環境構築についてはこちらを参考にして下さい。
プログラム
screenshot.py
# !/usr/bin/env python3


import sys
from subprocess import call
# 画像データを扱うためのライブラリ
from PIL import Image

# 保存する画像名、デフォルトでは"screenshot.png"
out_name = sys.argv[1] if len(sys.argv) > 1 else "screenshot.png"

# フレームバッファーをキャプチャし、PNG イメージに変換する
call(["fbgrab", out_name]);

# スクリーンショットした画像を読み込む
image = Image.open(out_name)

# RGB形式に画像を変換
image = image.convert("RGB")

# 画像を整形
image = image.resize(tuple(i * 2 for i in image.size), Image.NEAREST)


pixel_data = image.load()

# 画像の色変換
for y in range(image.size[1]):
    for x in range(image.size[0]):
        if pixel_data[x, y] == (255, 255, 255):
            pixel_data[x, y] = (173, 181, 120)

# Save the image again
image.save(out_name);
call(["fbgrab", out_name])によって得られるスクリーンショット画像は白黒の画像になっているので、本当のスクリーンの色を表現するために白色のピクセルを薄緑色に変換する必要があります。
その処理を実現するのがプログラム中の以下の部分です。
for y in range(image.size[1]):
    for x in range(image.size[0]):
        if pixel_data[x, y] == (255, 255, 255):
            pixel_data[x, y] = (173, 181, 120)
実行
第一引数に保存先の画像ファイルを指定できます。
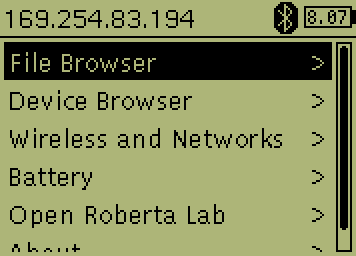
robot@ev3dev:$ python screenshot.py test.png
このような画像が得られました