とりあえず
酒と泪とRubyとRailsと さんの記事をなぞってみています。少しだけ異なる点があるとすれば、いつものごとくハマって苦労した点、あと仮想環境使って何度も検証したので細かい点を残しておいてます。
※まだgitのこと勉強中なので表現方法が間違っていたら指摘して頂きたいw
構成
GitHub に Octopress で出力した結果を保存(master ブランチ)、Bitbucket に記事を保存(source ブランチ)します。あと、チーム(複数人)でブログ管理できるようにします。あと Vagrant には、CentOS 6.5 を入れてます。
事前準備
- 仮想環境 Vagrant を作成していること(できれば複数)かつ、github.com にsshで接続できる環境設定済みであること。
- GitHubで「your_username.github.io」リポジトリを作成済みであること。
- BitBucket にアカウントを作成しておくこと。
Ruby Setup
Octopress Start をみると「Install Ruby 1.9.3 or greater using either rbenv or RVM.」と指示されているので rvm にて ruby をインストールします。ruby 2.1.2p(2014/5/31現在) がインスコされるけどHTMLのレンダリング動作に問題ないのでこのまま使います。
$ sudo su
# curl -L https://get.rvm.io | bash -s stable --ruby
# source /usr/local/rvm/scripts/rvm
# gem install bundler
# exit
Octopress Setup
GitHub に Octopress で出力した結果を保存(master ブランチ)するため Octopress をセットアップします。rake setup_github_pagesで指定するurlは、必ず Github 側を指定すること。
$ git clone git://github.com/imathis/octopress.git username.github.io
$ cd username.github.io
$ bundle install
$ rake install
$ rake setup_github_pages
Enter the read/write url for your repository
(For example, 'git@github.com:your_username/your_username.github.io.git)
           or 'https://github.com/your_username/your_username.github.io')
Repository url:
Repository url: には git@github.com:your_username/your_username.github.io.git を指定すること。※your_username は、自分のアカウント名
とりあえず記事を作成しGitHub に Octopress で出力した結果を保存(master ブランチ)にデプロイします。デプロイすると Master ブランチが Github に push されます。
$ rake generate
$ rake deploy
Github の Collaborators
GitHubでリポジトリを開き、Settings をクリック。「Restrict editing to collaborators only」をチェックします。
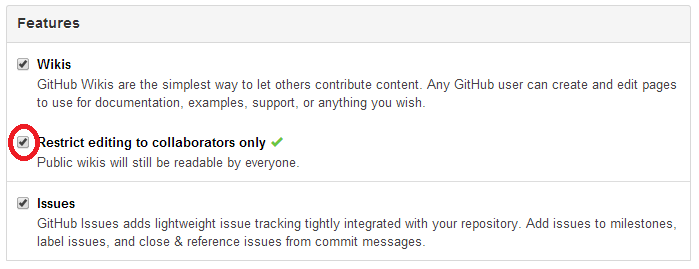
また、Collaborators をクリックし 共同管理者を追加します。
Bitbucket に 記事を保存
rake deploy コマンドは、Octopress(Jelly)で生成されたHTMLのみレポジトリにpushされるので元ネタ記事を管理したい場合は、別にレポジトリを作成しておく必要があります。Github だと常に公開(有料版なら非公開ができる)されるので、お金をかけな方法としては Bitbucket でレポジトリを作るのが得策。
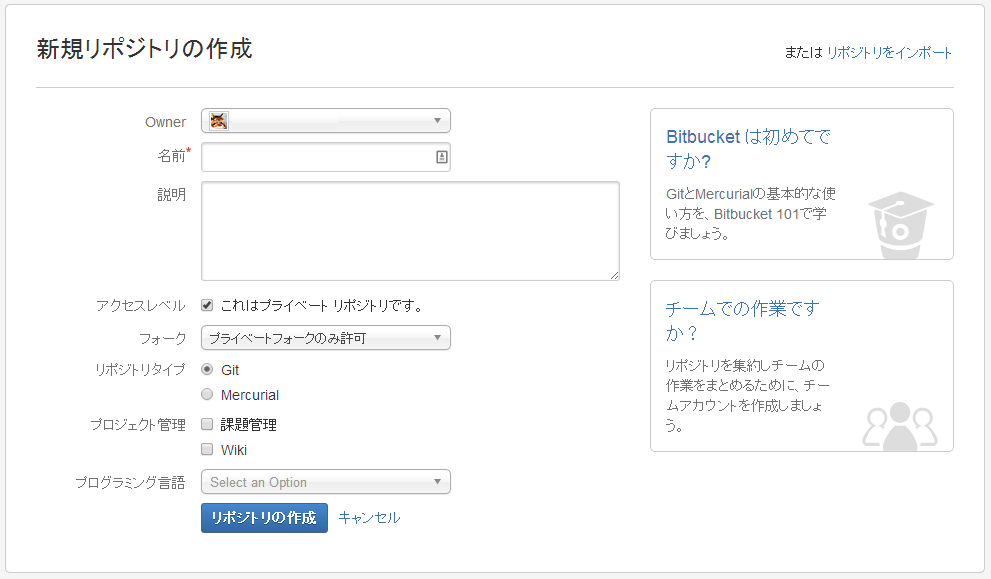
Bitbucket で リポジトリを作成
BitBucketにログインし「作成」からリポジトリを作成します。名前には「your_username.github.io」を指定します。
Bitbucket に 記事を保存
Bitbucket で記事を保存ソースを管理するようにしてみる。コマンドからの使い方は、Github と同様なので push するだけ。
$ git remote add bitbucket git@bitbucket.org:username/username.github.io.git
$ git add -A
$ git commit -m "add source post"
$ git push -u bitbucket source
その3に続く
Vagrant + GitHub(Pages) + Bitbucket + Octopress と環境ができた。次は複数人 で1つのBlogを編集できる環境の構築をしてみましょう。