手っ取り早くサーバ監視できてよい
MTRG , Hinemos, Cacti, Zabbix, Nagios, observium, ganglia, monit, zenoss とかサーバ監視ツールはあれど手軽にインストールできないのが玉にキズだなと思っていたら、最近流行りの Munin が手軽でさっくりいい感じに「サーバ監視できるよ」と教えてもらったので構築してみました。ちょー簡単w
ただ Munin は、サーバ監視システムというか、リソース管理システムの色合いが強いので(自分でプラグイン作れば色々とできるけど)、そこら辺りは Zabbix で通知系を管理し Munin で実際の状況を見るというのがいいらしい。
しかし少し前は、SNMP を使用し対応機器を監視対象にしてリソースを監視,GDで描画つのが一般的だった RRDtool, MTRG などありますが、こんな手軽に導入できると首位逆転ですよね。
と思ったら、通知系も簡単に設定できるらしい。ついでに SNMP 機器を監視するにはちょっと手が必要らしい。
前提条件
いつものごとく vm を2つ用意すること。Munin パッケージは、EPEL リポジトリからインストールするということ。Munin のデータポートは、4949/tcp, udp となっているのでファイヤーウォールで閉じていたら解放が必要ということ。ぐらいかな?
また個人・企業に問わずサーバ監視の情報は、第三者に見せていいものではないので適切なセキュリティ対策を必ず行うことが必要です。たとえば、Munin アクセスにはIP制限入れるとか認証いれるとかとか。必要だと思います。ついでに以下「Muninサーバ, Muninクライアント」と以下説明しますのでそこのとこよろしくお願いします。
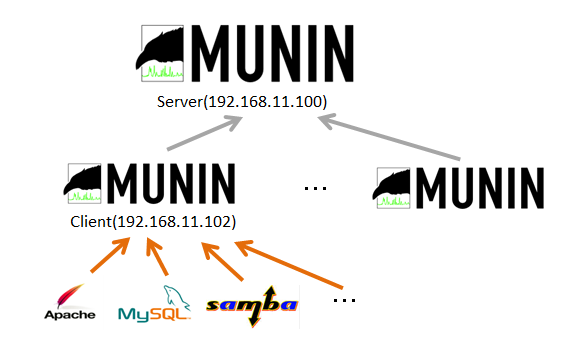
Muninサーバの構築 (192.168.11.100)
サーバのパッケージをインストールすると同時にエージェントである(munin-node)もインストールされます。最少構成の1台で Munin を運用する場合は、これでいいですね。またサーバ側には、Webサービスが必要なので Apache をインストールしておきます。
$ sudo yum install apache
パッケージを導入
munin パッケージをインストールして /etc/munin/munin.conf を少し弄るだけです。
$ sudo yum -y install munin --enablerepo=epel
$ sudo vi /etc/munin/munin.conf
dbdir   /var/lib/munin                 # コメントを外す
htmldir /var/www/html/munin
logdir /var/log/munin
rundir  /var/run/munin
BASIC認証
/etc/httpd/conf.d/munin.conf を見ると BASIC認証する設定になっているのでこのまま使用する。
<directory /var/www/html/munin>
  AuthUserFile /etc/munin/munin-htpasswd
  AuthName "Munin"
  AuthType Basic
  require valid-user
が、/etc/munin/munin-htpasswd は、空っぽなのでユーザ登録します。
$ sudo htpasswd -c /etc/munin/munin-htpasswd hoge
自動起動の設定と動作確認
特に難しいことは無くいつもの安定の設定ですw。
$ sudo service httpd restart
$ sudo service munin-node start
$ sudo chkconfig munin-node on
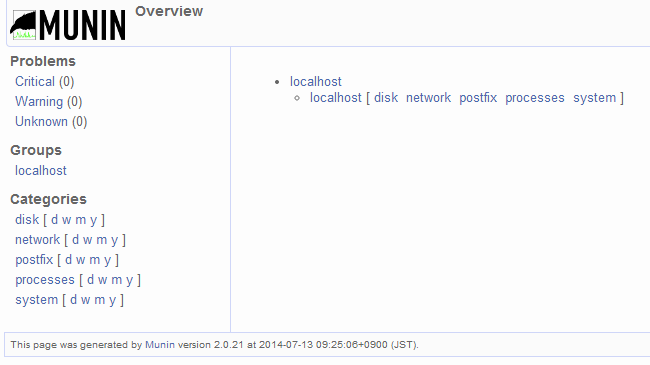
Munin が情報を収集するタイミングは、5分毎なのでコーヒーでも飲みながら少し待ってからhttp://192.168.11.100/munin/ にアクセスする。BASIC認証があるので上で設定したユーザ/パスワードを入力。
Muninクライアントの構築 (192.168.11.102)
muninエージェントのインストールと、Muninサーバにシステムの情報を転送する設定を行います。←これだけ。
パッケージを導入
muninエージェントをインストールして /etc/munin/munin-node.conf にMuninサーバアドレスを設定するだけ。
$ sudo yum -y install munin-node --enablerepo=epel
$ sudo vi /etc/munin/munin-node.conf
allow ^192\.168\.11\.102$
自動起動の設定と動作確認
こちらも特に難しいことは無くいつもの安定の設定ですねw。
$ sudo service munin-node start
$ sudo chkconfig munin-node on
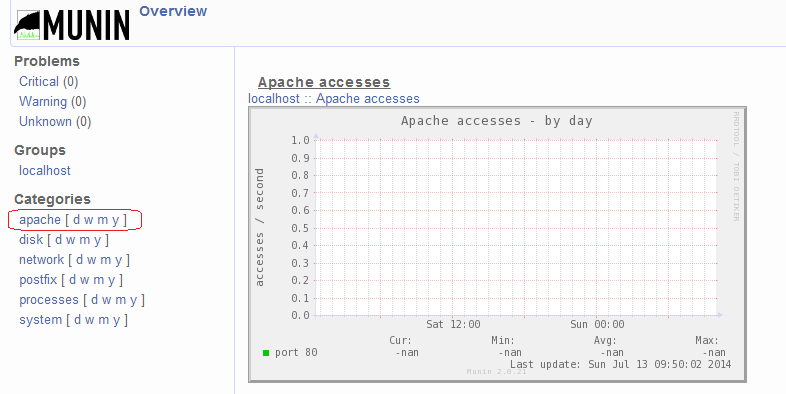
Apache プラグインを導入(手動設定の場合)
munin で監視されるリソース(Sensor っていうらしい)は、デフォルトで disk/network/postfix/processes/system の5つが設定済みなので初期状態としてはこれでいい感じです。で、Apache など有名どころの Sensor は自分で用意する必要があるかというとそうでもなく、他に Sensor がどんなのが存在するかは /usr/share/munin/plugins を見ると結構用意されているのが分かります。
自動でも設定することができますが、あえて手動でApache Sensor を設定してみます。
Apacheプラグインの設定
リンクを張るだけ。・・・で済む訳は、ないですね!!。ここ少しだけハマりますw
ちなみにMuninサーバ, Muninクライアント共に Apache の Sensor を設定しておきます。
Apacheプラグインをリンクを張ります。
$ sudo ln -s /usr/share/munin/plugins/apache_accesses /etc/munin/plugins/apache_accesses
$ sudo ln -s /usr/share/munin/plugins/apache_processes /etc/munin/plugins/apache_processes
$ sudo ln -s /usr/share/munin/plugins/apache_volume /etc/munin/plugins/apache_volume
Apache の設定ファイル httpd.conf に以下の設定を行います(ExtendedStatus On のコメントを外すだけだと思うけど)。
$ sudo vi /etc/httpd/conf/httpd.conf
LoadModule status_module modules/mod_status.so
ExtendedStatus On
Apache と、munin-node の再起動
$ sudo service httpd restart
$ sudo service munin-node restart
グラフが更新されない(まっしろ)。
おかしいな?グラフが更新されないと思ったら。プラグインが値を取得できていないことが原因でした。
$ sudo /etc/munin/plugins/munin-run apache_accesses
accesses80.value U   ← 失敗してる
accesses80.value 85   ← 値を返してるのであれば正常
まっしろ対策
/etc/munin/plugin-conf.d/munin-node と /etc/httpd/conf/httpd.conf を修正します。
[apache_*]
env.url   http://127.0.0.1:%d/server-status?auto
env.ports 80
Alias /server-status /server-status
<IfModule mod_status.c>
  ExtendedStatus On
  <Location /server-status>
    SetHandler server-status
    Order deny,allow
    Deny from all
    Allow from all
  </Location>
</IfModule>
VirtualHost を使用している場合
<VirtualHost *:80>
    ServerName 127.0.0.1
    <Location /server-status>
      SetHandler server-status
      Order deny,allow
      Deny from all
      allow from 127.0.0.1
    </Location>
</VirtualHost>
修正後は、Apache と Munin の再起動
$ sudo service httpd restart
$ sudo service munin-node restart
プラグインを導入(自動設定の場合)
インストールしたマシンで使えそうなプラグインのお勧めリスト一覧を確認できたり設定するコマンドは、以下でできます。
でも Apache と同様に細かい設定が必要かもしれないのでそこらは、適宜対応すること。
# munin-node-configure --suggest
# munin-node-configure --shell | sh
Muninクライアント ⇒ Muninサーバ に情報を転送
Muninクライアントというか、エージェントの情報を Muninサーバに転送する設定をします。
※Muninクライアント情報を受取るため Muninサーバ側の 4949/TCP, UDP が解放されていること。
Muninクライアント側の /etc/munin/munin-node.conf を修正します。
$ sudo vi /etc/munin/munin-node.conf
allow ^192\.168\.11\.100$
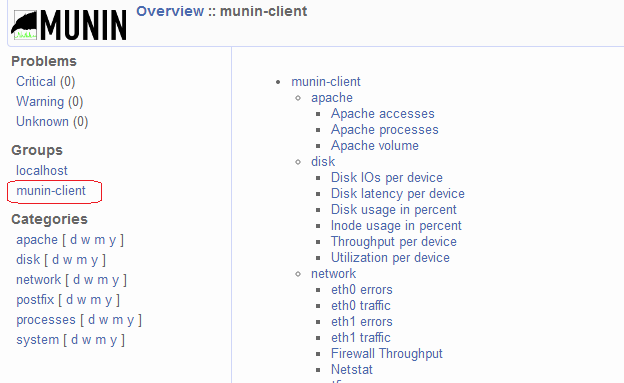
とりあえずこんな風になる
Muninサーバ, Muninクライアント 共に Apache, Munin を再起動して様子をみます。
$ sudo service httpd restart
$ sudo service munin-node restart
最終調整を行う
グループ化したりしたりしたりw
Muninサーバ側
[MyService_Server;]
[MyService_Server;Munin-Client]
    address 192.168.11.102
    use_node_name yes
[MyService_Server;Munin-Server]
    address 127.0.0.1
    use_node_name yes
allow ^127\.0\.0\.1$
allow ^::1$
Muninクライアント側
allow ^192\.168\.11\.100$
allow ^::1$
自作プラグインの作成
MTRG と同様に時間軸の差異(現在とひとつ前の値の差を計測した時間)でデータを作成すればいいので意外と楽に作成できると思います。/usr/share/munin/plugins ディレクトリのプラグインを見てみると sh でもいいの? というのもありましたが、最終的な書式が合っていればok(出力)なので特に言語に偏りはなさそうです(簡易的に使えるという意味です)。
munin-nodeの設定をコマンドで確認する方法
MuninでSSHログイン失敗数を記録してみた
muninプラグインを作成
munin の webUI を変更してみる
ちょっとUIがいけてないよなと思ったら webUI を簡単に変更することができるみたいです。
「Munstrap」これ結構いいですね。簡単に導入もできますし。
その他
とりあえず
「グルーピング化できるの?とかサーバ名とかとか」細かい点とかあるだろうけども「細かい設定はどーでもいいんだよ」というならこれでokですね。暇みてどこまでカスタマイズできるか調整してみます。


