いつもと感じがちがいますが、だいたいコピペでいけるかと。 :-)
Overview
- Making your Wifi AP Router with DNS-based-Adblock on Raspberry Pi 3
Environment
- Raspberry Pi 3 Model B
- Ethernet(
eth0): Connected to Internet
IP address192.168.22.65is taken from DHCP server. ex)Cable router - Wifi(
wlan0): Access Point.
It will be static IP, set to192.168.42.1
- Ethernet(
- microSD 8GB
- Raspbian Jessie Lite : 2016-11-25-raspbian-jessie-lite.img
Steps
RasPi: Initial setup to boot and to update
- Creating bootable microSD
- Windows 7 64bit
-
Rufus v2.11Portable
- Choose: 'Device'
- Create a bootable disk using:
DD image - Click Disk icon, and pick Raspbian '.ZIP' file. (You don't need to extract zip. It will burn with extracting. :-) )
- (Optional) Create the file named '
ssh' on SD to allow ssh-login. - Boot
- Update Packages:
sudo apt update; sudo apt upgrade -y - Install hostapd:
sudo apt install hostapd -y
Setup : wlan0 as STATIC IP (192.168.42.1), hostapd and ip-forwarding
###
# Make sure hostapd is installed :)
# sudo apt install hostapd -y

###
# Unmanage: wlan0 by DHCPCD
echo denyinterfaces wlan0 | sudo tee -a /etc/dhcpcd.conf

###
# Modify: /etc/network/interfaces
sudo sed -i \
-e 's/allow-hotplug wlan0/#allow-hotplug wlan0/g' \
-e 's/iface wlan0 inet manual/#iface wlan0 inet manual/g' \
-e 's@    wpa-conf /etc/wpa_supplicant/wpa_supplicant.conf@#    wpa-conf /etc/wpa_supplicant/wpa_supplicant.conf@'  \
/etc/network/interfaces

cat <<EOF | sudo tee -a /etc/network/interfaces
#
# wlan0 - static IP
allow-hotplug wlan0
iface wlan0 inet static
    address 192.168.42.1
    netmask 255.255.255.0
    network 192.168.42.0
    broadcast 192.168.42.255
EOF


###
# Create: /etc/hostapd/hostapd.conf
#  ssid/wpa_passphrase = Pi3-AP/raspberry
#  you may modify them.
cat <<EOF | sudo tee /etc/hostapd/hostapd.conf
interface=wlan0
driver=nl80211
# driver=rtl871xdrv
hw_mode=g
channel=6
ieee80211n=1
wmm_enabled=1
ht_capab=[HT40][SHORT-GI-20][DSSS_CCK-40]
macaddr_acl=0
auth_algs=1
ignore_broadcast_ssid=0
wpa=2
wpa_key_mgmt=WPA-PSK
rsn_pairwise=CCMP
ssid=Pi3-AP
wpa_passphrase=raspberry
EOF

##
# Edit: /etc/default/hostapd
echo DAEMON_CONF=\"/etc/hostapd/hostapd.conf\" | sudo tee -a /etc/default/hostapd

##
# Setting: IP Forward
sudo sed -i -e 's/#net.ipv4.ip_forward=1/net.ipv4.ip_forward=1/g'  /etc/sysctl.conf
#
sudo iptables -t nat -A POSTROUTING -o eth0 -j MASQUERADE
sudo iptables -A FORWARD -i eth0 -o wlan0 -m state --state RELATED,ESTABLISHED -j ACCEPT
sudo iptables -A FORWARD -i wlan0 -o eth0 -j ACCEPT
sudo sh -c "iptables-save > /etc/iptables.ipv4.nat"
#
echo 'iptables-restore < /etc/iptables.ipv4.nat' | sudo tee /lib/dhcpcd/dhcpcd-hooks/70-ipv4-nat

##
# Reboot!
sudo reboot
##
Pi-hole: Install and setup
-
Install script:
curl -L https://install.pi-hole.net | bash
Wait until configuration starts... -
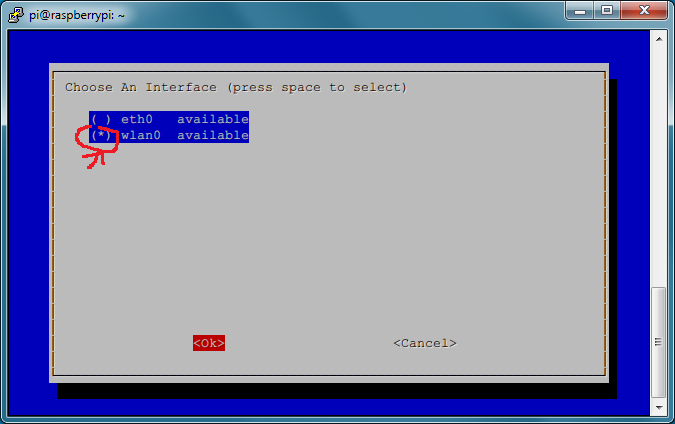
Enter > Enter > Enter > Down Arrow > SpaceBar > Tab > Enter
-
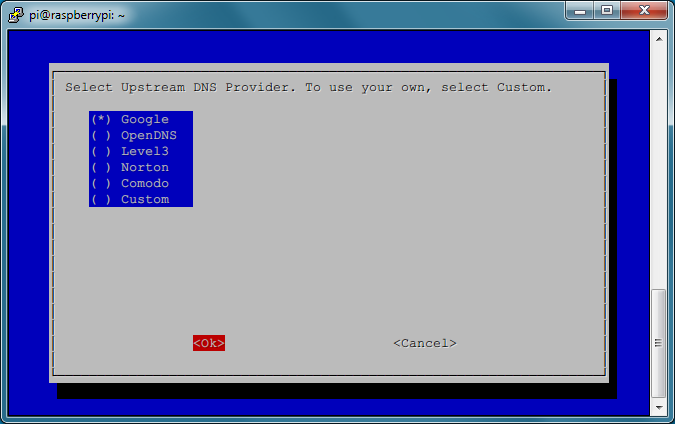
Up/Down and SpaceBar to select your favorite DNS, and Tab > Enter
-
Down>SpaceBar>Tab>Enter
Uncheck IPv6
-
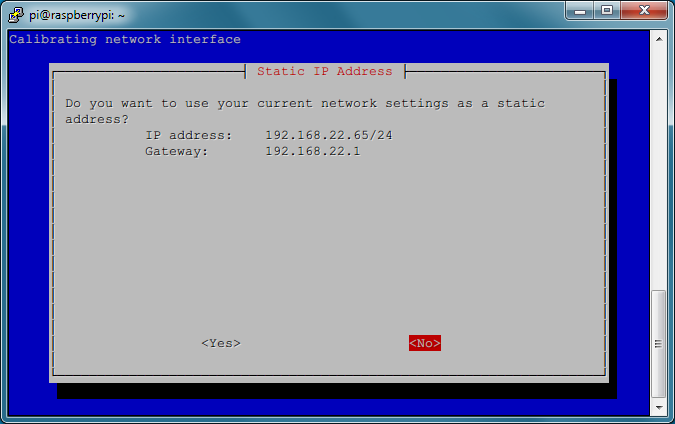
Right(to select 'NO' when it shows eth0 IP address) > Enter
-
Edit:
192.168.42.1/24
Then, Tab > Enter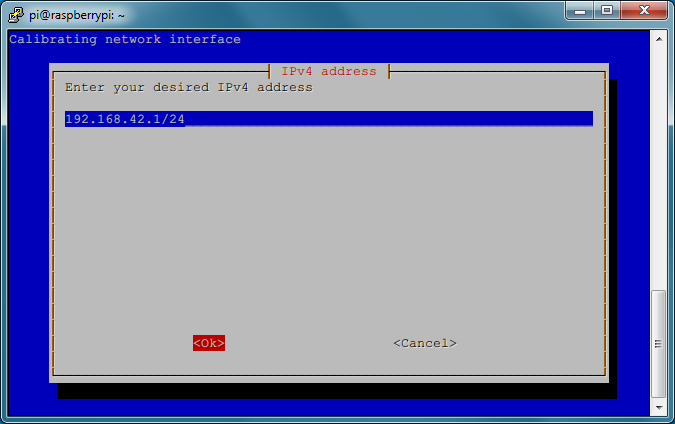
-
Edit:
192.168.42.1
Then, Tab > Enter
-
Make sure, and Enter:
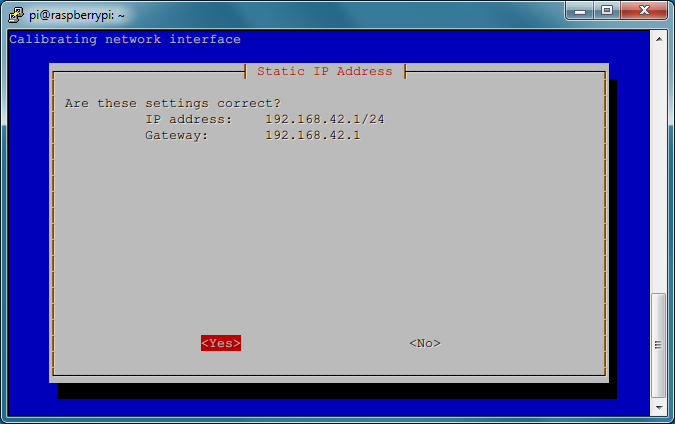
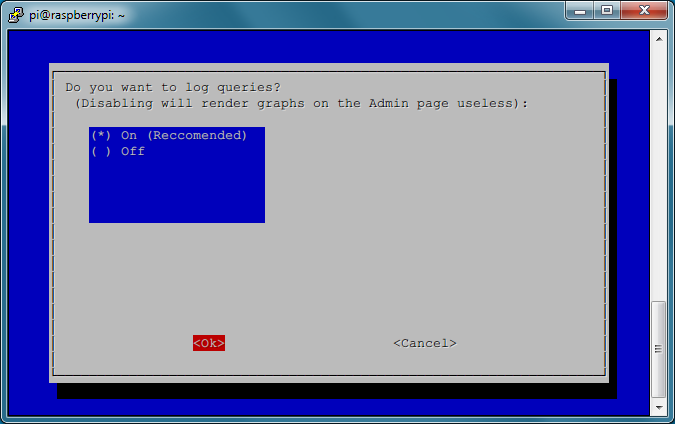
-
Tab>Enter
-
Wait ... The necessary packages will be installed.
-
You'll see the admin password.
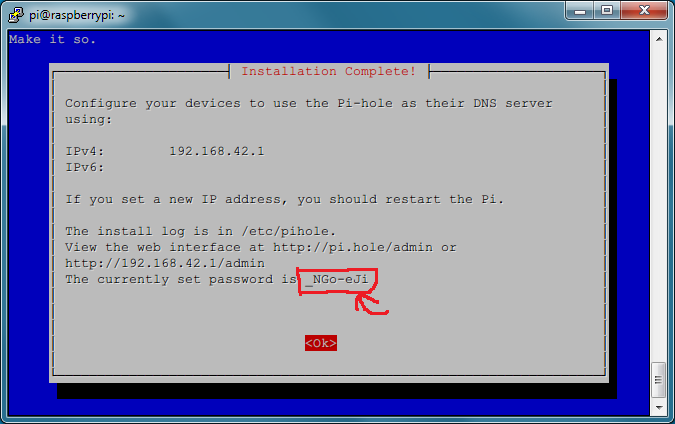
-
Press Enter to back to shell.
-
Edit: /etc/dhcpcd.conf - remove last 4 lines
sudo vi /etc/dhcpcd.conf
type:Gdddddddd:wq[Enter](shift+'g' to go to last line, 'dd' 4times to 4 remove lines, ':' to command, 'wq' to write and quit.) -
Reboot
sudo reboot -
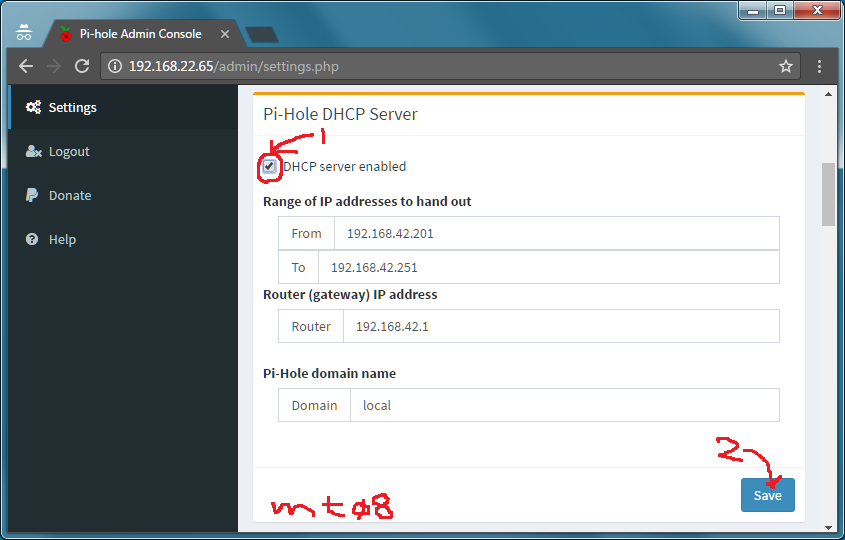
Open WebBrowser: http://RasPi_eth0_IP_Address/admin/settings.php
Enter admin-password to login, Check 'DHCP server enabled' and [Save]
Connect to RPi3 Wifi Access Point
- You'll find SSID 'RPi3-AP' and 'raspberry' as passphrase. (Or you change your own ones.)
- You should modify
/etc/hostapd/hostapd.confforssid=andwpa_passphrase=.
- You should modify
C:\> ipconfig
...
Wireless LAN adapter Wireless Network Connection:

   Connection-specific DNS Suffix  . : local
   IPv4 Address. . . . . . . . . . . : 192.168.42.213
   Subnet Mask . . . . . . . . . . . : 255.255.255.0
   Default Gateway . . . . . . . . . : 192.168.42.1
...
C:\>nslookup www.google.com
Server:  raspberrypi
Address:  192.168.42.1

Non-authoritative answer:
Name:    www.google.com
Addresses:  2607:f8b0:4005:804::2004
          216.58.193.100

C:\>nslookup doubleclick.net
Server:  raspberrypi
Address:  192.168.42.1

Name:    doubleclick.net
Addresses:  2607:f8b0:4005:809::200e
          192.168.42.1

C:\>
Others
- If you lost admin password, you can change it by:
pihole -a -p your_new_password - Related:
- It's not enough to have been tested, it might something wrong. :-|
あまりテストしてないので、不具合あるかも...