もう2016年なので、皆さんは息をするようにes6を使われていることだと思います。
当然、serverless frameworkのコードもes6で書きたいですよね。
もちろん、普通に自分でbabelでトランスパイルしてもいいのですが、公式にserverless-optimizer-pluginというものが準備されているので、これを使ってみようと思います。
以下の説明はすべてmacを前提にしていますが、windowsでも雰囲気で大体いけるはずです。
コードはこちらにあります。
(リポジトリ名とproject名が合ってないですが気にしないでください...)
そもそもserverless frameworkってなんぞ
serverless frameworkは、AWS LambdaとAWS API Gatewayを組み合わせて、サーバレスなアプリを構築するフレームワークです。
serverlessの詳しい説明や導入,基本的な使い方についてはこちらの記事が詳しいです。
serverlessの導入
前提としてnodeとnpmは既にinstall済みとします。
まずはserverless本体をinstallします。
既にserverlessがinstall済みの方は不要ですが、optimizer-pluginはv0.1.0以上を要求しますので注意してください。
$ npm install -g serverless
serverless projectの作成
今回はserverlessOptimizerSampleという名前でprojectを作ります。名前はキャメルケースで付けるのが良いっぽいです。
AWSのprofileが~/.aws/credentialsに置かれている前提なので、そうでない場合は-pオプションで場所を指定してください。
$ serverless project create -n serverlessOptimizerSample -d serverless-optimizer-sample.com -r ap-northeast-1 -e hogehoge@gmail.com
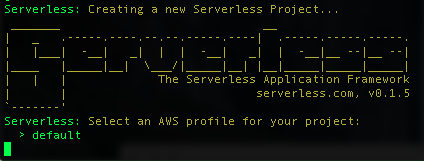
実行すると以下のように、ロゴマークと一緒にAWSのどのprofileを使うか聞かれます。今はdefaultが選択されているのでそのままEnterを押してください。
いろいろ表示が出て、projectが作成されます。意外と時間がかかるのでゆっくり待ちましょう。
終わったらproject名のディレクトリができているはず。中身を確認してみます。
$ cd serverlessOptimizerSample
$ tree

├── README.md
├── _meta
│   ├── resources
│   │   └── s-resources-cf-development-apnortheast1.json
│   └── variables
│       ├── s-variables-common.json
│       ├── s-variables-development-apnortheast1.json
│       └── s-variables-development.json
├── admin.env
├── package.json
└── s-project.json
serverless-optimizer-pluginの導入
pluginはprojectディレクトリ直下でinstallします。
optimizer-pluginにはbrowserifyがbundleされていますが、babelifyは入ってないので、一緒にinstallします。
$ npm install --save serverless-optimizer-plugin babelify
component, module, functionの作成
ちょっと前まではcomponentという概念は無かったのですが、nodejs以外の複数のランタイムを混在させるためのものみたいです。
componentはserverless component createで作成でき、この時にmoduleとfunctionも一緒に作ることができます。
今回は、component名はhelloComponent, module名はhelloModule, function名はhelloWorldにします。
$ serverless component create -c helloComponent -m helloModule -f helloWorld
$ tree

├── README.md
├── _meta
│   ├── resources
│   │   └── s-resources-cf-development-apnortheast1.json
│   └── variables
│       ├── s-variables-common.json
│       ├── s-variables-development-apnortheast1.json
│       └── s-variables-development.json
├── admin.env
├── helloComponent
│   ├── helloModule
│   │   ├── helloWorld
│   │   │   ├── event.json
│   │   │   ├── handler.js
│   │   │   └── s-function.json
│   │   └── s-module.json
│   ├── lib
│   │   └── index.js
│   ├── node_modules
│   │   ├── dotenv
│   │   │   ├── Contributing.md
│   │   │   ├── README.md
│   │   │   ├── config.js
│   │   │   ├── dotenv.png
│   │   │   ├── lib
│   │   │   │   └── main.js
│   │   │   ├── package.json
│   │   │   └── test
│   │   │       ├── config.js
│   │   │       └── main.js
│   │   └── serverless-helpers-js
│   │       ├── README.md
│   │       ├── env
│   │       │   └── index.js
│   │       ├── index.js
│   │       └── package.json
│   ├── package.json
│   └── s-component.json
├── package.json
└── s-project.json
project -> component -> module -> functionという構造になっているのが分かります。
serverless-optimizer-pluginの適用
まずはこのprojectで利用するpluginをs-project.jsonで指定します。
plugins: [
    "serverless-optimizer-plugin"
]
次に、optimizer内部で使用するbrowserifyの設定をs-component.jsonかs-function.jsonに書きます。
s-component.jsonに書いた場合はそのcomponentが内包するfunction全てに、s-function.jsonに書いた場合はそのfunction単体に適用されます。両方に書くと、s-function.jsonに書いた方で上書きされます。
今回はs-component.jsonで設定します。
{
    "name": "helloComponent",
    "runtime": "nodejs",
    "custom": {
        "optimize": {
            "exclude": [ "aws-sdk" ],
            "transforms": [
                {
                    "name": "babelify",
                    "opts": {
                        "presets": [
                            "es2015"
                        ]
                    }
                }
            ]
        }
    }
}
何を設定しているかは内容で大体察してください。
最後にes6を利用するために、babelのpresetをinstallしましょう。helloComponent内のpackage.jsonにsaveしている点に注意してください。
$ cd helloComponent && npm install --save babel-preset-es2015
これでfunctionをes6で書く準備ができました!
es6で書いてみる
helloComponent/helloModule/helloWorld/handler.js を見てみると、以下のような内容になっていると思います。
'use strict';

/**
 * Serverless Module: Lambda Handler
 * - Your lambda functions should be a thin wrapper around your own separate
 * modules, to keep your code testable, reusable and AWS independent
 * - 'serverless-helpers-js' module is required for Serverless ENV var support.  Hopefully, AWS will add ENV support to Lambda soon :)
 */

// Require Serverless ENV vars
var ServerlessHelpers = require('serverless-helpers-js').loadEnv();

// Require Logic
var lib = require('../../lib');

// Lambda Handler
module.exports.handler = function(event, context) {

  lib.respond(event, function(error, response) {
    return context.done(error, response);
  });
};
これをes6っぽく書きなおしてみます。
'use strict';

/**
 * Serverless Module: Lambda Handler
 * - Your lambda functions should be a thin wrapper around your own separate
 * modules, to keep your code testable, reusable and AWS independent
 * - 'serverless-helpers-js' module is required for Serverless ENV var support.  Hopefully, AWS will add ENV support to Lambda soon :)
 */

// Require Serverless ENV vars
import { loadEnv } from 'serverless-helpers-js';
const ServerlessHelpers = loadEnv();

// import ServerlessHelpers from 'serverless-helpers-js'.loadEnv();
// Require Logic
import lib from '../../lib';

// Lambda Handler
export function handler(event, context) {

  lib.respond(event, (error, response) => {
    return context.done(error, response);
  });
};
いいですね。次はhelloComponent/lib/index.jsです。
before:
/**
 * Lib
 */

module.exports.respond = function(event, cb) {

  var response = {
    message: "Your Serverless function ran successfully!"
  };

  return cb(null, response);
};
after:
/**
 * Lib
 */

const respond = (event, cb) => {

  const response = {
    message: "Your Serverless function ran successfully!!!"
  };

  return cb(null, response);
};

export default { respond };
素晴らしい。じゃあ実行してみましょう。
ローカルでの実行はserverless function runですが、v0.0.x系とは微妙に実行方法が変わっているので注意が必要です。
$ serverless function run helloComponent/helloModule/helloWorld
こんな感じで、serverless function run <componentName>/<moduleName>/<functionName>という風に書きます。
...と言ったものの、ローカル実行時はoptimizerが走らないのでエラーになります。
この辺、どうするのが良いのかよくわからず...とりあえずここは男らしくすっぱりあっさり諦めてdeployに移ります。
deployする
先にs-function.jsonを確認します。
デフォルトでは使用するmeory sizeが1024になっています。
今回は適当なメッセージを返すだけのfunctionなので、最小の128にしておきましょう。
"memorySize": 128
他にも色々ありますが、とりあえずはendpoints内の"method"= "GET"と"path": "helloModule/helloWorld"だけ確認してください。すぐ使います。
ではdeployしましょう。
$ serverless function deploy helloComponent/helloModule/helloWorld
$ serverless endpoint deploy helloComponent/helloModule/helloWorld@helloModule/helloWorld~GET
1行めのserverless function deployではコードをlambdaにアップロードしています。
functionの指定方法はfunction runと同じ。
実行すると自動的にoptimizerが走って、コードのminifyやes5へのトランスパイルを行ってくれます。
2行めのserverless endpoint deployではfunctionへのエンドポイントを作成しています。
エンドポイントの指定方法は以下の通りです。
<componentName>/<moduleName>/<functionName>@<endpointUrl>~<endpointMethod>
さっき見たpathとmethodがそれぞれ、endpointUrlとendpointMethodに対応しているわけですね。
serverless endpoint deployが成功すると以下のような表示になるはずです。
一番下の行に表示されているのが、発行されたエンドポイントのURLです。
じゃあさっそくアクセスしてみましょう。パンツァーフォー!!!!
$ open https://hogehoge.execute-api.ap-northeast-1.amazonaws.com/development/helloModule/helloWorld
こんな感じのメッセージが表示されたら成功です。
{"message":"Your Serverless function ran successfully!"}
やったね。
まとめ
いかがでしょうか。pluginを導入することで ローカルで実行できないという辛すぎる現実から目を逸らせば簡単にes6でfunctionが書けるようになりましたね。
serverless frameworkは開発の速度が速いです。どれぐらい速いかというと、昨日v0.1.3とv0.1.4が出たと思ったら、今日npm updateしてv0.1.5が入るとかそういう感じです。(2016/01/24現在)
この記事に書いてあることもすぐに古くなってしまうと思うので、serverless framework気になってる方は今すぐやりましょう!!

