はじめに
前回はUnityちゃんを単に表示しただけでした。
今回は、キー操作でUnityちゃんをモーション付きで動かしてみることにします。
Stepとしては以下のようになります。
- 床を置く
- Animatorを設定する
- 動きを制御するScriptを付ける
床を置く
今回は重力の設定とかはしないので、別に床が無くても良いんですが、雰囲気を出すために一応作っておきます。
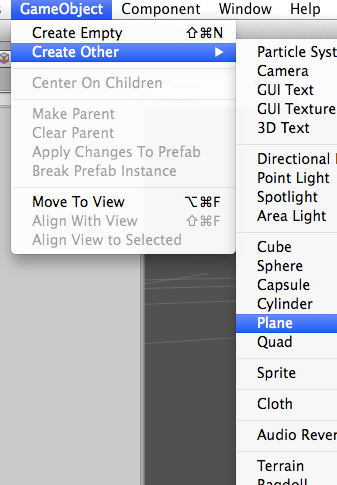
メニューから GameObject -> Create Other -> Plane を選びます。
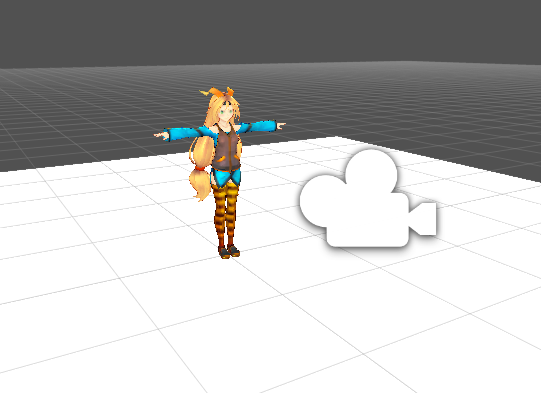
するとUnityちゃんの胴体を真っ二つにする位置に表示されるので、位置を変更しておきます。
position=(0,0,0) が良いでしょう。
こんな感じになります。
Animatorを設定する
次に、キャラクターとMotionを関連付けます。UnityちゃんのPackageには色々Motionが付属しているので簡単に使えるのです。
Animatorというのを使うと、キャラクターの状態(止まっている、走っている、ジャンプしている、ダメージを受けている、等)に応じて、Motionを切り替えることができるようです。
AnimatorはStateMachine(メカニム?)になっていて、状態にMotionを関連付け、各変数の条件によって状態遷移やMotionのBlendなどを定義できるようです。
凝った使い方をしないのであれば、Animatorは簡単なので今回もAnimatorを使って設定しておきます。
Animator作成
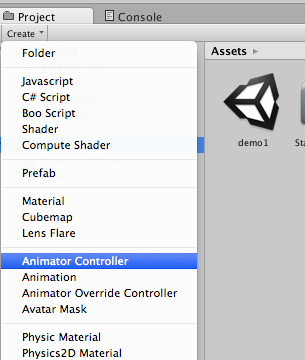
まず、Projectの 「Create」から Animator Contollerを選択します。
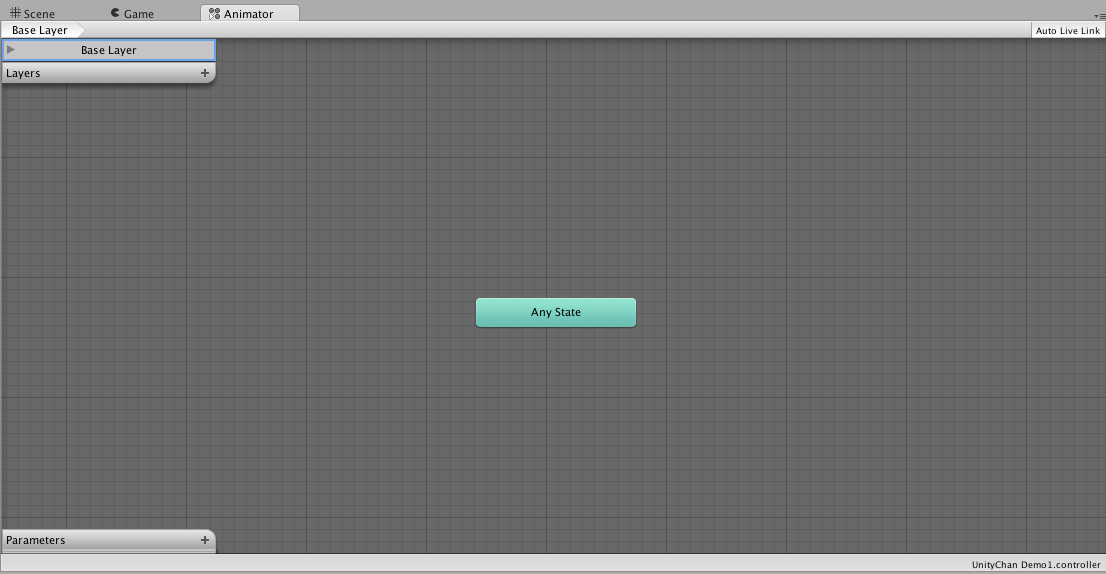
すると以下のように Any Stateとだけ書かれた四角が表示されます。
この作ったAnimatorを UnityChan Demo1 と名づけておきます。
IdleとRunningの状態を作成
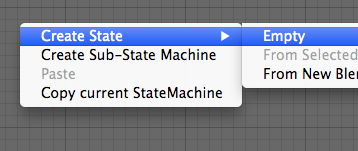
Any Stateはあまり気にしないで、何も無いところを右クリックして Create State → Emptyを選択します。
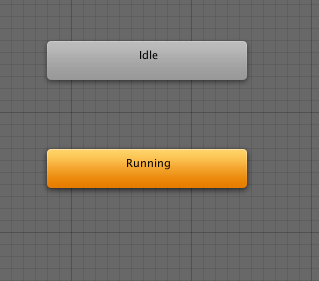
すると、New Stateという四角が現れるので、名前を Idleとしておきます。
これで Idleという状態が作られました。同様にRunningという状態も作成しておきます。
状態に対してMotionを設定
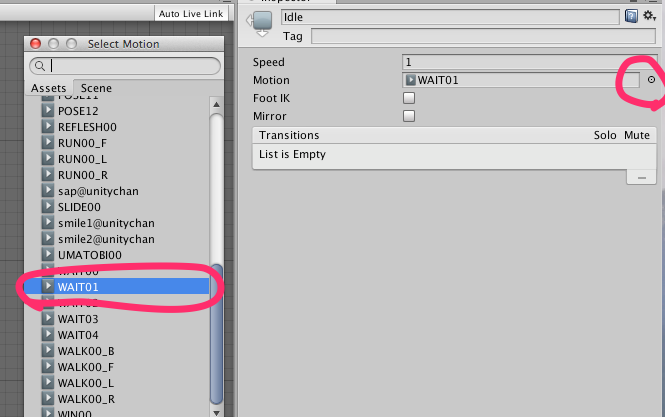
Idle状態に割り当てるアニメーションを選択します。今回は WAIT01を使うことにします。
Idleの状態を選択して、MotionのところをクリックしてWAIT01を選べばOKです。
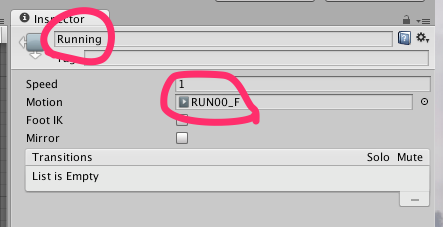
同様に Running状態に対して、Motion RUN00_Fを割り当てておきます。
状態間の遷移を設定
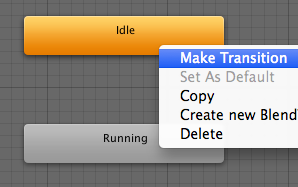
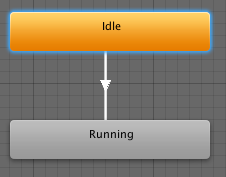
Idleを右クリックして、Make Transitionを選んで、Runningに対して矢印を引きます。
左下のParameterの+をクリックして、Boolを選びます。
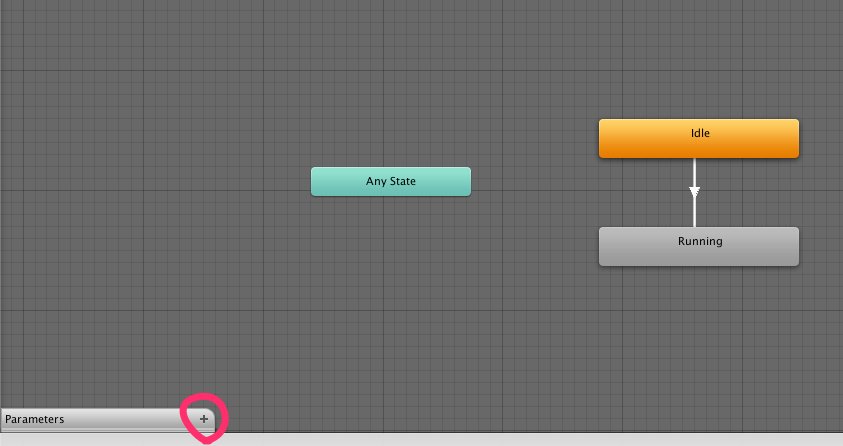
New Boolという変数が追加されるので、名前をis_runningとでもしておきます。
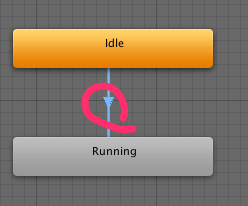
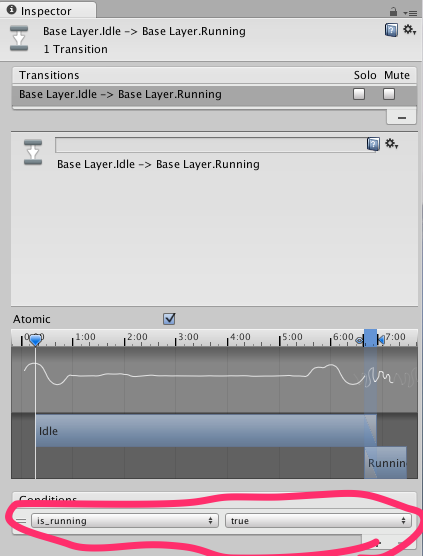
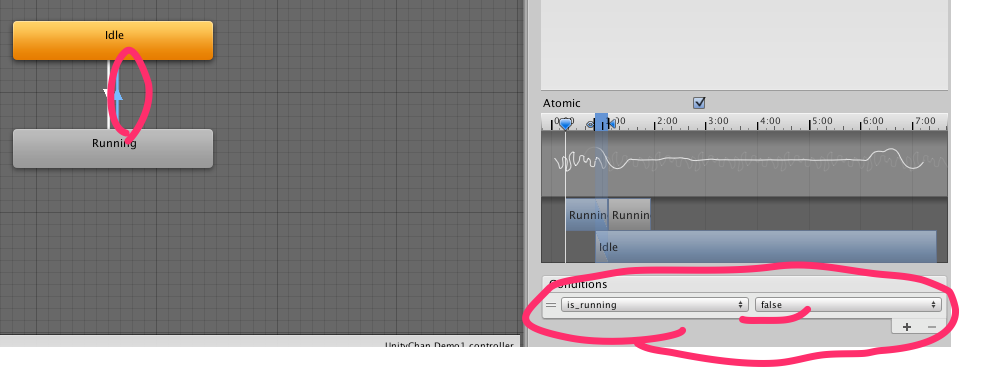
矢印をクリックすると、右側のInspectorが変わります。
Conditionsで is_running -> true としておきます。
また、逆向きの矢印 Running -> Idleを作って、同様のConditionを変更し、
is_running -> false としておきます。
UnityちゃんにAnimatorを設定
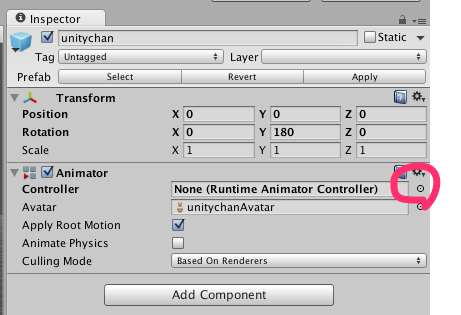
Hierarchyのunitychanを選択して、Animator → Controller のボタンをクリックして、先ほどのUnityChan Demo1を選びます。
これでUnityちゃんにMotionが関連付けられました。
テスト実行
実行してみると、のんびり伸びをするUnityちゃんが表示されると思います。
動きを制御するScriptを付ける
キー操作でキャラクターを動かすために、ちょっとスクリプトを書きます。
おそらく既存のスクリプトでもできるような気がしますが、練習として自作してみることにします。
C# スクリプトの新規作成
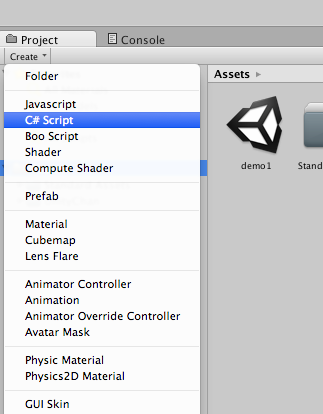
Project → Create → C# Script を選びます。名前をUnityChanDemo1としておきます。
Unityちゃんにスクリプトを設定
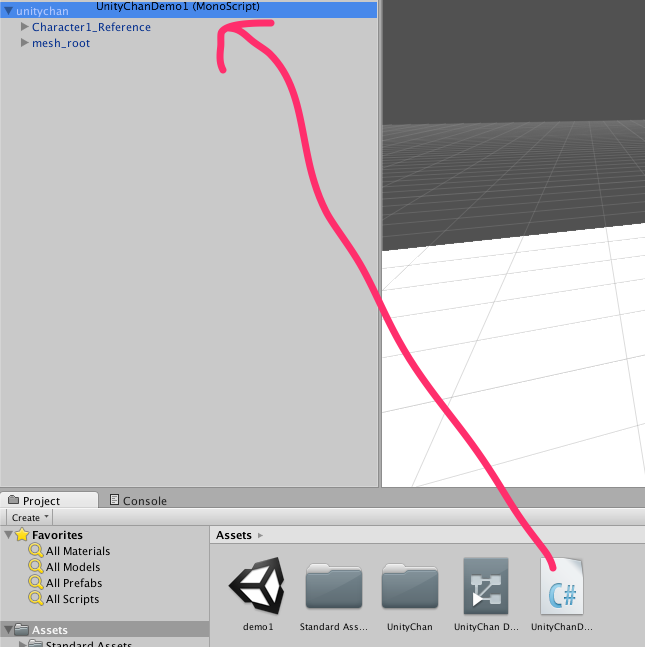
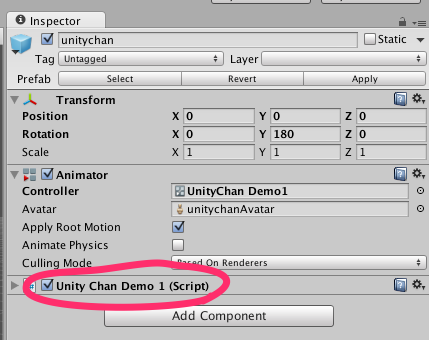
その作ったファイルを、Hierarchyのunitichanにドラッグアンドドロップします。
UnityちゃんのInspectorを見ると作ったスクリプトがComponentとして増えているのがわかります。
スクリプトの編集
AssetのスクリプトかInspectorのスクリプトをダブルクリックします。
するとMonoDevelopが起動します。メソッドの補完とか完全に効くのでとても便利です。
とりあえず、以下のように書きます。
using UnityEngine;
using System.Collections;

public class UnityChanDemo1 : MonoBehaviour {

	private Animator animator;
	// Use this for initialization
	void Start () {
		animator = GetComponent<Animator>();
	}

	// Update is called once per frame
	void Update () {
		if (Input.GetKey("up")) {
			transform.position += transform.forward * 0.01f;
			animator.SetBool("is_running", true);
		} else {
			animator.SetBool("is_running", false);
		}
		if (Input.GetKey("right")) {
			transform.Rotate(0, 10, 0);
		}
		if (Input.GetKey ("left")) {
			transform.Rotate(0, -10, 0);
		}
	}
}
ポイントは、
animator = GetComponent<Animator>();
とすることで、 Unityちゃんに関連付けられている Animatorオブジェクトの参照が取得できるということ。
animator.SetBool("is_running", true);
とすることで、Animatorの変数に対して、Set/Getできること。そしてそうすると、Animatorが状態遷移をしてMotionが切り替わります。
以下の様なメソッドで動かすのに必要な処理ができること
Input.GetKey("up"); // キー入力判定
transform.position += transform.forward * 0.01f; // 移動
transform.Rotate(0, -10, 0); // 回転
という感じでしょうか。
おわりに
動きが遅いとか、カメラが追随しないとか、色々ありますが、とりあえず動くようにはなりました。
今回作ったものは以下のURLにPublishしてあります。
https://dl.dropboxusercontent.com/u/21300511/UnityRoadRunner/demo1b/demo1b.html
