お詫び
nginx advent calendar ですが、nginxの濃い話ではないです。nginxと組み合わせて作成する簡易認証システムについて書きます。
はじめに
管理画面の認証、皆さんどうされていますか?
一番ナイーブな方法だとBasic認証を使う、ということになると思いますが、ID/PWの管理が面倒なことや、漏洩した時のリスクを考えるとさすがに企業内ではBasic認証のみでの認証は採用がしづらいです。とはいえ、きちんとした管理システムを作成するのも、これはこれで手間です。多くのリソースを管理業務に割く事が難しい小さい組織であれば尚更、難題です。
多くの人がGoogleのアカウントを所持し、Google Appsを採用している企業も多い今、こういう認証部分はできることならGoogleさんに任せてしまいたいな、と思うところです。
google_auth_proxy
とはいえ、googleのoauthを使用した認証システムをイチから構築するのも、これはこれで手間です。
こういったシステムを実現するための便利なツールとして、bitlyの方が作られたOSS「google_auth_proxy」があります。
https://github.com/bitly/google_auth_proxy
こちらは単独で動作するミドルウェアですが、nginxのupsteamとしてgoogle_auth_proxyを設定すると、当該パスへのアクセスに対して簡単にgoogleのoauth2認証をかけることができます。
githubのページに載っている図を引用すると、以下のような構成になります。
導入の手順
Googleの設定
まずはじめに、googleでoauth認証を行えるようにするための事前の設定を行います。
client_idの払い出し
oauth認証を使用する場合、使用するサイトごとにclient idを発行する必要があります。以下が手順です。
ここではgoogle_auth_proxyを動作させるサイトのドメインが "moaikids.com" であるとします。
- https://console.developers.google.com/project にアクセス
- 任意の project を作成し、それをクリック
- APIs & auth - Credentials をクリック
- Create new Client ID をクリック
- 必要な情報を入力し、Create Client IDをクリック
- APPLICATION TYPE : Web application
- AUTHORIZED JAVASCRIPT ORIGINS : http://moaikids.com/
- AUTHORIZED REDIRECT ORIGINS : http://moaikids.com/oauth2/callback
こちらでoauth認証に必要なclient_idが払い出されました。
「CLIENT ID」と「CLIENT SECRET」の情報を、ミドルウェアの設定のために控えておいてください。
インストール
nginx
基本です。nginxのadvent calendarですので。
golang
google_auth_proxyはgolang上で動作します。そのため、あらかじめgolangをインストールしましょう。
CentOS系であれば yum installで一発でインストールできます。
yum install golang
google_auth_proxy
google_auth_proxyは go get コマンドで簡単にインストールが行えます。インストール場所を明示的に指定する場合は、環境変数 GOPATH にディレクトリを設定してください。
go get github.com/bitly/google_auth_proxy
supervisor
google_auth_proxyは単体でも起動可能ですが、ここではsupervisorを使用してdaemon起動させてみます。こちらも CentOSでは yum install で簡単にインストールできます。
yum install supervisor
設定
installとは逆の順番で行きます。
supervisor
まずはsupervisorで、google_auth_proxyの起動設定を記述します。
なお google_auth_proxy の起動オプションは以下のようになっています。
Usage of google_auth_proxy:
  -authenticated-emails-file="": authenticate against emails via file (one per line)
  -client-id="": the Google OAuth Client ID: ie: "123456.apps.googleusercontent.com"
  -client-secret="": the OAuth Client Secret
  -config="": path to config file
  -cookie-domain="": an optional cookie domain to force cookies to (ie: .yourcompany.com)
  -cookie-expire=168h0m0s: expire timeframe for cookie
  -cookie-https-only=false: set HTTPS only cookie
  -cookie-secret="": the seed string for secure cookies
  -google-apps-domain=: authenticate against the given Google apps domain (may be given multiple times)
  -htpasswd-file="": additionally authenticate against a htpasswd file. Entries must be created with "htpasswd -s" for SHA encryption
  -http-address="127.0.0.1:4180": <addr>:<port> to listen on for HTTP clients
  -pass-basic-auth=true: pass HTTP Basic Auth, X-Forwarded-User and X-Forwarded-Email information to upstream
  -redirect-url="": the OAuth Redirect URL. ie: "https://internalapp.yourcompany.com/oauth2/callback"
  -upstream=: the http url(s) of the upstream endpoint. If multiple, routing is based on path
  -version=false: print version string
これらのうち、ここでは最低限の設定項目のみを指定してみます。
yum install した場合、 /etc/supervisor.conf 中に、以下のように /etc/supervisord.d/*.ini のファイルを読みこむようになっているので、そちらのディレクトリ配下に .ini ファイルを作成します。
[include]
files = supervisord.d/*.ini
ここでは、moaikids.com.ini とし、以下のように記述します。
[program:authproxy_moaikids_com]
command=/var/lib/golang/bin/google_auth_proxy \
--client-id=(client_id) \
--client-secret=(client_secret) \
--cookie-secret=(任意の文字列) \
--http-address=(google_auth_proxyのドメインとport) \
--google-apps-domain=(google appsアカウントのドメイン) \
--upstream=(認証をかけたいサイトのupstream) \
--redirect-url=(oauth2認証のredirect url。client_idの払い出し時に指定したものを設定)
user=root
autorestart=true
stdout_logfile=/var/log/supervisor/authproxy_moaikids_com.log
redirect_stderr=true
こちらを設定した上で
/etc/init.d/supervisord restart
を実行すると、supervisord の再起動に伴って google_auth_proxy が起動します。
nginx
google_auth_proxy を upstream として接続するよう、設定を行います。
    location / {
        proxy_pass (google_auth_proxyのドメイン:port);
    }
設定を行ったら、nginx を再起動します。
ログイン手順
- nginx にアクセス
- 以下のような画面が表示されるので、ボタンを押下

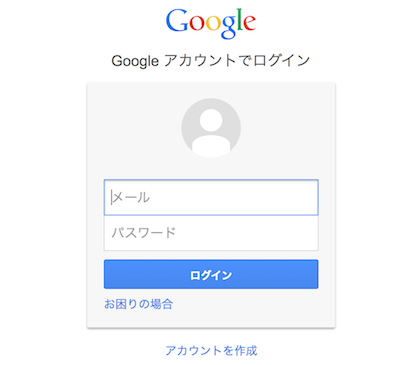
- Googleのログイン画面が表示されるので、google_auth_proxyで設定したドメインのアカウントでログイン

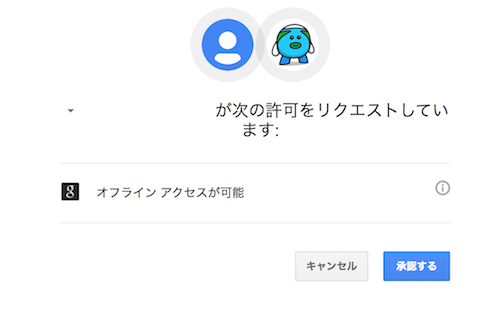
- アクセス許可を求められます。こちらで「承認する」を押下

- これで画面にアクセス可能になります。
はまった点
- Apacheでも試したが上手くいかなかった
- Request HeaderにAuthorizationが付与されない……
- ここは nginx advent calendar なので、nginxで動かしましょう。
- google_auth_proxy の upstream 先のパスが http(s)://(host)/ の形式でないと、上手くredirectされない
- たとえば upstream が http://localhost:8080/hoge/fuga 等だとうまく動かない
- 仕様なのか、設定で回避できるのかは、調査中...
まとめ
以上、nginx と google_auth_proxy を組み合わせた簡易認証システムについて書かせていただきました。
Google Appsを導入しているような小規模な組織で、手軽に認証システムを構築するには、このアプローチは非常に手軽で良いな、と思っています。
