mxnetで使う為のデータセットのダウンロードと解凍が全然終わらないので記事を書く。
MXNetはワシントン大学とカーネギーメロン大学で開発されてたようで、海外では人気。
gitでの盛り上がり具合をみるとpytorchと同じくらいの検索ヒット数。
検索ヒット数で比べていいのかどうかという議論は置いといて、使ってる人はそこそこいる。
http://qiita.com/pottava/items/ed1975bf7b67d696c70d
mxnetはサンプルが充実してる
kaggleやったものまでサンプルとして上がってる
https://github.com/dmlc/mxnet/tree/master/example
多すぎてどこからやればいいのか不明になるので
簡単なサンプルを動かすならこっち
https://github.com/dmlc/mxnet-notebooks
kerasライクな文法で見やすくなってる。
インストール
pythonじゃなくてJuliaやRでやるんだ!とかscala、goの時代だ!という場合は公式へ。
pip install mxnet       # CPU
pip install mxnet-mkl   # CPU with MKL-DNN acceleration
pip install mxnet-cu75  # GPU with CUDA 7.5
pip install mxnet-cu80  # GPU with CUDA 8.0
mnistを試す
クラスキャットさんの記事をさらっと読んだ。
http://caffe.classcat.com/2017/02/22/mxnet-tutorial-mnist/
mnistデータのロード。たまにyann先生のmnistサーバー落ちてたり、データセット取る先のサーバーの状態も気にすることも。
無料で公開してくれてるわけだし、感謝。
import numpy as np
import os
import urllib
import gzip
import struct
def download_data(url, force_download=True):
    fname = url.split("/")[-1]
    if force_download or not os.path.exists(fname):
        urllib.urlretrieve(url, fname)
    return fname

def read_data(label_url, image_url):
    with gzip.open(download_data(label_url)) as flbl:
        magic, num = struct.unpack(">II", flbl.read(8))
        label = np.fromstring(flbl.read(), dtype=np.int8)
    with gzip.open(download_data(image_url), 'rb') as fimg:
        magic, num, rows, cols = struct.unpack(">IIII", fimg.read(16))
        image = np.fromstring(fimg.read(), dtype=np.uint8).reshape(len(label), rows, cols)
    return (label, image)

path='http://yann.lecun.com/exdb/mnist/'
(train_lbl, train_img) = read_data(
    path+'train-labels-idx1-ubyte.gz', path+'train-images-idx3-ubyte.gz')
(val_lbl, val_img) = read_data(
    path+'t10k-labels-idx1-ubyte.gz', path+'t10k-images-idx3-ubyte.gz')
画像データをNDArrayIterってmx用のインテレータに突っ込む。
import mxnet as mx

def to4d(img):
    return img.reshape(img.shape[0], 1, 28, 28).astype(np.float32)/255

batch_size = 100
train_iter = mx.io.NDArrayIter(to4d(train_img), train_lbl, batch_size, shuffle=True)
val_iter = mx.io.NDArrayIter(to4d(val_img), val_lbl, batch_size)
層を定義。3fcまで活性化関数があって最後にソフトマックスでどこかの数字に1が返って来て数字がわかるわけ。
mnistは0から9の数字
こんな感じで来たら答え8か的な感じ
[0,0,0,0,0,0,0,0,1,0]
# Create a place holder variable for the input data
data = mx.sym.Variable('data')
# Flatten the data from 4-D shape (batch_size, num_channel, width, height)
# into 2-D (batch_size, num_channel*width*height)
data = mx.sym.Flatten(data=data)

# The first fully-connected layer
fc1  = mx.sym.FullyConnected(data=data, name='fc1', num_hidden=128)
# Apply relu to the output of the first fully-connnected layer
act1 = mx.sym.Activation(data=fc1, name='relu1', act_type="relu")

# The second fully-connected layer and the according activation function
fc2  = mx.sym.FullyConnected(data=act1, name='fc2', num_hidden = 64)
act2 = mx.sym.Activation(data=fc2, name='relu2', act_type="relu")

# The thrid fully-connected layer, note that the hidden size should be 10, which is the number of unique digits
fc3  = mx.sym.FullyConnected(data=act2, name='fc3', num_hidden=10)
# The softmax and loss layer
mlp  = mx.sym.SoftmaxOutput(data=fc3, name='softmax')

# We visualize the network structure with output size (the batch_size is ignored.)
shape = {"data" : (batch_size, 1, 28, 28)}
ここでフィードフォワードのモデルを生成してfitで学習。
SGDっていう誤差の傾きが低い方に一定量ずつ更新していくアルゴリズムを使用。
model = mx.model.FeedForward(
    symbol = mlp,       # network structure
    num_epoch = 10,     # number of data passes for training
    learning_rate = 0.1 # learning rate of SGD
)
model.fit(
    X=train_iter,       # training data
    eval_data=val_iter, # validation data
    batch_end_callback = mx.callback.Speedometer(batch_size, 200) # output progress for each 200 data batches
)
predictを使って予測値の出力。
prob = model.predict(val_img[0:1].astype(np.float32)/255)[0]
assert max(prob) > 0.99, "Low prediction accuracy."
print 'Classified as %d with probability %f' % (prob.argmax(), max(prob))
FeedForwardがもぉ非推奨になってる気がするが、
mxnet長く使うこともないと思うので細かいこと気にしない。
基礎機能
だいたいこれでわかった。
CNNにしたければ層の部分をConvolutionとかに変更すればいい。
data = mx.symbol.Variable('data')
# first conv layer
conv1 = mx.sym.Convolution(data=data, kernel=(5,5), num_filter=20)
tanh1 = mx.sym.Activation(data=conv1, act_type="tanh")
pool1 = mx.sym.Pooling(data=tanh1, pool_type="max", kernel=(2,2), stride=(2,2))
# second conv layer
conv2 = mx.sym.Convolution(data=pool1, kernel=(5,5), num_filter=50)
tanh2 = mx.sym.Activation(data=conv2, act_type="tanh")
pool2 = mx.sym.Pooling(data=tanh2, pool_type="max", kernel=(2,2), stride=(2,2))
# first fullc layer
flatten = mx.sym.Flatten(data=pool2)
fc1 = mx.symbol.FullyConnected(data=flatten, num_hidden=500)
tanh3 = mx.sym.Activation(data=fc1, act_type="tanh")
# second fullc
fc2 = mx.sym.FullyConnected(data=tanh3, num_hidden=10)
# softmax loss
lenet = mx.sym.SoftmaxOutput(data=fc2, name='softmax')
mxnetには他にも重要そうな機能が数個ありそうだけど、さらっとだけ。
NDArrayはnumpyみたいにmxnet上で行列操作するものらしい。
http://caffe.classcat.com/2017/02/16/mxnet-tutorial-ndarray/
Symbolは内部的な状態変数を保持するとある。chainerのVariable的なもので勾配情報を保持してるのかも。
http://caffe.classcat.com/2017/02/16/mxnet-tutorial-symbol/
import mxnet as mx
a = mx.sym.Variable('a')
b = mx.sym.Variable('b')
c = a + b
(a, b, c)
実行するとSymbolになってる。
(<Symbol a>, <Symbol b>, <Symbol _plus0>)
シンボルにも2種類あるって書いてるな。
Moduleはネットワークをまとめる。
import mxnet as mx
from data_iter import SyntheticData

# mlp
net = mx.sym.Variable('data')
net = mx.sym.FullyConnected(net, name='fc1', num_hidden=64)
net = mx.sym.Activation(net, name='relu1', act_type="relu")
net = mx.sym.FullyConnected(net, name='fc2', num_hidden=10)
net = mx.sym.SoftmaxOutput(net, name='softmax')
# synthetic 10 classes dataset with 128 dimension
data = SyntheticData(10, 128)
netってのを定義してモジュールに突っ込んでる。
mod = mx.mod.Module(symbol=net,
                    context=mx.cpu(),
                    data_names=['data'],
                    label_names=['softmax_label'])
モデル保存
5エポックごとに保存
model_prefix = 'mx_mlp'
checkpoint = mx.callback.do_checkpoint(model_prefix)

mod = mx.mod.Module(symbol=net)
mod.fit(data.get_iter(batch_size), num_epoch=5, epoch_end_callback=checkpoint)
モデルロード
sym, arg_params, aux_params = mx.model.load_checkpoint(model_prefix, 3)
print(sym.tojson() == net.tojson())

# assign the loaded parameters to the module
mod.set_params(arg_params, aux_params)
まだ解凍が終わらないので画像分類を見る
ここより
https://github.com/dmlc/mxnet-notebooks/blob/master/python/tutorials/predict_imagenet.ipynb
mxnetさんのイメージネットデータを取得。
import os, urllib
import mxnet as mx
def download(url,prefix=''):
    filename = prefix+url.split("/")[-1]
    if not os.path.exists(filename):
        urllib.urlretrieve(url, filename)

path='http://data.mxnet.io/models/imagenet-11k/'
download(path+'resnet-152/resnet-152-symbol.json', 'full-')
download(path+'resnet-152/resnet-152-0000.params', 'full-')
download(path+'synset.txt', 'full-')

with open('full-synset.txt', 'r') as f:
    synsets = [l.rstrip() for l in f]

sym, arg_params, aux_params = mx.model.load_checkpoint('full-resnet-152', 0)
さっきでて来たsymbol。load_checkpointで学習済みモデルのsymbolを取得してモジュールに突っ込んでる。
mod = mx.mod.Module(symbol=sym, context=mx.gpu())
mod.bind(for_training=False, data_shapes=[('data', (1,3,224,224))])
mod.set_params(arg_params, aux_params)
get_imageは画像の形とか変換してる。
predictの初めもswapaxesで転置って行列のフォーマットをいじってる。
mod.forward
squeezeは大きさが1の次元を除去するらしい。
なんだろ インデックスかな?ともかく いらないとこを消した。
import matplotlib
matplotlib.rc("savefig", dpi=100)
import matplotlib.pyplot as plt
import cv2
import numpy as np
from collections import namedtuple
Batch = namedtuple('Batch', ['data'])
def get_image(url, show=True):
filename = url.split("/")[-1]
urllib.urlretrieve(url, filename)
img = cv2.imread(filename)
if img is None:
print('failed to download ' + url)
if show:
plt.imshow(cv2.cvtColor(img, cv2.COLOR_BGR2RGB))
plt.axis('off')
return filename
def predict(filename, mod, synsets):
img = cv2.cvtColor(cv2.imread(filename), cv2.COLOR_BGR2RGB)
if img is None:
return None
img = cv2.resize(img, (224, 224))
img = np.swapaxes(img, 0, 2)
img = np.swapaxes(img, 1, 2)
img = img[np.newaxis, :]
mod.forward(Batch([mx.nd.array(img)]))
prob = mod.get_outputs()[0].asnumpy()
prob = np.squeeze(prob)
a = np.argsort(prob)[::-1]
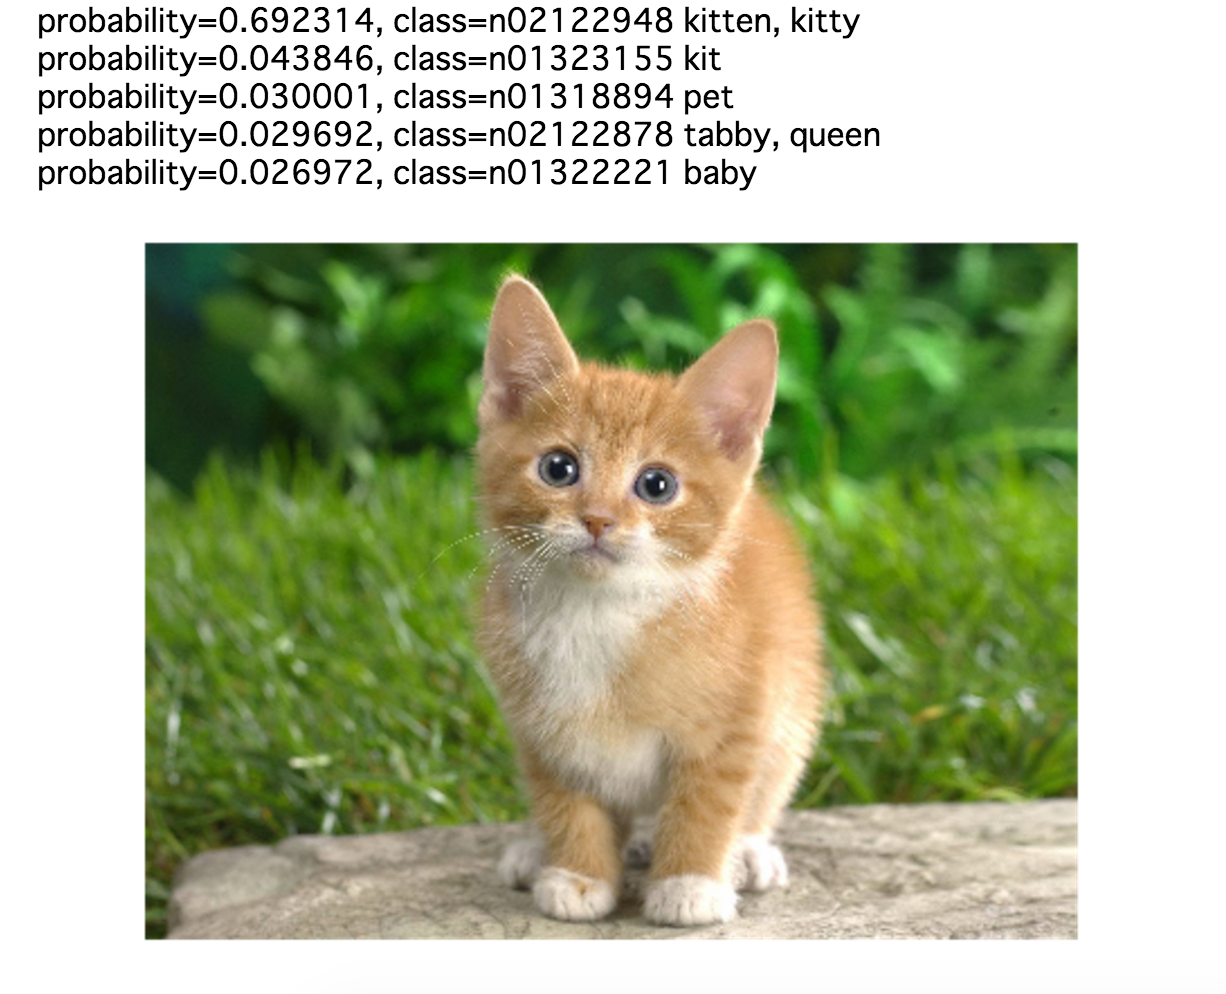
for i in a[0:5]:
print('probability=%f, class=%s' %(prob[i], synsets[i]))
で、こうなる。
url = 'http://writm.com/wp-content/uploads/2016/08/Cat-hd-wallpapers.jpg'
predict(get_image(url), mod, synsets)
残り11分と書いてるので回帰分析も見る
行列用意
# Training data
train_data = np.array([[1,2],[3,4],[5,6],[3,2],[7,1],[6,9]])
train_label = np.array([5,11,17,7,9,24])
batch_size = 1

# Evaluation Data
eval_data = np.array([[7,2],[6,10],[12,2]])
eval_label = np.array([11,26,16])
インテレータに突っ込め
train_iter = mx.io.NDArrayIter(train_data,train_label, batch_size, shuffle=True,label_name='lin_reg_label')
eval_iter = mx.io.NDArrayIter(eval_data, eval_label, batch_size, shuffle=False)
LinearRegressionOutputっての使おう!
X = mx.sym.Variable('data')
Y = mx.symbol.Variable('lin_reg_label')
fully_connected_layer  = mx.sym.FullyConnected(data=X, name='fc1', num_hidden = 1)
lro = mx.sym.LinearRegressionOutput(data=fully_connected_layer, label=Y, name="lro")
モジュール化しておこう
model = mx.mod.Module(
    symbol = lro ,
    data_names=['data'],
    label_names = ['lin_reg_label']# network structure
)
学習しよう!
model.fit(train_iter, eval_iter,
            optimizer_params={'learning_rate':0.01, 'momentum': 0.9},
            num_epoch=1000,
            batch_end_callback = mx.callback.Speedometer(batch_size, 2))
推定しよう!!
model.predict(eval_iter).asnumpy()
回帰なんで2乗誤差で。
# Evaluation
metric = mx.metric.MSE()
model.score(eval_iter, metric)
あと10分なのでlstmを
文字列取得
import os
import urllib
import zipfile
if not os.path.exists("char_lstm.zip"):
    urllib.urlretrieve("http://data.mxnet.io/data/char_lstm.zip", "char_lstm.zip")
with zipfile.ZipFile("char_lstm.zip","r") as f:
    f.extractall("./")
with open('obama.txt', 'r') as f:
    print f.read()[0:1000]
全単語にidをつける
def read_content(path):
    with open(path) as ins:
        return ins.read()

# Return a dict which maps each char into an unique int id
def build_vocab(path):
    content = list(read_content(path))
    idx = 1 # 0 is left for zero-padding
    the_vocab = {}
    for word in content:
        if len(word) == 0:
            continue
        if not word in the_vocab:
            the_vocab[word] = idx
            idx += 1
    return the_vocab

# Encode a sentence with int ids
def text2id(sentence, the_vocab):
    words = list(sentence)
    return [the_vocab[w] for w in words if len(w) > 0]

# build char vocabluary from input
vocab = build_vocab("./obama.txt")
print('vocab size = %d' %(len(vocab)))
lstmモデル作成
import lstm
# Each line contains at most 129 chars.
seq_len = 129
# embedding dimension, which maps a character to a 256-dimension vector
num_embed = 256
# number of lstm layers
num_lstm_layer = 3
# hidden unit in LSTM cell
num_hidden = 512

symbol = lstm.lstm_unroll(
    num_lstm_layer,
    seq_len,
    len(vocab) + 1,
    num_hidden=num_hidden,
    num_embed=num_embed,
    num_label=len(vocab) + 1,
    dropout=0.2)

"""test_seq_len"""
data_file = open("./obama.txt")
for line in data_file:
    assert len(line) <= seq_len + 1, "seq_len is smaller than maximum line length. Current line length is %d. Line content is: %s" % (len(line), line)
data_file.close()
学習。
この設定だと各行に最大で129文字ずつで文字をidに変換した纏まりを作る。
import bucket_io

# The batch size for training
batch_size = 32

# initalize states for LSTM
init_c = [('l%d_init_c'%l, (batch_size, num_hidden)) for l in range(num_lstm_layer)]
init_h = [('l%d_init_h'%l, (batch_size, num_hidden)) for l in range(num_lstm_layer)]
init_states = init_c + init_h

# Even though BucketSentenceIter supports various length examples,
# we simply use the fixed length version here
data_train = bucket_io.BucketSentenceIter(
    "./obama.txt",
    vocab,
    [seq_len],
    batch_size,
    init_states,
    seperate_char='\n',
    text2id=text2id,
    read_content=read_content)
学習。
import mxnet as mx
import numpy as np
import logging
logging.getLogger().setLevel(logging.DEBUG)

# We will show a quick demo with only 1 epoch. In practice, we can set it to be 100
num_epoch = 1
# learning rate
learning_rate = 0.01

# Evaluation metric
def Perplexity(label, pred):
    loss = 0.
    for i in range(pred.shape[0]):
        loss += -np.log(max(1e-10, pred[i][int(label[i])]))
    return np.exp(loss / label.size)

model = mx.model.FeedForward(
    ctx=mx.gpu(0),
    symbol=symbol,
    num_epoch=num_epoch,
    learning_rate=learning_rate,
    momentum=0,
    wd=0.0001,
    initializer=mx.init.Xavier(factor_type="in", magnitude=2.34))

model.fit(X=data_train,
          eval_metric=mx.metric.np(Perplexity),
          batch_end_callback=mx.callback.Speedometer(batch_size, 20),
          epoch_end_callback=mx.callback.do_checkpoint("obama"))
推定
さっきでて来たload_checkpointを使ってる。
from rnn_model import LSTMInferenceModel
import rnn_model

# load from check-point
_, arg_params, __ = mx.model.load_checkpoint("obama", 75)

# build an inference model
model = rnn_model.LSTMInferenceModel(
    num_lstm_layer,
    len(vocab) + 1,
    num_hidden=num_hidden,
    num_embed=num_embed,
    num_label=len(vocab) + 1,
    arg_params=arg_params,
    ctx=mx.gpu(),
    dropout=0.2)
model.forwardここで推定。
seq_length = 600
input_ndarray = mx.nd.zeros((1,))
revert_vocab = MakeRevertVocab(vocab)
# Feel free to change the starter sentence
output ='The United States'
random_sample = False
new_sentence = True

ignore_length = len(output)

for i in range(seq_length):
    if i <= ignore_length - 1:
        MakeInput(output[i], vocab, input_ndarray)
    else:
        MakeInput(output[-1], vocab, input_ndarray)
    prob = model.forward(input_ndarray, new_sentence)
    new_sentence = False
    next_char = MakeOutput(prob, revert_vocab, random_sample)
    if next_char == '':
        new_sentence = True
    if i >= ignore_length - 1:
        output += next_char
print(output)
MakeRevertVocabでモデルで推定するように逆にしてる。
MakeInputここで推定用の文字をidにしてる。
なるほど。ボキャブラリにないと0にしてるのだ。この辺はチューニングに関わりそうだ。
MakeOutputで前の文字の次に来る確率が高い文字を出力する。
# helper strcuture for prediction
def MakeRevertVocab(vocab):
    dic = {}
    for k, v in vocab.items():
        dic[v] = k
    return dic

# make input from char
def MakeInput(char, vocab, arr):
    idx = vocab[char]
    tmp = np.zeros((1,))
    tmp[0] = idx
    arr[:] = tmp

# helper function for random sample
def _cdf(weights):
    total = sum(weights)
    result = []
    cumsum = 0
    for w in weights:
        cumsum += w
        result.append(cumsum / total)
    return result

def _choice(population, weights):
    assert len(population) == len(weights)
    cdf_vals = _cdf(weights)
    x = random.random()
    idx = bisect.bisect(cdf_vals, x)
    return population[idx]

# we can use random output or fixed output by choosing largest probability
def MakeOutput(prob, vocab, sample=False, temperature=1.):
    if sample == False:
        idx = np.argmax(prob, axis=1)[0]
    else:
        fix_dict = [""] + [vocab[i] for i in range(1, len(vocab) + 1)]
        scale_prob = np.clip(prob, 1e-6, 1 - 1e-6)
        rescale = np.exp(np.log(scale_prob) / temperature)
        rescale[:] /= rescale.sum()
        return _choice(fix_dict, rescale[0, :])
    try:
        char = vocab[idx]
    except:
        char = ''
    return char
The United Statesを入れると
これが出て来てるのか。すごいな。
The United States of America. That's why I'm running for President.The first place we can do better than that they can afford to get the that they can afford to differ on the part of the political settlement. The second part of the problem is that the consequences would have to see the chance to starthe country that we can start by the challenges of the American people. The American people have been talking about how to compete with the streets of San Antonio who are serious about the courage to come together as one people. That the American people have been trying to get there. And they say
残り5分とあるが少しずつ時間が伸びてる気がする
mxnetでtensorboardが使えるのか
結局解凍が終わらないが、一旦ここまでにする。
ではでは