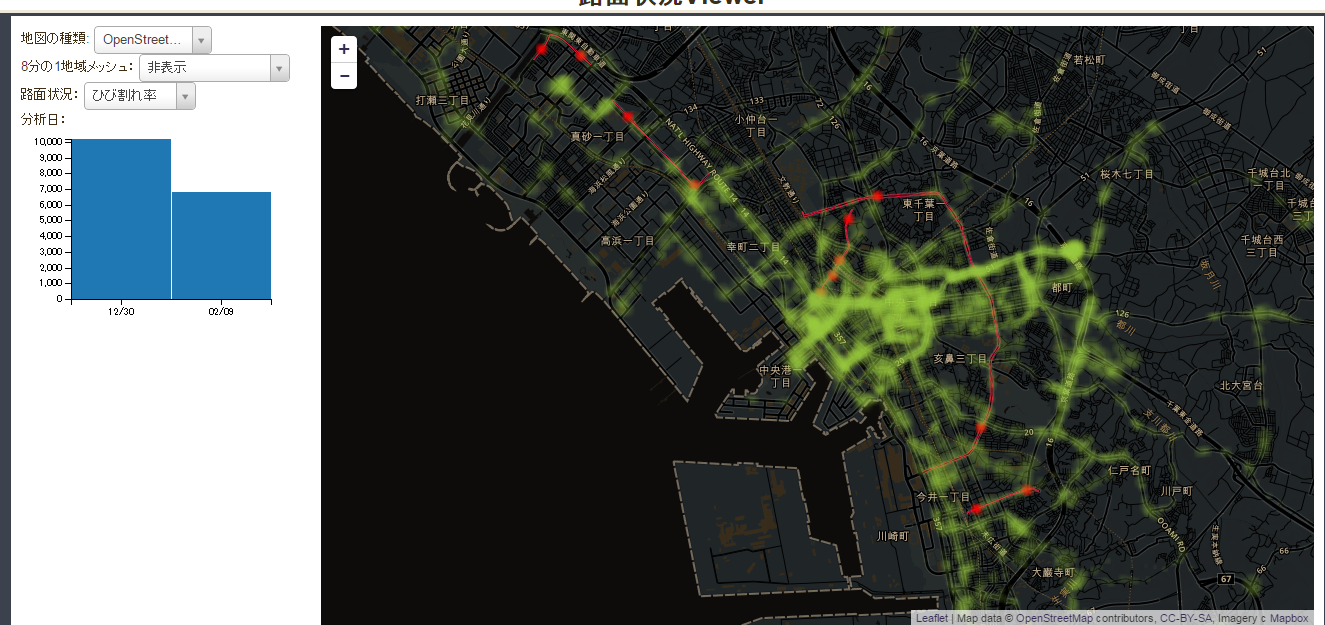
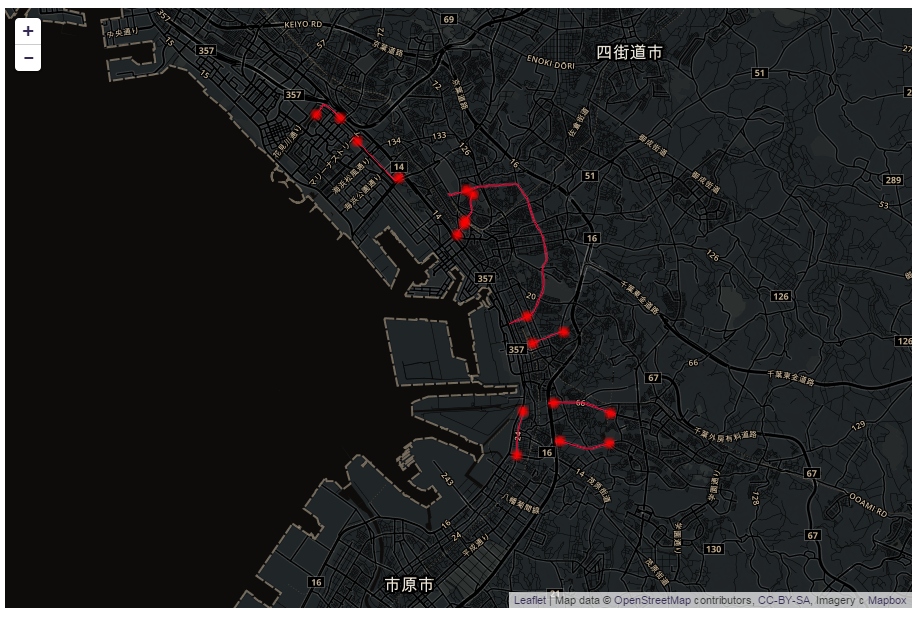
現在、「路面管理の高度化における実証実験」として、バス,タクシーなどの公共交通車両に取り付けられた安価なセンサーによって取得されたデータを収集し,それらを集約したビッグデータが公開されています。
路面管理ビッグデータのオープンデータコンテスト
http://micrms.force.com/apis
今回はこのデータを利用して地図上で路面の状況を確認できるようにしました。
路面状況Viewer
http://needtec.sakura.ne.jp/road_mgt/road_mgt.html
GitHub
https://github.com/mima3/road_mgt
路面管理の高度化における実証実験 APIについて
APIの仕様書は下記からダウンロードできます。
http://micrms.force.com/developer
データとしては大きく以下の3つに分けることができます。
・路面計測データ i-DRIMSという機械で計測したデータ。加速度、角速度、位置のデータ
・路面状況データ 路面計測データを分析した路面の状況のデータ
・路面緒元データ 自治体毎に短い区間で設定した道路管理情報
通常は路面状況データと路面緒元データを使用することになると思います。
路面状況データの取得方法
路面状況を取得するには以下のURLに対してGETを行います。
この結果は次のようなXMLとなります。
<rdf:RDF xmlns:rdf="http://www.w3.org/1999/02/22-rdf-syntax-ns#" xmlns:geo="http://www.w3.org/2003/01/geo/wgs84_pos#" xmlns:rm="http://roadmgt.herokuapp.com/vocab/rm#" xmlns:rdfs="http://www.w3.org/2000/01/rdf-schema#">
  <rdf:Description rdf:about="http://roadmgt.herokuapp.com/api/v1/datapoints/road-surface_282">
    <rm:iri>2.65</rm:iri>
    <rm:step>0.0</rm:step>
    <rm:patching_num>0</rm:patching_num>
    <rm:municipality_id>1</rm:municipality_id>
    <rm:too_slow_fast_flag>0</rm:too_slow_fast_flag>
    <rm:subsidence_and_puddle>0.0</rm:subsidence_and_puddle>
    <rm:section_id>-1</rm:section_id>
    <rm:speed>37.55711977</rm:speed>
    <rdf:type>http://roadmgt.herokuapp.com/vocab/rm#road-surface</rdf:type>
    <geo:alt>0.0</geo:alt>
    <rm:rms>21.14314346</rm:rms>
    <geo:long>140.1434769</geo:long>
    <rm:rutting_amount>3.75</rm:rutting_amount>
    <rm:pothole_num>0</rm:pothole_num>
    <rm:speed_fluctuation_flag>0</rm:speed_fluctuation_flag>
    <rdfs:label>road-surface_282</rdfs:label>
    <rm:cracking_rate>5.3</rm:cracking_rate>
    <geo:lat>35.61753776</geo:lat>
    <rm:analysis_timestamp>2014-12-30 17:00:02.0</rm:analysis_timestamp>
    <rm:distance>220</rm:distance>
  </rdf:Description>
  <rdf:Description rdf:about="http://roadmgt.herokuapp.com/api/v1/datapoints/road-surface_294">
    <rm:speed_fluctuation_flag>1</rm:speed_fluctuation_flag>
    <rm:patching_num>0</rm:patching_num>
    <rm:iri>2.5</rm:iri>
    <rm:step>0.0</rm:step>
    <rm:too_slow_fast_flag>0</rm:too_slow_fast_flag>
    <rm:subsidence_and_puddle>0.0</rm:subsidence_and_puddle>
    <rm:section_id>-1</rm:section_id>
    <rm:municipality_id>1</rm:municipality_id>
    <rm:distance>340</rm:distance>
    <geo:alt>0.0</geo:alt>
    <rm:cracking_rate>7.5</rm:cracking_rate>
    <geo:long>140.1464737</geo:long>
    <rdf:type>http://roadmgt.herokuapp.com/vocab/rm#road-surface</rdf:type>
    <rm:rms>26.23188158</rm:rms>
    <geo:lat>35.61759593</geo:lat>
    <rm:pothole_num>0</rm:pothole_num>
    <rm:speed>42.15859739</rm:speed>
    <rm:analysis_timestamp>2014-12-30 17:00:02.0</rm:analysis_timestamp>
    <rm:rutting_amount>5.3</rm:rutting_amount>
    <rdfs:label>road-surface_294</rdfs:label>
  </rdf:Description>
  略
</rdf:RDF>
路面状況を全データ取得する方法
APIを実行した時の最大取得件数はデフォルトで300件です。
以降のデータを取得するには、以下のようにoffsetを利用する必要があります。
(1)まず先頭を取得
http://roadmgt.herokuapp.com/api/v1/datapoints?data_type=road-surface&limit=300&offset=0
(2)正常にデータが取得できたら、offsetを変更して実行
http://roadmgt.herokuapp.com/api/v1/datapoints?data_type=road-surface&limit=300&offset=300
(3)これを以下のレスポンスになるまで繰り返す。
404 notFound
路面状況のパラメータ
路面状況はパラメータを指定してデータをフィルタリングすることが可能です。
指定可能なパラメータは次の通りです。
| 名称 | 型 | 説明 |
|---|---|---|
| municipality | xsd:int | 自治体ID 自治体のIDらしいが当然の権利のように説明が一切ないので意味がわかりません。 1と11が入っていてます。おそらく、1が千葉市で11が豊中市だとは思います。 |
| section | xsd:int | 区間ID。おそらく、道路の区間を内部で一意のIDをふっているのでしょうがよくわかりません。-1とか入っています。 |
| date_start | xsd:date | 分析日。終了の指定とセットでない場合はエラー(YYYY-MM-DD) |
| date_end | xsd:date | 分析日。開始の指定とセットでない場合はエラー(YYYY-MM-DD) |
| lat_start | xsd:double | 緯度開始。終了の指定とセットでない場合はエラー |
| lat_end | xsd:double | 緯度終了。開始の指定とセットでない場合はエラー |
| lon_start | xsd:double | 経度開始。終了の指定とセットでない場合はエラー |
| lon_end | xsd:double | 経度終了。開始の指定とセットでない場合はエラー |
経度緯度を指定した実行例:
注意
ここで紹介したパラメータ並びに、offset,limit以外のパラメータを指定するとエラーとなります。
このことは、以下のようなコードだとエラーになることを意味します。
$.ajax({
  type : 'GET',
  url : 'http://roadmgt.herokuapp.com/api/v1/datapoints',
  cache: false // キャッシュを回避するとエラーになる。
  data : {
    data_type : 'road-surface',
    lat_start  : lat_start,
    lon_start : lon_start,
    lat_end  : lat_end,
    lon_end  : lon_end,
    offset : offset,
    limit : limit
  },
  success : function (data) {
  },
  'error' :  function(xhr, textStatus, error) {
  }
});
このことはIE系でデータが更新されていても、内容が変わらないというリスクを含むことになります。
cahce=falseの場合、パラメータにユニークな一時的な値を指定することで、別のリクエストとして認識させ、キャッシュの使用を回避しているのですが、これが利用できなくなります。
ターゲットの直接指定
rdf:aboutに記述してある、URIを指定することで直接ターゲットを取得できます。
実行例:
http://roadmgt.herokuapp.com/api/v1/datapoints/road-surface_282
取得結果:
<rdf:RDF xmlns:rdf="http://www.w3.org/1999/02/22-rdf-syntax-ns#" xmlns:geo="http://www.w3.org/2003/01/geo/wgs84_pos#" xmlns:rm="http://roadmgt.herokuapp.com/vocab/rm#" xmlns:rdfs="http://www.w3.org/2000/01/rdf-schema#">
<rdf:Description rdf:about="http://roadmgt.herokuapp.com/api/v1/datapoints/road-surface_282">
<rm:iri>2.65</rm:iri>
<rm:step>0.0</rm:step>
<rm:patching_num>0</rm:patching_num>
<rm:municipality_id>1</rm:municipality_id>
<rm:too_slow_fast_flag>0</rm:too_slow_fast_flag>
<rm:subsidence_and_puddle>0.0</rm:subsidence_and_puddle>
<rm:section_id>-1</rm:section_id>
<rm:speed>37.55711977</rm:speed>
<rdf:type>http://roadmgt.herokuapp.com/vocab/rm#road-surface</rdf:type>
<geo:alt>0.0</geo:alt>
<rm:rms>21.14314346</rm:rms>
<geo:long>140.1434769</geo:long>
<rm:rutting_amount>3.75</rm:rutting_amount>
<rm:pothole_num>0</rm:pothole_num>
<rm:speed_fluctuation_flag>0</rm:speed_fluctuation_flag>
<rdfs:label>road-surface_282</rdfs:label>
<rm:cracking_rate>5.3</rm:cracking_rate>
<geo:lat>35.61753776</geo:lat>
<rm:analysis_timestamp>2014-12-30 17:00:02.0</rm:analysis_timestamp>
<rm:distance>220</rm:distance>
</rdf:Description>
</rdf:RDF>
ターゲット名の後にプロパティ名を指定することで、プロパティーのみの取得ができます。
この際、「:」を「_」に変更する必要があります。たとえば、「rm:step」を取得したい場合は「rm_step」と指定します。
実行例:
http://roadmgt.herokuapp.com/api/v1/datapoints/road-surface_282/rm_step
取得結果
<rdf:RDF xmlns:rdf="http://www.w3.org/1999/02/22-rdf-syntax-ns#" xmlns:geo="http://www.w3.org/2003/01/geo/wgs84_pos#" xmlns:rm="http://roadmgt.herokuapp.com/vocab/rm#">
<rdf:Description rdf:about="http://roadmgt.herokuapp.com/api/v1/datapoints/road-surface_282">
<rm:step>0.0</rm:step>
</rdf:Description>
</rdf:RDF>
レスポンスの説明
主なプロパティを以下に説明します。
| プロパティ | 名称 | 型 | 説明 |
|---|---|---|---|
| rm:analysis_timestamp | 分析日時 | xsd:dateTime | 「2015-01-14 09:01:57」という形式で入っています。 |
| rm:iri | IRI | xsd:double | International Roughness Index 舗装の平坦性(乗り心地)を客観的. に評価する尺度 http://www.kandoken.jp/huroku/130913_2_kouenshiryo.pdf |
| rm:pothole_num | ポットホール数 | xsd:int | 道路の舗装表面が陥没してできた穴の数 |
| rm:patching_num | パッチング数 | xsd:int | 舗装の損傷に対する応急処置を実施した数 http://www.mlit.go.jp/road/ir/ir-council/pdf/roadstock05.pdf |
| rm:cracking_rate | ひび割れ率 | xsd:double | http://www.town.oki.fukuoka.jp/file/gyousei/nyuusatsu/FILE_346_45.pdf |
| rm:rutting_amount | わだち掘れ深さ | xsd:double | http://www.fuzita.org/cod/rut_.html |
| rm:step | 段差 | xsd:double | |
| rm:subsidence_and_puddle | 沈下・水たまり | xsd:double | |
| geo:lat | 緯度 | xsd:double | |
| geo:long | 経度 | xsd:double | |
| geo:alt | 高度 | xsd:double |
路面緒元データの取得方法
基本的に路面状況と同じです。
以下のURLに対してGETを行います。
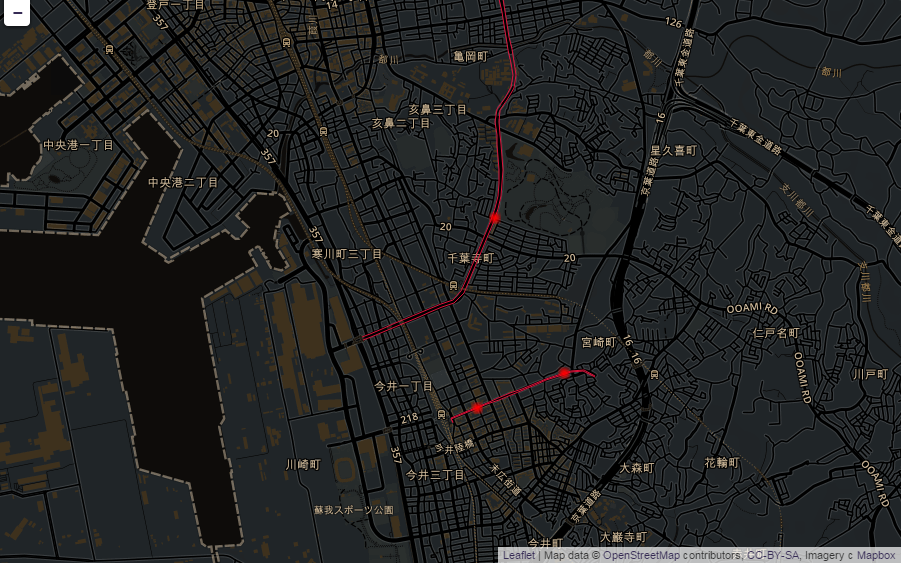
拡大するとわかりますが、一応、車線毎にデータが存在するようです。
プログラム言語で使用する
Python
ここではPythonで路面状況を取得する方法を記述します。
# -*- coding: utf-8 -*-
import urllib
import urllib2
from lxml import etree
import csv
from collections import defaultdict


def get_road_surface(offset, limit):
    """
    路面状況データ
    """
    url = ('http://roadmgt.herokuapp.com/api/v1/datapoints?data_type=road-surface&offset=%d&limit=%d' % (offset, limit))

    req = urllib2.Request(url)
    opener = urllib2.build_opener()
    conn = opener.open(req)
    cont = conn.read()
    parser = etree.XMLParser(recover=True)
    root = etree.fromstring(cont, parser)
    namespaces = {
        'geo' : 'http://www.w3.org/2003/01/geo/wgs84_pos#',
        'rdf' : 'http://www.w3.org/1999/02/22-rdf-syntax-ns#',
        'rdfs' : 'http://www.w3.org/2000/01/rdf-schema#',
        'rm' : 'http://roadmgt.herokuapp.com/vocab/rm#'
    }

    row = []
    datas = {}
    value_tags = root.xpath('//rdf:Description', namespaces=namespaces)
    value_tags = root.xpath('//rdf:Description', namespaces=namespaces)
    for value_tag in value_tags:
        label = value_tag.find('rdfs:label', namespaces).text
        step = value_tag.find('rm:step', namespaces).text
        alt = value_tag.find('geo:alt', namespaces).text
        analysis_timestamp = value_tag.find('rm:analysis_timestamp', namespaces).text
        rutting_amount = value_tag.find('rm:rutting_amount', namespaces).text
        municipality_id = value_tag.find('rm:municipality_id', namespaces).text
        speed_fluctuation_flag = value_tag.find('rm:speed_fluctuation_flag', namespaces).text
        section_id = value_tag.find('rm:section_id', namespaces).text
        distance = value_tag.find('rm:distance', namespaces).text
        long = value_tag.find('geo:long', namespaces).text
        iri = value_tag.find('rm:iri', namespaces).text
        cracking_rate = value_tag.find('rm:cracking_rate', namespaces).text
        pothole_num = value_tag.find('rm:pothole_num', namespaces).text
        subsidence_and_puddle = value_tag.find('rm:subsidence_and_puddle', namespaces).text
        speed = value_tag.find('rm:speed', namespaces).text
        rms = value_tag.find('rm:rms', namespaces).text
        lat = value_tag.find('geo:lat', namespaces).text
        too_slow_fast_flag = value_tag.find('rm:too_slow_fast_flag', namespaces).text
        patching_num = value_tag.find('rm:patching_num', namespaces).text

        row.append({
            'label' : label,
            'step' : step,
            'alt' : alt,
            'analysis_timestamp' : analysis_timestamp,
            'rutting_amount' : rutting_amount,
            'municipality_id' : municipality_id,
            'speed_fluctuation_flag' : speed_fluctuation_flag,
            'section_id' : section_id,
            'distance' : distance,
            'long' : long,
            'iri' : iri,
            'cracking_rate' : cracking_rate,
            'pothole_num' : pothole_num,
            'subsidence_and_puddle' : subsidence_and_puddle,
            'speed' : speed,
            'rms' : rms,
            'lat' : lat,
            'too_slow_fast_flag' : too_slow_fast_flag,
            'patching_num' :patching_num
        })
    return row

def get_meas_locale(offset, limit):
    """
    路面計測時の位置データ
    """
    url = ('http://roadmgt.herokuapp.com/api/v1/datapoints?data_type=meas-locale&offset=%d&limit=%d' % (offset, limit))

    req = urllib2.Request(url)
    opener = urllib2.build_opener()
    conn = opener.open(req)
    cont = conn.read()
    parser = etree.XMLParser(recover=True)
    root = etree.fromstring(cont, parser)

    namespaces = {
        'geo' : 'http://www.w3.org/2003/01/geo/wgs84_pos#',
        'rdf' : 'http://www.w3.org/1999/02/22-rdf-syntax-ns#',
        'rdfs' : 'http://www.w3.org/2000/01/rdf-schema#',
        'rm' : 'http://roadmgt.herokuapp.com/vocab/rm#'
    }

    row = []
    datas = {}
    value_tags = root.xpath('//rdf:Description', namespaces=namespaces)
    for value_tag in value_tags:
        label = value_tag.find('rdfs:label', namespaces).text
        gpstimestamp = value_tag.find('rm:gpstimestamp', namespaces).text
        course = value_tag.find('rm:course', namespaces).text
        measurement_start_timestamp = value_tag.find('rm:measurement_start_timestamp', namespaces).text
        mounting_direction = value_tag.find('rm:mounting_direction', namespaces).text
        car_model = value_tag.find('rm:car_model', namespaces).text
        long = value_tag.find('geo:long', namespaces).text
        lat = value_tag.find('geo:lat', namespaces).text
        alt = value_tag.find('geo:alt', namespaces).text
        model_number = value_tag.find('rm:model_number', namespaces).text
        car_number = value_tag.find('rm:car_number', namespaces).text
        speed = value_tag.find('rm:speed', namespaces).text
        vertical_accuracy = value_tag.find('rm:vertical_accuracy', namespaces).text
        measurement_timestamp = value_tag.find('rm:measurement_timestamp', namespaces).text
        horizontal_accuracy = value_tag.find('rm:horizontal_accuracy', namespaces).text
        row.append({
            'label' : label,
            'gpstimestamp' : gpstimestamp,
            'course' : course,
            'measurement_start_timestamp' : measurement_start_timestamp,
            'mounting_direction' : mounting_direction,
            'car_model' : car_model,
            'long' : long,
            'lat' : lat,
            'alt' : alt,
            'model_number' : model_number,
            'car_number' : car_number,
            'speed' : speed,
            'vertical_accuracy' : vertical_accuracy,
            'measurement_timestamp' : measurement_timestamp,
            'horizontal_accuracy' : horizontal_accuracy
        })
    return row

def get_road_surface_all():
    ret = []
    limit = 300
    offset = 0
    try:
        while True:
            print ('get_road_surface_all %d' % offset)
            r = get_road_surface(offset, limit)
            ret.extend(r)
            offset += limit
    except urllib2.HTTPError, ex:
        if ex.code == 404:
            return ret
        else:
            raise
get_road_surface_all()を使用すれば、全路面状況が取得できます。
プログラムとしてはurllibでAPIを実行して、レスポンスをlxmlで解析しているだけです。
JavaScript
ここではJavaScriptで路面状況を取得する方法を記述します。
  /**
   * 路面情報のAPIを実行
   */
  function getDataByRange(data_type, lat_start, lon_start, lat_end, lon_end, callback) {
    var offset = 0;
    var limit = 300;
    var obj = {};

    function loadRoadOffset(lat_start, lon_start, lat_end, lon_end, offset, limit, obj, cb) {

      console.log(offset, limit);
      $.ajax({
        type : 'GET',
        url : 'http://roadmgt.herokuapp.com/api/v1/datapoints',
        cache: true , //, cacheをfalseにするとエラーになる。おそらく変なパラメータを無視するのでなく、はじいている
        data : {
          data_type : data_type,
          lat_start  : lat_start,
          lon_start : lon_start,
          lat_end  : lat_end,
          lon_end  : lon_end,
          offset : offset,
          limit : limit
        },
        success : function (data) {
          console.log(data);
          var root = data.documentElement;
          var attrs = root.attributes;
          var records = root.childNodes;
          for(var i=0; i<records.length; i++){
            if(records[i].nodeName.match(/rdf:Description/i)){
              var s = records[i].attributes["rdf:about"].value;
              var props = records[i].childNodes;
              for(var j=0; j<props.length; j++){
                if(props[j].nodeType == 1){
                  var p = props[j].nodeName;
                  var o = props[j].textContent;
                  if (!obj[s]) {
                    obj[s] = {};
                  }
                  if (obj[s][p]) {
                    if (!Array.isArray(obj[s][p])) {
                      var tmp = arys[s][p];
                      obj[s][p] = [];
                      obj[s][p].push(tmp);
                    }
                    obj[s][p].push(o);
                  } else {
                    obj[s][p] = o;
                  }
                }
              }
            }
          }
          loadRoadOffset(lat_start, lon_start, lat_end, lon_end, offset + limit, limit, obj, cb);
        },
        'error' :  function(xhr, textStatus, error) {
          console.log(xhr);
          var err = xhr.responseText;
          if (err == '404 notFound') {
            cb(null , obj);
          } else {
            cb(err , null);
          }
        }
      });
    }
    loadRoadOffset(lat_start, lon_start, lat_end, lon_end, offset, limit, obj, function(err, res) {
      callback(err, res);
    });
  }
この関数は次のように実行します。
getDataByRange('road-master', surfaceRange.lat_min, surfaceRange.long_min, surfaceRange.lat_max, surfaceRange.long_max, function(err, data) {
      console.log('loadRoad', err, data);
});
この処理は指定の範囲の道路緒元データを全て取得します。
まとめ
「路面管理の高度化における実証実験」のAPIを実行することで路面の状況を取得することができます。
これにより道路の劣化状況などの可視化が行えます。


