1年ほど前に購入したIntel Edisonのファームウェアをアップデートしたので、そのやり方をメモしておきます。
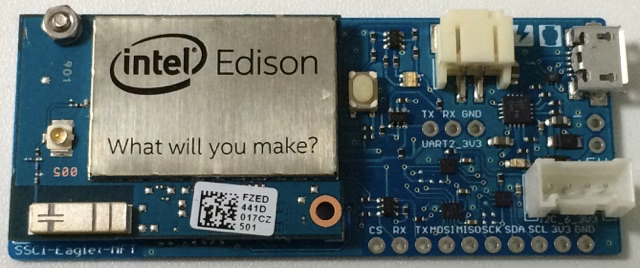
ベースボードはSwitchScience版Eagletを使います。
コマンドはMacから接続することを前提に書いていますので、Windowsだと読み替えが必要です。
1. Macと接続する
シリアルコンソールへの接続
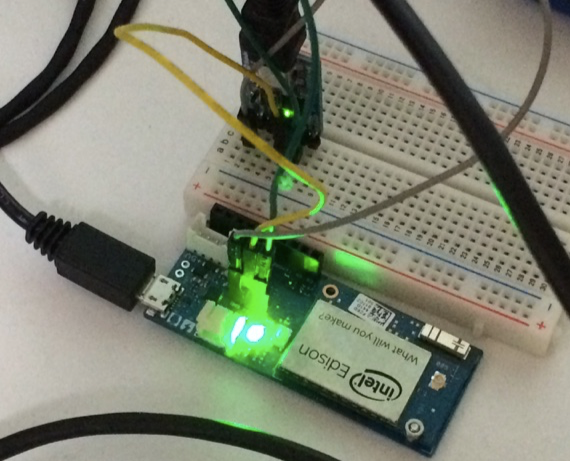
ベースボードに出ているシリアルポートにUSBシリアル変換基板を接続してMacからシリアルコンソールを見れるようにします。
EdisonのI/Oは1.8Vですが、Eagletは3.3Vへ変換する回路が搭載されているので、3.3Vで接続できるシリアル変換基板が使えます。
今回はサンハヤトのUSBシリアル変換基板を使いました。
シリアル変換基板の電圧設定を3.3Vにするのを忘れないようにしてください。
ベースボード <-> USBシリアル変換基板

TX         <-> RX
RX         <-> TX
GND        <-> GND
EdisonをUSBで接続
ボードのmicroUSBポートとMacのUSBをケーブルで接続するとファームウェアを書き込むためのディスクとして認識されます。
2. ファームウェアのアップデート
Edisonのファームウェアをアップデートするにはディスクとして認識されたEdisonにファームウェアのイメージを書き込む必要があります。
過去のバージョンのファームウェアはダウンロードしたイメージを直接ディスクに展開すれば問題ありませんでした。
しかし、最新のファームウェアはイメージサイズが認識されるディスクサイズを上回っており、マニュアル等に記載されているコマンドではアップデートできませんでした。
そこで、Intelから提供されているFlash Tool Liteというソフトウェアを使ってファームウェアアップデートを行います。
https://software.intel.com/en-us/iot/hardware/edison/downloads から最新のイメージとFlash Tool Liteをダウンロードします。
今回はRelease 2.1 Yocto* complete imageとFlash Tool Lite(OS X)を選択してダウンロードします。
Flash Tool Liteのインストールを行い起動します。
起動すると以下のような画面になります。

Browseボタンから上でダウンロードしたイメージファイルを選択すると解凍が始まります。
解凍が終わるとStart to flashボタンが押せるようになるので、押してEdisonを接続するとファームウェアの書き込みが始まります。
基板上のLEDがチカチカしなくなれば完了です。
3. シリアルコンソールに接続する
以下の手順で接続します。
# xxxxxxの部分は環境によって異なるので置き換えてください。
$ screen /dev/tty.usbserial-xxxxxx 115200 -L
# 何も出てこない時はEnterを押すと出てきます。
Poky (Yocto Project Reference Distro) 1.7.2 edison ttyMFD2

edison login: root # root でログイン
root@edison:~# configure_edison --version # firmwareバージョンを確認
159.devkit
root@edison:~# uname -a # kernelのバージョンを確認
Linux edison 3.10.17-poky-edison+ #1 SMP PREEMPT Fri Jun 19 12:06:40 CEST 2015 i686 GNU/Linux
4. EdisonをWiFiへ接続する
root@edison:~# configure_edison --setup
Configure Edison: Device Password

Enter a new password (leave empty to abort)
This will be used to connect to the access point and login to the device.
Password: # 設定するパスワードを入力

Configure Edison: Device Name

Give this Edison a unique name.
This will be used for the access point SSID and mDNS address.
Make it at least five characters long (leave empty to skip): # デバイス名を設定

Configure Edison: WiFi Connection
...
Enter 0 to rescan for networks.
Enter 1 to exit.
Enter 2 to input a hidden network SSID.
Enter a number between 3 to 7 to choose one of the listed network SSIDs: # SSIDの選択

Password must be between 8 and 63 characters.
What is the network password?: # WiFiの暗号化キーを入力

Attempting to enable network access, please check 'wpa_cli status' after a minute to confirm.
Done. Please connect your laptop or PC to the same network as this device and go to http://192.168.x.x or http://xxxxxxx.local in your browser.
ここまで出れば終わりです。最後に出てきたURLへアクセスするとEdison上に立っているWebサーバーにアクセスできます。
5. OSのパッケージのアップデートを行う
4の続きでEdisonにログインした状態で以下を実行します。
root@edison:~# opkg update
root@edison:~# opkg upgrade
以上で完了です。
