install手順や基本設定は割愛します.
KPIログを可視化する上で必要な主にKibanaの使い方メモです.
Goal
- KPIとなる指標をログ出力し、Kibanaで可視化する
- アプリケーション => fluentd => elasticsearch <- kibana
- KPIは複数設定され、指標はそれぞれ異なるため、KPIの種類によってデータ構造が変更できなければいけない
- 1つのKPIを様々な軸で集計可能にしたい
ログ送信
今回はfluent-logger-rubyを使う.
https://github.com/fluent/fluent-logger-ruby
簡単に以下のようにログを送信します.
log = Fluent::Logger::FluentLogger.new(nil, host: 'localhost', port: 24224)

log.post("kpi.user_login", {user_id: user_id, user_email: user_email})
log.post("kpi.user_register", {user_id: user_id, user_email: user_email})
Fluentd Out
fluent-plugin-elasticsearchを使ってelasticsearchにstoreする.
https://github.com/uken/fluent-plugin-elasticsearch
<match kpi.user_register>
  type copy
  <store>
    type elasticsearch

    index_name kpi
    type_name user_register

    include_tag_key true
    tag_key @log_name

    host localhost
    port 9200

    logstash_format true
    logstash_prefix kpi.user_register

    flush_interval 3s
  </store>

  <store>
    type file
    path /var/log/td-agent/kpi.user_register.log
  </store>
</match>

<match kpi.user_login>
  type copy
  <store>
    type elasticsearch

    index_name kpi
    type_name user_login

    include_tag_key true
    tag_key @log_name

    host localhost
    port 9200

    logstash_format true
    logstash_prefix kpi.user_login

    flush_interval 3s
  </store>

  <store>
    type file
    path /var/log/td-agent/kpi.user_login.log
  </store>
</match>
logstash_format trueにしないとkibanaが想定した形にならない.
logstash_prefixを指定しないと、user_registerもuser_loginも同じindexに同じスキーマでつっこまれる.
デバッグにも使えるのでtype copyでelasticsearch以外にも別fileに書き出しておくと便利.
ElasticSearch
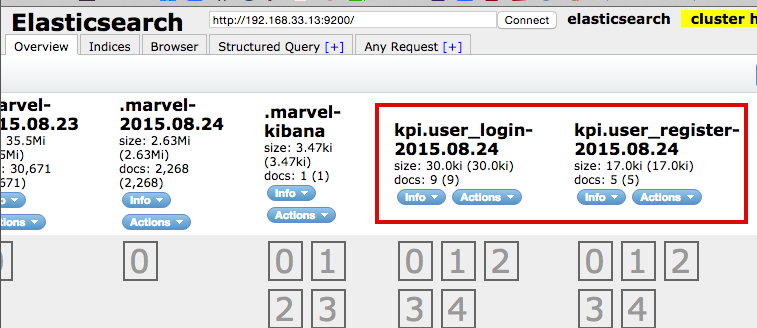
elasticsearchにデータが投入されていることを、headプラグインなどで確認.
kpi.user_login-YYYY.MM.DD
kpi.user_register-YYYY.MM.DD
といった名前のindexが日毎に作成される.
日付がかわると新規indexになるが、このときjsonデータがかわるとスキーマがかわってしまい、kibanaダッシュボードで使われている属性が変更削除されているとダッシュボードも見れなくなるので注意.
logstashの日付の粒度変更したい場合、以下の記事参考になりそうです.
http://y-ken.hatenablog.com/entry/fluentd-elasticsearch-kibana-index-partitioning
headプラグインのBrowserタブで、index/typeを指定するとデータが確認できるので、スキーマがうまく作れてるかなど簡単に確認できる.
Kibana
Index登録
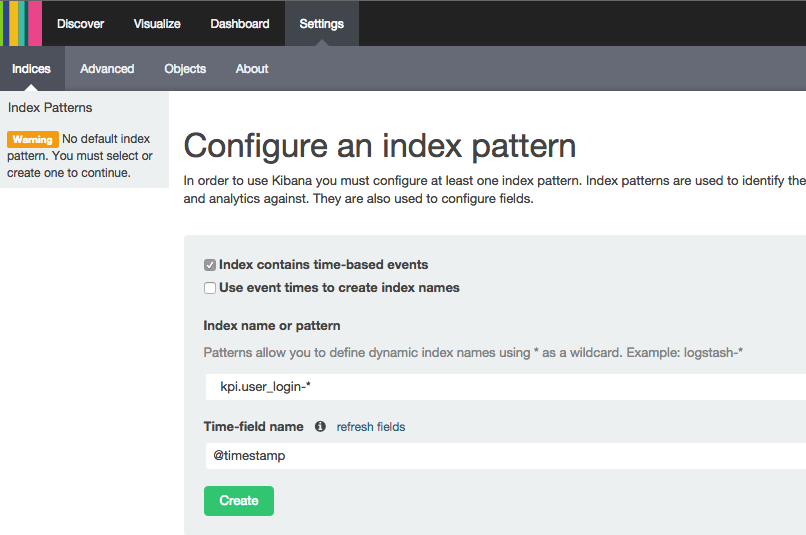
Settings > Indicesでelasticsearchに作成されたindexを指定して保存する.
日付部分はワイルドカードで.
※Indicesはindexの複数形です!
Search条件登録
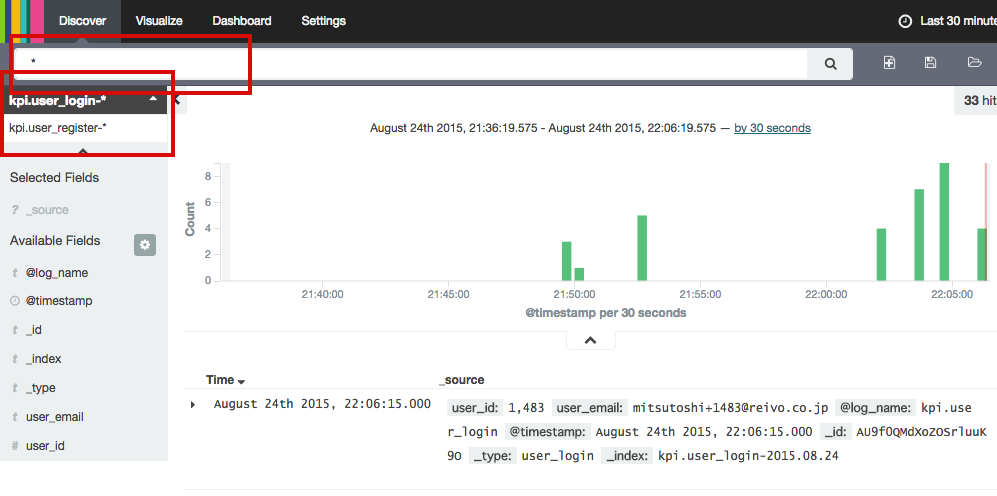
Discoverタブに遷移. 左上に表示されるIndexワイルドカード名のプルダウンを開くと別のindexを選択できるので、ここでindexをざっくり選んで、一番上バーに"*"とだけなってるエリアに検索条件を指定することでさらに絞りこみが可能(今回は全件取得).
右上のSave Searchボタンで検索名をつけて保存する.
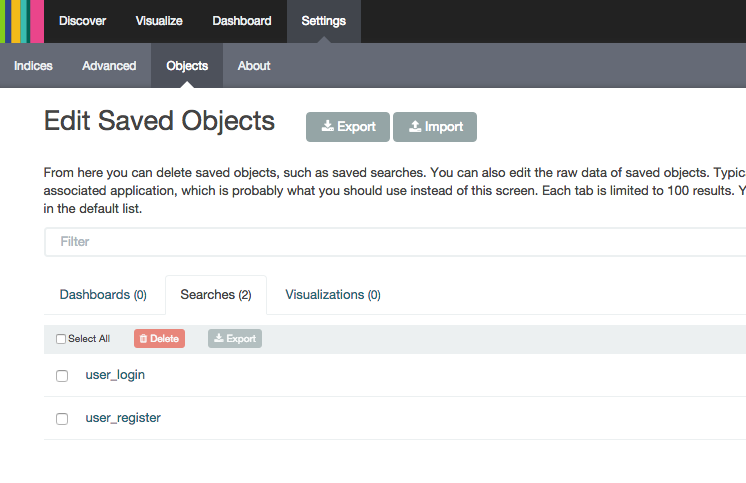
作成した検索条件は、Settings > Objects > Searchesで確認できる.
可視化ルール登録
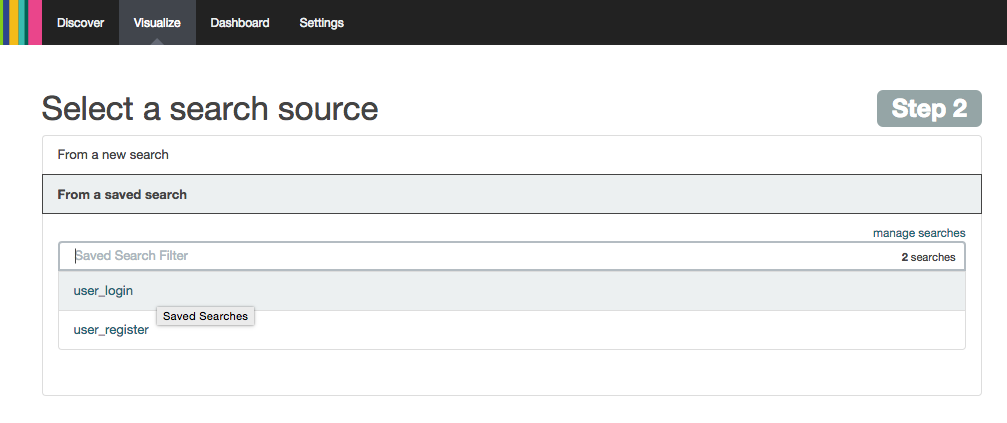
(Step1)Vertical Bar Chartを選んで、(Step2)From a saved search(さっき作成した検索条件)を選ぶ.
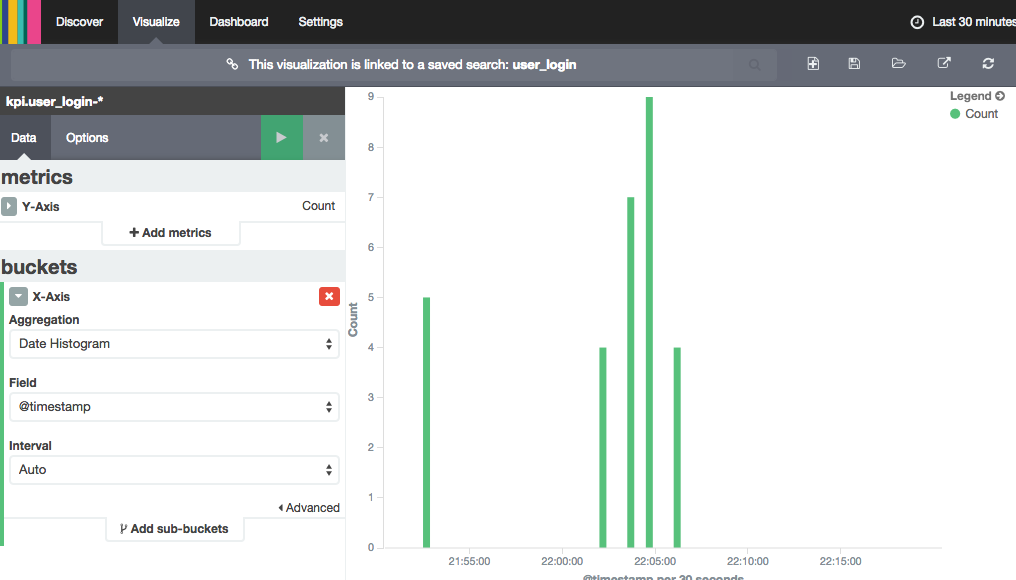
Y-Axis: countとすると、単純にログの総数がY軸の値になる.
X-Axis: Aggregation=Date Histogramとすると、X軸を@timestampで並べる.
再生ボタンを押すとグラフプレビューが更新される.
グラフがおかしければ右上の時間範囲を確認する.
Search条件登録したときのようにVisualizeも右上のボタンから名前をつけて保存しておく.
他にもユーザ属性があればもちろん円グラフで比率を監視することも可能.
ダッシュボード登録
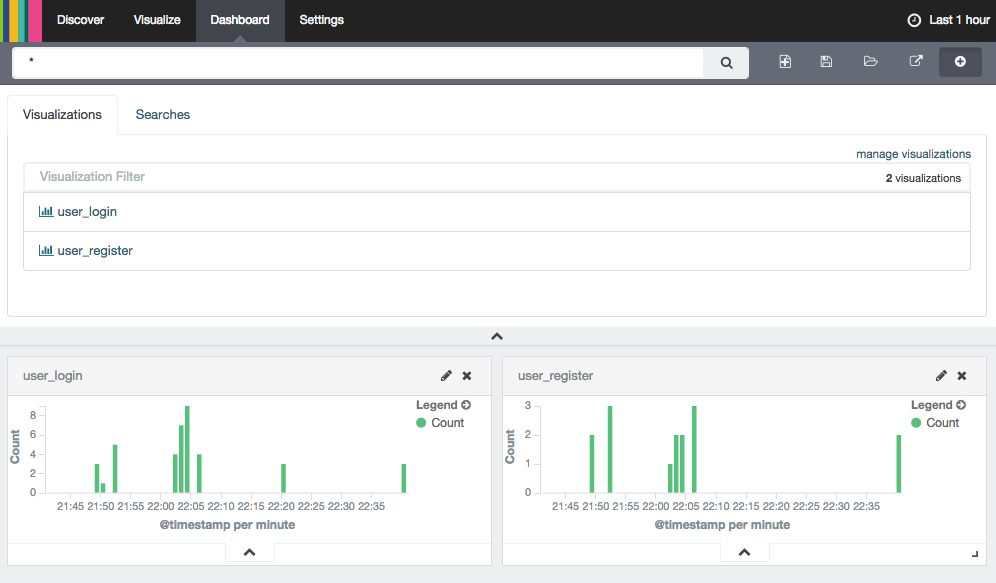
右上の+ボタンでVisualizeを選んで好きな位置に配置する.
同じ要領でダッシュボード名をつけて保存する.
