オンラインジャッジシステムのOSSが何処かに転がっていないかと探して出てきたものを、Dockerを使ってデプロイしたときのまとめです。
修正:2016/12/20
エラー解消のため、Dockerfileを利用せずにdocker-sharif-judgeイメージをそのまま利用する方式に変更しました。
Dockerイメージは外部のものを利用するため、利用は自己責任でお願いします。
目的
- OSSのオンラインジャッジシステム(Sharif-Judge)を触れる環境を作る
- 環境構築はDocker(docker-compose)で行う
この記事でやること
- docker-composeを使って、Sharif-Judge + Postgresqlの環境を構築
-
docker-sharif-judgeの
DockerfileからビルドしたDockerイメージ - Postgresの公式Dockerイメージ(postgres)
-
docker-sharif-judgeの
本記事では以下のGitHubリポジトリを参照します。
Docker-Sharif-Judge
https://github.com/metaVariable/Docker-Sharif-Judge
Sharif-judgeとは
GitHubで公開されているOSSのオンラインジャッジシステムです。
提出するプログラミング言語としてC, C++, Java, Python2, Python3に対応しています。
システム自体のインターフェースはPHP(CodeIgniter)、バックエンドはBASHで記述されているようです。
またC, C++, Javaの実行時にはsandbox(保護領域内でプログラムを実行する仕組み)によってセキュリティを確保しています。(※ただしPythonを除く)
詳細は配布元のドキュメントをご覧下さい。
Sharif-Judge
https://github.com/mjnaderi/Sharif-JudgeSharif Judge is a free and open source online judge for C, C++, Java and Python programming courses.
The web interface is written in PHP (CodeIgniter framework) and the main backend is written in BASH.
Python in Sharif Judge is not sandboxed yet. Just a low level of security is provided for python. If you want to use Sharif Judge for python, USE IT AT YOUR OWN RISK or provide sandboxing yourself.
The full documentation is at https://github.com/mjnaderi/Sharif-Judge/tree/docs
Download the latest release from https://github.com/mjnaderi/Sharif-Judge/releases
docker-sharif-judge
Sharif-Judge本体(Apache環境)のDocker環境が有志により公開されています。
※ DB関連は別途用意する必要があります。
今回はこれを参考にします。(実際にはDockerfileのみ)
docker-sharif-judge
https://hub.docker.com/r/liuyang1204/docker-sharif-judge/
手順
1. Dockerイメージ作成用のリポジトリをクローン
git clone https://github.com/metaVariable/Docker-Sharif-Judge.git
2. docker-composeで環境構築
cd Docker-Sharif-Judge
docker-compose up -d
要:Docker, docker-compose
補足)docker engineの入手
参考)https://docs.docker.com/engine/installation/
# CentOSの場合
sudo yum update
## docker.repoの追加
sudo tee /etc/yum.repos.d/docker.repo <<-'EOF'
[dockerrepo]
name=Docker Repository
baseurl=https://yum.dockerproject.org/repo/main/centos/7/
enabled=1
gpgcheck=1
gpgkey=https://yum.dockerproject.org/gpg
EOF

## インストール, サービス登録, デーモン起動
sudo yum install docker-engine -y
sudo systemctl enable docker.service # service登録
sudo systemctl start docker          # daemon起動
補足)docker-composeの入手
参考)https://docs.docker.com/engine/installation/linux/centos/
# CentOSの場合
curl -L https://github.com/docker/compose/releases/download/1.9.0/run.sh > /usr/local/bin/docker-compose
chmod +x /usr/local/bin/docker-compose
参考)docker-compose.yml
## sharif-judge環境
app:
  image: liuyang1204/docker-sharif-judge  # docker-sharif-judgeのイメージを使用
  #build: .                    #
  environment:
    DB_DRIVER: postgre
    DB_HOST: postgres          # データベースの接続先ホスト
    DB_USER: postgres          # データベースのユーザー
    DB_PASS: postgres          # データベースのパスワード
    DB_NAME: postgres          # データベース名
  ports:
    - "80:80"                  # 公開ポート番号(ホスト:コンテナ)
  links:
    - postgres:postgres        # postgresのイメージとリンク
  container_name: sharif-judge

## Postgresの公式イメージ
postgres:
  image: postgres                # 公式配布イメージの指定
  environment:
    POSTGRES_USER: postgres      # データベースのユーザー
    POSTGRES_PASSWORD: postgres  # データベースのパスワード
    POSTGRES_DB: postgres        # データベース名
  ports:
    - "5432:5432"
  container_name: postgres-db
  volumes_from:
    - postgres-data              # data-volumeを別コンテナに

## Postgresのデータ格納用コンテナ
postgres-data:
  image: busybox
  volumes:
      - /var/lib/postgresql/data # data-volumeのパス
  container_name: postgres-datastore
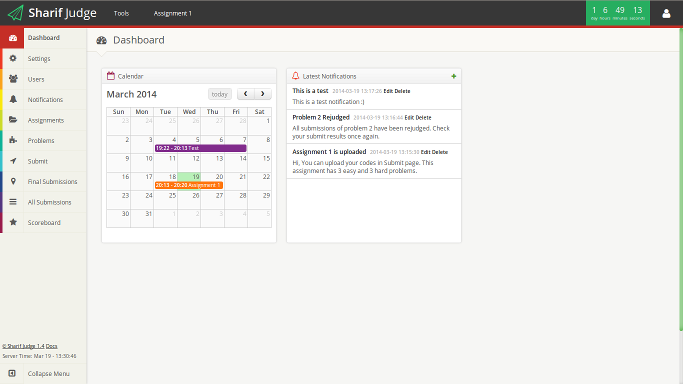
3. ブラウザで http://localhost にアクセス
- 初回起動時には管理者情報の登録が必要となります(あとで変更可能)
- 情報を入力後、トップページに遷移できます
(おまけ)Azure上のVMで外部公開したときにハマってたところ
※ VMのデプロイ方法など細かい説明はありません
DNS名を固定していれば、ブラウザからそのままVMにアクセスは可能です。
ただし、Azureの基本のCentOSテンプレートを元にVMを構築した場合、初期設定ではSSH用22番ポート以外のアクセスは制限されています。
公開する場合は、同じリソースグループにある ネットワークセキュリティグループ - 受信セキュリティ規則 に、指定したHTTP通信用のポート(今回は80番)を追加登録する必要があります。
※ 詳細は他の方のドキュメントを追って下さい。
例)https://www.ipentec.com/document/document.aspx?page=microsoft-azure-add-receive-security-rule-in-network-security
上手くいけば、http://www.<<VMに紐づけられたDNS名>>でアクセスができるはずです。
その他
- Dockerイメージは外部のものを使用していますので、利用は自己責任でお願いします
- ブラウザでアクセスして管理者としてログインしたあと、
SettingsタブからTesterとAssignmentsのパスを以下のように修正してください。tester path: /data/tester/assignments path: /data/assignments/
-
Problemタブにアクセス時のエラーは、Assignmentsに何かを登録すると消えたりします
参考
本家: https://github.com/mjnaderi/Sharif-Judge
Docker版本体: https://hub.docker.com/r/liuyang1204/docker-sharif-judge/