概要
XCode 6.3.1でUIViewControllerからGLKViewを使って3D描画してみたのでサンプルコードをメモしておく。
サンプルコードはOpenGL Gameテンプレートを簡単にしてGLKitだけ使うようにした感じ。
関連記事:Xcode - OpenGL Gameテンプレートを3Dプログラミング未経験者が読む - Qiita
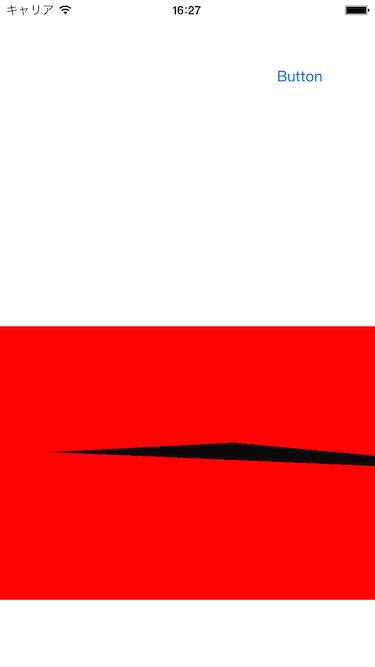
AutoLayout使ってないので表示はいびつ。
書いたコード
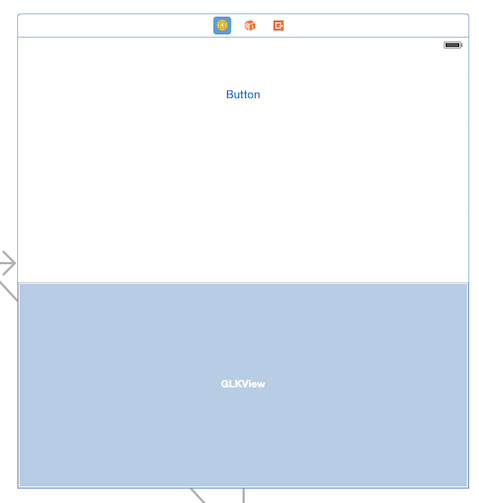
storyboard
MyViewController.h
#import <UIKit/UIKit.h>
#import <GLKit/GLKit.h>

@interface MyViewController : UIViewController <GLKViewDelegate>
@property (weak, nonatomic) IBOutlet GLKView *myGLKView;
@end
MyViewController.m
#import "MyViewController.h"
#import <OpenGLES/ES2/glext.h>

#define BUFFER_OFFSET(i) ((char *)NULL + (i))

GLfloat gMyVertexData2[18] =
{
    0.5f, 0.0f, 0.0f,       0.0f, 0.0f, 1.0f,
    0.0f, 0.5f, 0.0f,       0.0f, 0.0f, 1.0f,
    0.0f, -0.5f, 0.0f,      0.0f, 0.0f, 1.0f
};

@interface MyViewController ()
{
    float _rotation;

    GLuint _myVertexArray;
    GLuint _myVertexBuffer;
}
@property (strong, nonatomic) GLKBaseEffect *effect;

@end

@implementation MyViewController

- (void)viewDidLoad
{
    [super viewDidLoad];

    EAGLContext *context = [[EAGLContext alloc] initWithAPI:kEAGLRenderingAPIOpenGLES2];

    self.myGLKView.context = context;
    self.myGLKView.delegate = self;
    [self.myGLKView setEnableSetNeedsDisplay:YES];
    [self.view addSubview:self.myGLKView];

    [EAGLContext setCurrentContext:context];

    CADisplayLink *displayLink = [CADisplayLink displayLinkWithTarget:self selector:@selector(drawFrame)];
    [displayLink addToRunLoop:[NSRunLoop currentRunLoop] forMode:NSDefaultRunLoopMode];

    [self setupGL];
}

- (void)setupGL
{
    self.effect = [[GLKBaseEffect alloc] init];
    self.effect.light0.enabled = GL_TRUE;
    self.effect.light0.diffuseColor = GLKVector4Make(1.0f, 0.4f, 0.4f, 1.0f);

    glGenVertexArraysOES(1, &_myVertexArray);
    glBindVertexArrayOES(_myVertexArray);

    glGenBuffers(1, &_myVertexBuffer);
    glBindBuffer(GL_ARRAY_BUFFER, _myVertexBuffer);
    glBufferData(GL_ARRAY_BUFFER, sizeof(gMyVertexData2), gMyVertexData2, GL_STATIC_DRAW);
    glEnableVertexAttribArray(GLKVertexAttribPosition);
    glVertexAttribPointer(GLKVertexAttribPosition, 3, GL_FLOAT, GL_FALSE, 24, BUFFER_OFFSET(0));
    glEnableVertexAttribArray(GLKVertexAttribNormal);
    glVertexAttribPointer(GLKVertexAttribNormal, 3, GL_FLOAT, GL_FALSE, 24, BUFFER_OFFSET(12));

    glBindVertexArrayOES(0);
}

- (void)drawFrame
{
    float aspect = fabs(self.view.bounds.size.width / self.view.bounds.size.height);
    GLKMatrix4 projectionMatrix = GLKMatrix4MakePerspective(GLKMathDegreesToRadians(65.0f), aspect, 0.1f, 100.0f);

    self.effect.transform.projectionMatrix = projectionMatrix;

    GLKMatrix4 modelViewMatrix = GLKMatrix4MakeTranslation(0.0f, 0.0f, -1.5f);
    modelViewMatrix = GLKMatrix4Rotate(modelViewMatrix, _rotation, 1.0f, 1.0f, 1.0f);

    self.effect.transform.modelviewMatrix = modelViewMatrix;

    _rotation += 0.2 * 0.5f;

    [self.myGLKView setNeedsDisplay];
}

- (void)glkView:(GLKView *)view drawInRect:(CGRect)rect
{
    glClearColor(1, 0, 0, 1.0f);
    glClear(GL_COLOR_BUFFER_BIT | GL_DEPTH_BUFFER_BIT);

    glBindVertexArrayOES(0);
    glBindVertexArrayOES(_myVertexArray);

    [self.effect prepareToDraw];

    glDrawArrays(GL_TRIANGLES, 0, 3);
}

@end